
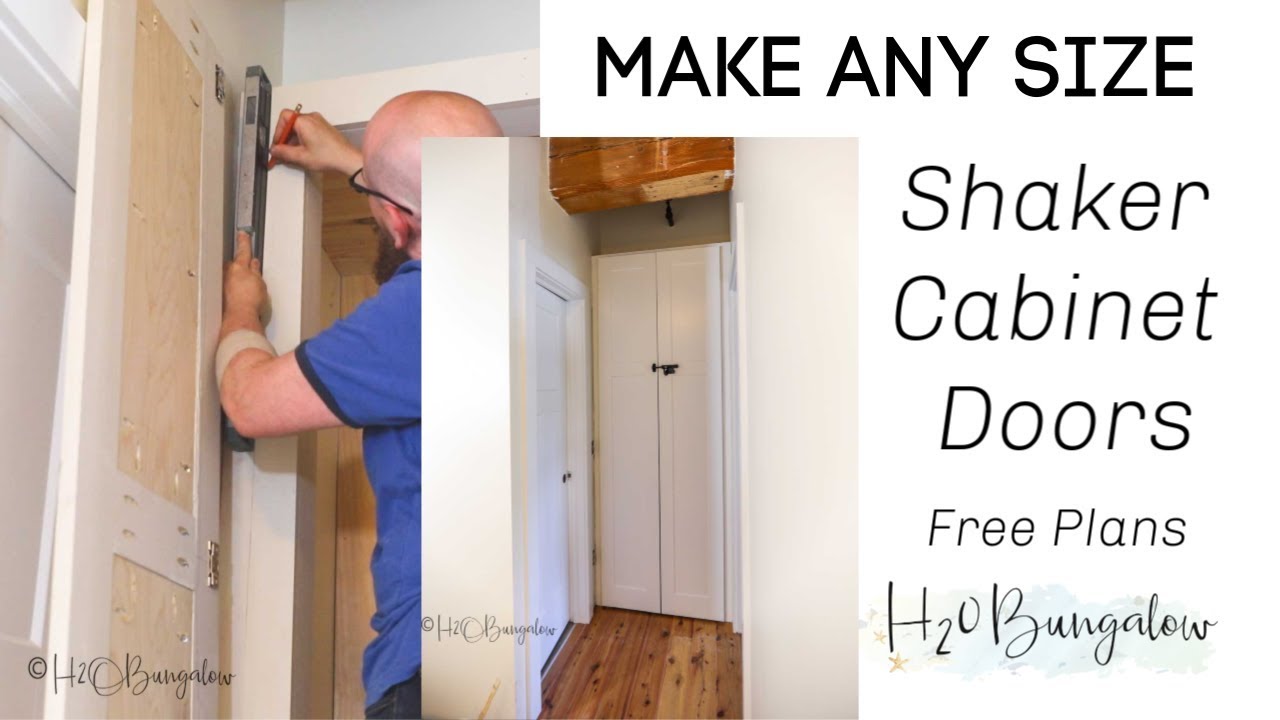
Are you ready to build beautiful Shaker cabinet doors but don’t have a router? You’re not alone.
Many woodworkers feel stuck when they see projects that call for expensive or hard-to-use tools. The good news is, you can create stunning, professional-looking Shaker doors without a router. In this guide, you’ll discover simple techniques and easy steps that anyone can follow.
Whether you’re a beginner or just looking for a new method, you’ll find everything you need to bring your cabinets to life. Keep reading, and by the end, you’ll have the confidence to make your own Shaker doors—no router required.
Materials And Tools Needed
Creating shaker cabinet doors without a router requires careful selection of materials and tools. The right supplies make the project easier and ensure great results. This section outlines what you need before starting.
Essential Wood Types
Choose wood that is easy to work with and durable. Pine is affordable and soft, perfect for beginners. Poplar is smooth and paints well. Oak offers strength but is harder to cut. Select wood boards that are straight and free of knots.
Basic Hand Tools
You need simple tools to shape and assemble the doors. A handsaw or a backsaw works well for cutting the wood. A chisel helps create the recessed panel edges. Use a hammer and nails or wood glue for joining pieces. Sandpaper or a sanding block smooths rough edges.
Measuring And Marking Supplies
Accurate measurements are key to fit and finish. A tape measure or ruler will measure wood pieces precisely. A carpenter’s square ensures right angles. Use a pencil to mark cut lines clearly. Clamps hold pieces steady while cutting and gluing.
Credit: www.youtube.com
Choosing The Right Wood
Choosing the right wood is key for making shaker cabinet doors without a router. Wood affects the look, strength, and ease of work. Picking the right type helps you create doors that last and look great.
Durability And Finish
Hardwoods like oak and maple offer strong, long-lasting doors. They resist dents and scratches better than softwoods. Softwoods, such as pine, are easier to shape but may dent easily. The finish also depends on wood type. Smooth woods absorb stains evenly for a nice look. Rougher grains might need extra sanding before finishing.
Cost And Availability
Wood prices vary widely. Common woods like pine cost less and are easy to find. Hardwoods tend to be more expensive but offer better durability. Availability depends on your location and season. Choose wood that fits your budget and is easy to buy locally. This saves time and shipping costs.
Cutting The Door Frame
Cutting the door frame is a key step in making shaker cabinet doors without a router. It sets the shape and size of the door. Accuracy here helps the door fit well and look great. You can cut the frame using simple tools. Careful measuring and steady cutting lead to smooth edges and clean lines.
Measuring And Marking Cuts
Start by measuring your wood pieces carefully. Use a tape measure for precise lengths. Mark your cutting lines clearly with a pencil. Draw straight lines along the marks to guide your cuts. Double-check each measurement before cutting. This avoids mistakes and wasted wood. Mark both ends of the boards for better accuracy.
Using A Handsaw Or Circular Saw
Choose a handsaw for small, detailed cuts. It offers control and less chance of error. Use smooth, even strokes to cut along your lines. Keep the saw steady and follow the mark closely. For faster cuts, a circular saw works well. Set the blade depth to match the wood thickness. Hold the saw firmly and guide it slowly along the line. Both tools can create clean cuts without a router. Take your time for the best result.
Creating The Shaker Style Recess
Creating the Shaker style recess is a key step in making shaker cabinet doors without a router. This recessed panel gives the door its classic, clean look. The process involves careful marking, precise chiseling, and using tools that can replace a router. Each step needs focus and patience to get a smooth, even recess.
Marking The Recess Area
Start by measuring the size of the recessed panel. Use a pencil and ruler to draw a clear outline on the door panel. Mark the recess area inside the frame, leaving enough space for the raised edges. Double-check your measurements to avoid mistakes. Clean, straight lines make chiseling easier and more accurate.
Chiseling Techniques
Choose a sharp chisel to carve out the recess. Begin by making shallow cuts along the marked lines. Work slowly, removing small wood pieces at a time. Keep the chisel flat to avoid uneven depths. Use a mallet for controlled taps. Smooth the recess floor by gently shaving thin layers of wood. Stop often to check the depth and evenness.
Using A Router Alternative
A hand plane or a block plane works well as a router alternative. Use it to smooth the recess edges and floor. Move the plane in the direction of the wood grain. This method helps keep the wood surface flat and neat. For detailed corners, a file or sandpaper can refine the shape. These tools help create a clean recess without power equipment.
Assembling The Door Frame
Assembling the door frame is a key step in making shaker cabinet doors without a router. It brings all the cut pieces together and forms the strong base of the door. Careful assembly ensures the door looks neat and fits well.
Each part must align perfectly for a smooth finish. This step needs patience and attention to detail. Follow these simple steps to assemble your door frame easily.
Dry Fitting The Pieces
Start by placing all the frame parts on a flat surface. Arrange them as they will fit in the final door. Check the corners and edges for tight fits. Move pieces slightly to see if they fit without gaps. Dry fitting helps avoid mistakes before gluing.
Joining With Wood Glue And Nails
Apply wood glue on the edges that meet. Spread the glue evenly for a strong bond. Press the pieces together and wipe off any extra glue. Use small nails or brads to hold the frame in place. Nails add strength while the glue dries.
Clamping For Secure Bond
Place clamps around the door frame to hold parts tightly. Tighten clamps gently to avoid damaging the wood. Leave the clamps on for at least 30 minutes. Clamping ensures the glue bonds well and the frame stays square. Remove clamps carefully once dry.
Credit: housefulofhandmadeshop.com
Sanding And Finishing
Sanding and finishing are key steps in making shaker cabinet doors without a router. These steps help create a smooth surface and give your doors a beautiful look. Proper sanding removes rough spots and prepares the wood to accept paint or stain evenly. Finishing protects the wood and makes your doors last longer.
Sanding Tips For Smooth Surfaces
Start with medium-grit sandpaper, around 120 grit. Sand all surfaces evenly to remove any rough edges. Use a sanding block for flat areas to keep pressure even. For corners and small spots, use folded sandpaper or a sanding sponge. After the first sanding, wipe off the dust with a clean cloth. Then, switch to fine-grit sandpaper, like 220 grit. Sand lightly to smooth the surface without scratching. Clean the dust again before finishing.
Applying Paint Or Stain
Choose high-quality paint or stain for best results. Use a brush or a cloth, depending on the finish you want. Apply thin, even coats to avoid drips and streaks. Let each coat dry fully before adding the next. Sand lightly between coats with fine sandpaper to keep the surface smooth. Finish with a clear topcoat for extra protection and shine. Allow the doors to dry completely before installing.
Installing The Cabinet Doors
Installing shaker cabinet doors without a router is simple and rewarding. Proper installation makes your cabinets look clean and professional. Follow these steps to attach and align your doors easily.
Attaching Hinges
Start by choosing the right hinges for your shaker doors. Most use simple butt hinges or European-style hinges. Mark the hinge placement on the door edge and the cabinet frame. Use a pencil to draw straight lines for accuracy. Drill small pilot holes to avoid splitting the wood. Screw the hinges onto the door first, then attach them to the cabinet frame. Tighten all screws firmly, but do not over-tighten. Check that the hinges move smoothly without binding.
Aligning And Mounting Doors
Hold the door in place against the cabinet frame. Adjust the door so it sits evenly with the cabinet surface. Use shims or small blocks to keep the door steady while you work. Check the gaps around the door edges for even spacing. Slightly loosen hinge screws to make small adjustments. Tighten screws again once the door is perfectly aligned. Open and close the door several times to ensure smooth movement. Repeat this process for all doors for a consistent look.
Troubleshooting Common Issues
Troubleshooting common issues can save time and frustration while making shaker cabinet doors without a router. Small problems often appear during the process. Knowing how to fix them keeps your project on track. Focus on two main issues: uneven joints and wood splitting.
Fixing Uneven Joints
Uneven joints make cabinet doors look unprofessional. Check each joint carefully before assembly. Use a sanding block to level rough edges. Clamp pieces tightly to hold them straight. Use a hand plane to shave down high spots. Test the fit often to avoid gaps. Consistency is key to smooth, tight joints.
Handling Wood Splitting
Wood splitting happens when nails or screws push too hard. Pre-drill small holes before adding fasteners. Use sharp, thin drill bits for clean holes. Choose screws designed for wood to reduce pressure. Avoid hammering near edges to prevent cracks. Applying wood glue inside joints adds strength and reduces splitting. Take time to handle wood gently.

Credit: pineandpoplar.com
Frequently Asked Questions
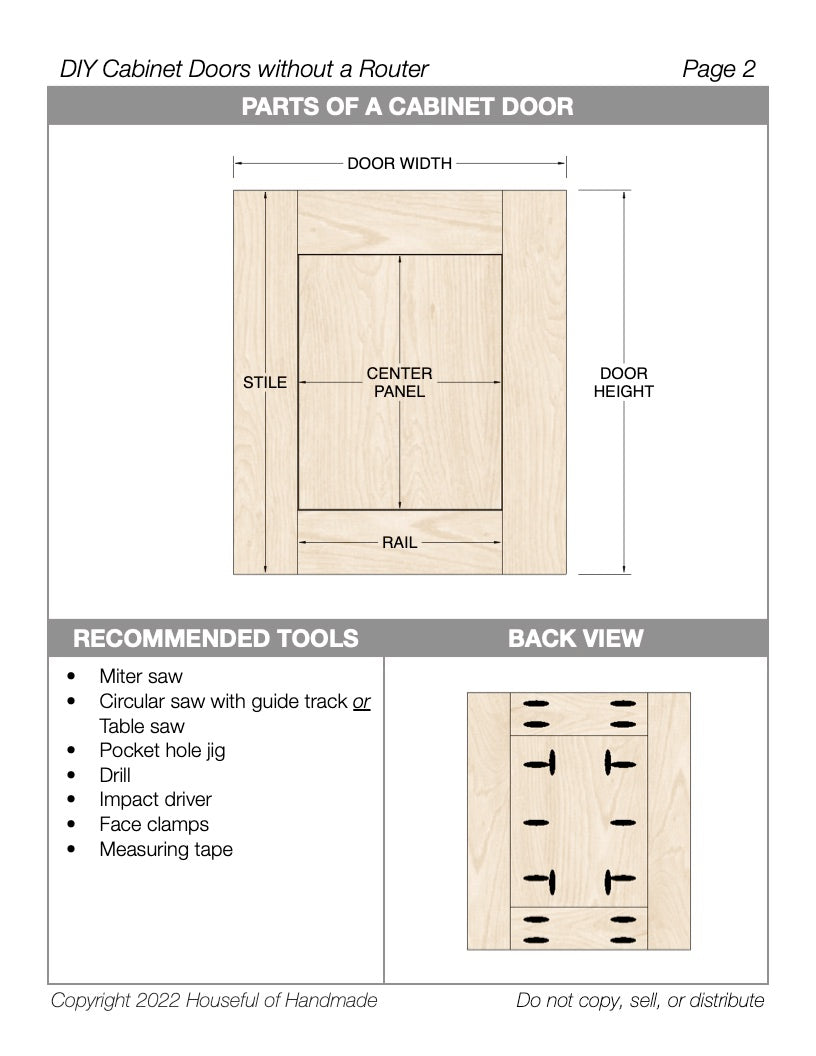
How Can I Make Shaker Cabinet Doors Without A Router?
You can use hand tools like chisels, a table saw, and a block plane. These tools help create the frame and panel design manually. Patience and careful measuring are key.
What Tools Are Needed To Build Shaker Cabinet Doors Manually?
Basic tools include a table saw, chisels, clamps, and a sanding block. These tools allow precise cuts and smooth finishes without a router. They are common in many workshops.
How Do I Create The Recessed Panel Effect Without A Router?
Use a table saw to cut a rabbet or groove along the inside edge of the frame. A chisel can clean up corners and smooth the groove. This method mimics router-made panels.
Is It Hard To Make Shaker Doors Without Power Tools?
It takes more time and effort but is doable with hand tools. Accuracy in measuring and cutting is very important. Practice on scrap wood first to gain confidence.
Can I Get A Smooth Finish Without A Router On Shaker Doors?
Yes, sanding by hand or with a sanding block works well. Use fine-grit sandpaper to smooth edges and surfaces. This ensures a clean and professional look.
Conclusion
Making shaker cabinet doors without a router is doable and rewarding. You only need basic tools and patience. Simple cuts and careful assembly create clean, strong doors. This method saves money and still looks great. Try these steps to build your own shaker doors.
Your kitchen or workspace will gain charm and style. Give it a shot, and enjoy the process. Crafting by hand brings pride and satisfaction. Keep practicing, and your skills will grow fast.