
Have you ever wanted a unique, natural piece of furniture that adds charm to your home? Making a wood table from a tree stump is easier than you might think.
You don’t need fancy tools or expert skills—just a little patience and creativity. Imagine turning a simple stump into a beautiful table that becomes the centerpiece of your room. In this guide, you’ll discover step-by-step how to bring new life to a tree stump and create a one-of-a-kind wood table you’ll be proud of.
Keep reading to unlock the secrets to this rewarding DIY project!
Choosing The Right Tree Stump
Choosing the right tree stump is the first step to making a beautiful wood table. The stump sets the base for your project. Picking the best one affects the table’s look and strength. This guide helps you find the right stump for your wood table.
Types Of Wood Suitable For Tables
Hardwood types work best for tree stump tables. Oak, maple, and walnut are popular choices. These woods last long and resist damage. Softwoods like pine may crack or wear quickly. Choose wood that holds up well over time. The wood grain and color also add to the table’s charm.
Size And Shape Considerations
The stump’s size depends on your table design. A larger stump makes a solid, stable base. Check the stump’s height and width before starting. Round or oval shapes work well for most tables. Irregular shapes can add character but may need extra work. Balance size and shape to fit your space and style.
Checking For Rot And Damage
Inspect the stump carefully for rot or cracks. Rot weakens the wood and can ruin the table. Look for soft spots or discoloration on the surface. Avoid stumps with insect holes or fungus. A healthy, solid stump ensures your table lasts for years. Clean the stump well before use to remove dirt and debris.
Preparing The Stump
Preparing the tree stump is the first step to making a beautiful wood table. This process ensures the wood is ready for crafting. Proper preparation helps create a smooth, durable surface. It also prevents future damage and makes the table look great.
Removing Bark And Debris
Start by removing all bark from the stump. Bark can trap moisture and cause decay. Use a sharp knife or chisel to peel it off carefully. Clear away any dirt, leaves, or small branches. Make sure the stump is clean and bare. This step helps the wood dry evenly and stay strong.
Drying The Wood Properly
Drying the stump is crucial before working on it. Fresh wood has high moisture and can crack if used too soon. Place the stump in a dry, ventilated area. Keep it off the ground to avoid moisture absorption. Drying can take several weeks or months. Check the stump regularly for cracks or mold. Proper drying prevents warping and makes the table last longer.
Sanding And Smoothing The Surface
Once dry, sand the stump to create a smooth surface. Start with coarse sandpaper to remove rough spots. Gradually use finer sandpaper for a polished finish. Sand all sides, including the top and edges. Smooth wood feels good to touch and looks professional. Sanding also prepares the surface for sealing or painting.
Designing Your Table
Designing your wood table from a tree stump is an exciting step. It shapes the final look and function. Careful planning makes your table both useful and beautiful. Consider the size, style, and extra features. These choices help match your table to your space and needs.
Deciding On Table Height And Shape
Choose a height that fits the table’s use. A coffee table is lower, a dining table is higher. Measure other furniture nearby to keep balance. The shape depends on the stump’s natural form or your cut. Round or oval shapes keep the wood’s natural beauty. Square or rectangular shapes offer more surface area.
Adding Legs Or Keeping It Natural
Legs can lift the stump and add style. Metal, wood, or hairpin legs create different looks. Secure legs tightly for stability. Keeping the stump as is gives a rustic feel. Sand and polish the bottom to keep it steady. Decide based on your room style and use.
Incorporating Additional Features
Think about adding storage or decoration. A glass top can protect the wood and add shine. Carving patterns or painting can add personality. Sealing the wood protects it from spills and damage. Small wheels can make the table easy to move. Choose features that fit your lifestyle.

Credit: www.justinecelina.com
Tools And Materials Needed
Making a wood table from a tree stump needs the right tools and materials. This helps you work safely and get good results. Preparing your workspace and having all items ready makes the project easier and faster.
Below are the key tools, finishes, and safety gear you will need for this project.
Essential Tools List
You will need a chainsaw or handsaw to cut the stump to the right height. A sander or sandpaper smooths the surface. A drill helps make holes if you attach legs. Measuring tape and pencil mark your cuts and positions. Clamps hold pieces steady while you work. A chisel can shape edges or remove bark.
Recommended Finishes And Sealants
Use wood oil or varnish to protect and enhance the wood’s color. Clear polyurethane adds a durable, shiny finish. Wood stain changes the color while showing the grain. Choose a finish that suits indoor or outdoor use. Apply multiple thin coats for best protection.
Safety Gear To Use
Wear safety glasses to protect your eyes from dust and debris. Use gloves to avoid splinters and cuts. A dust mask prevents inhaling sawdust. Ear protection reduces noise from power tools. Wear sturdy shoes to protect your feet from falling tools or wood.
Step-by-step Assembly
Building a wood table from a tree stump is simple with clear steps. Assembly brings all parts together into a sturdy table. Follow this guide to complete your project smoothly.
Attaching Legs Or Base
Start by choosing strong legs or a base for your stump. Measure the stump’s bottom to match leg placement. Drill pilot holes carefully to avoid splitting the wood. Use screws or bolts to fix legs securely. Check if the table stands straight and stable. Adjust leg positions if needed for balance.
Applying Finishes
Sand the entire stump surface to smooth rough spots. Use fine-grit sandpaper for a polished look. Wipe away dust with a clean cloth. Apply a wood finish to protect and beautify the table. Options include varnish, oil, or polyurethane. Apply thin coats and let each dry well before the next.
Final Touches And Inspection
Examine the table for any loose parts or rough edges. Tighten screws and smooth any rough areas with sandpaper. Clean the table surface for a neat appearance. Place the table in your chosen spot and test its stability. Your unique wood stump table is ready to use.

Credit: www.youtube.com
Maintaining Your Wood Table
Maintaining your wood table made from a tree stump helps keep it strong and beautiful. Wood changes over time. It can dry out, crack, or lose its shine. Taking care of your table will make it last longer. Simple steps protect your wood and keep it looking good.
Cleaning Tips
Use a soft cloth to clean the table. Avoid harsh chemicals that can damage the wood. Warm water with mild soap works well. Wipe spills quickly to stop stains. Dry the surface with a clean cloth. Dust the table often to prevent buildup.
Reapplying Finish
Wood finish protects your table from water and dirt. Check the finish every few months. If the surface looks dull, it may need more finish. Lightly sand the table with fine sandpaper first. Apply a thin coat of wood finish or oil. Let it dry fully before use. This keeps the wood rich and shiny.
Preventing Cracks And Damage
Wood can crack from dry air or heat. Keep the table away from direct sunlight or heaters. Use coasters and placemats to stop scratches. Avoid placing hot items directly on the surface. Keep humidity levels steady in the room. These steps help stop cracks and other damage.
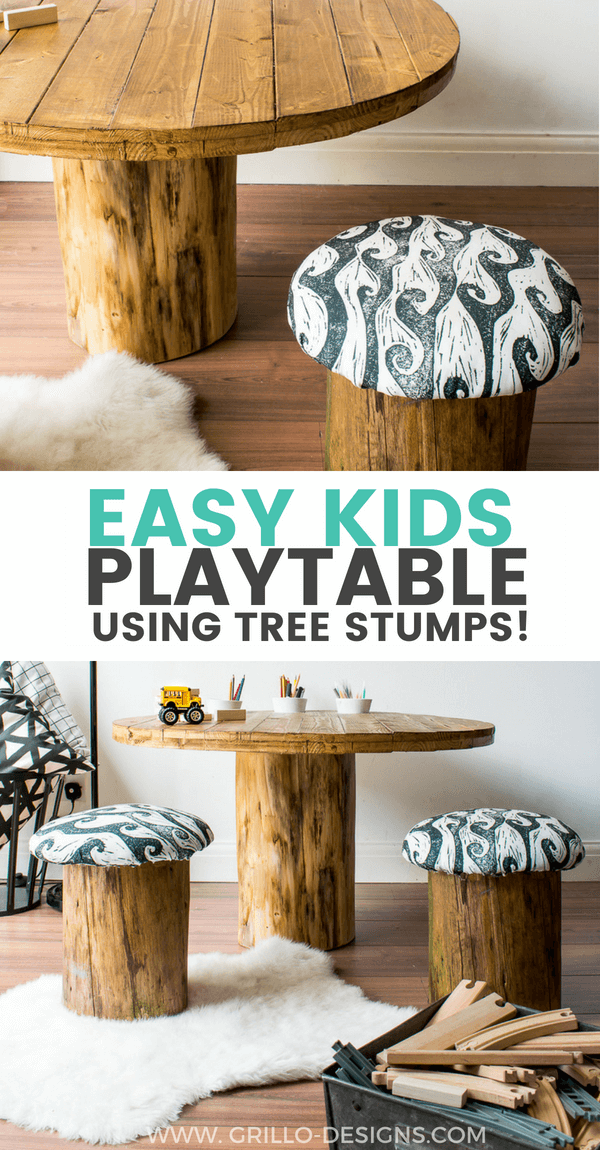
Credit: grillo-designs.com
Frequently Asked Questions
How Do I Prepare A Tree Stump For Making A Wood Table?
Start by removing bark and cleaning the stump thoroughly. Sand the surface smooth to avoid splinters. Let the stump dry completely before working on it.
What Tools Are Needed To Make A Table From A Tree Stump?
You need a saw, sander, drill, and protective finish. Clamps and measuring tape also help for accuracy. Safety gear like gloves and goggles are important too.
How Long Does It Take To Make A Wood Table From A Stump?
The process can take a few days. Drying the wood may take the longest time. Actual building usually takes a few hours.
Can I Use Any Tree Stump For A Table?
Hardwood stumps like oak or maple work best. Softwoods may crack or wear quickly. Choose a healthy, solid stump with minimal cracks.
How Do I Protect My Wood Table Made From A Stump?
Apply a sealant or wood finish to protect against moisture. Reapply every year to keep it strong. Avoid placing it in direct sunlight or wet areas.
Conclusion
Creating a wood table from a tree stump is a simple, rewarding project. It brings nature right into your home. You only need some basic tools and patience. Each step shapes the stump into a unique, useful piece. The result lasts for years and adds charm to any room.
Try this project to enjoy crafting with your own hands. A wooden stump table is both practical and beautiful. Start today and see how satisfying it feels.