
Are you looking for a simple way to add style and extra seating to your kitchen? Building a bench for your kitchen table might be the perfect solution.
Not only can a bench save space, but it also creates a cozy spot for family and friends to gather. Imagine having a sturdy, custom-made bench that fits your kitchen perfectly—built by you! In this guide, you’ll discover easy steps and practical tips to make your own kitchen bench, even if you’ve never built furniture before.
Ready to transform your dining area and impress everyone with your handiwork? Let’s get started!
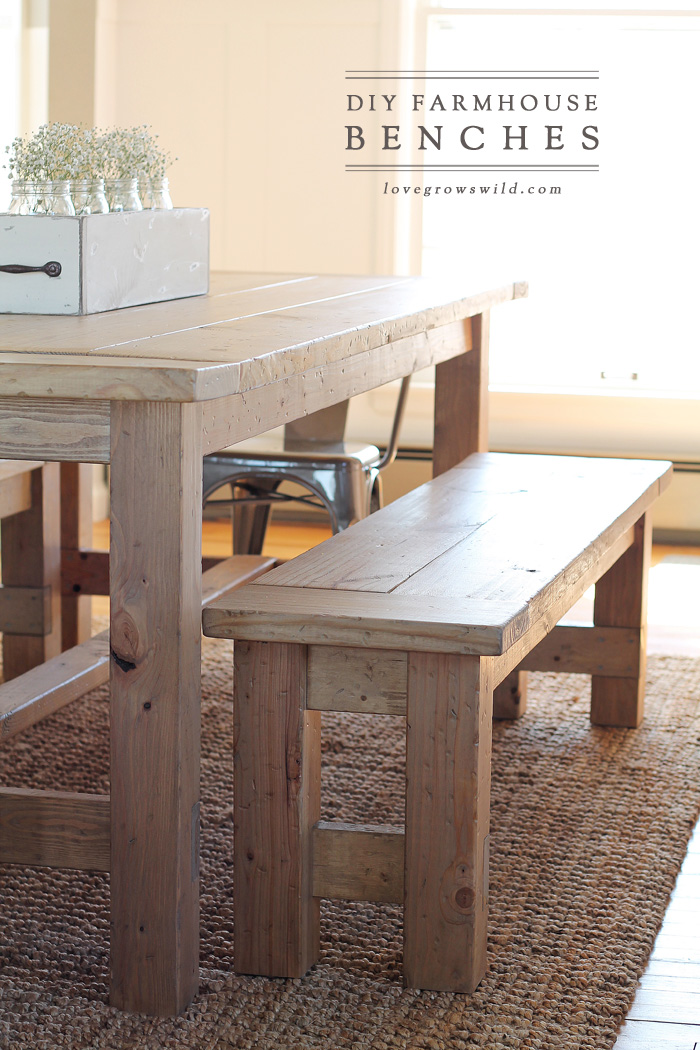
Credit: lovegrowswild.com
Choosing The Right Materials
Choosing the right materials is the first step in building a sturdy bench for your kitchen table. The materials affect the bench’s strength, look, and how long it lasts. Good choices make the project easier and the final product better.
Selecting Wood Types
Pick wood that is strong and fits your kitchen style. Pine is soft and easy to work with. Oak and maple are harder and last longer. They cost more but are very sturdy. Avoid wood that bends or cracks easily. Check for smooth surfaces and no big knots. These woods hold screws and nails well. Finish the wood with paint or sealant to protect it from spills.
Gathering Tools And Supplies
Prepare all tools before starting. You need a saw to cut wood pieces. A drill helps make holes for screws. Sandpaper smooths rough edges. Have screws, wood glue, and clamps ready. Clamps hold pieces tight while glue dries. A tape measure and pencil help with exact cuts. Safety gear like goggles and gloves keeps you safe during work. Having everything ready saves time and avoids mistakes.

Credit: www.youtube.com
Planning Your Bench Design
Planning your bench design is the first step in creating a perfect seating solution for your kitchen table. It helps ensure the bench fits well and looks good. Careful planning saves time, materials, and effort during building.
Start by understanding the size and shape of your kitchen table. Think about how many people will use the bench. Consider comfort and space around the table.
Measuring Your Kitchen Table
Measure the length of your kitchen table. Use a tape measure for accuracy. Write down the measurement in inches or centimeters. Measure the height of the table from the floor to the top. Note the width of the table if you want the bench to match or fit under it. Check for any overhang or legs that might affect bench placement.
Deciding On Bench Dimensions
Decide on the length of the bench. It should be slightly shorter than the table length. Leave space for chairs or movement at the ends. Choose a bench height that is about 12 inches lower than the table height. This allows enough legroom for sitting. Pick a comfortable bench width, usually between 12 and 18 inches. Make sure the bench is wide enough to sit on but not too wide for your kitchen space.
Cutting And Preparing Wood
Cutting and preparing wood is the first step in building a sturdy kitchen bench. This step shapes the wood pieces to the right size and form. It ensures all parts fit together perfectly. Careful preparation helps the bench last longer and look better.
Use the right tools and take your time. This makes the work safer and easier. Safety and accuracy go hand in hand here. Let’s break down the process into simple steps.
Marking Cut Lines
Start by measuring the wood pieces needed for your bench. Use a tape measure for exact numbers. Mark the lines clearly with a pencil. Draw straight lines using a ruler or square tool. Clear lines guide your cuts and avoid mistakes.
Double-check the measurements before cutting. Measure twice, cut once. This old saying saves wood and time. Mark all pieces before moving to the cutting stage.
Cutting Wood Pieces Safely
Wear safety glasses and gloves before cutting wood. Use a stable work surface to hold the wood steady. Choose a saw that fits your skill level. A handsaw works well for simple cuts. A power saw cuts faster but needs more care.
Cut slowly along the marked lines. Keep your hands away from the blade. Stop and check the cut progress often. Smooth rough edges with sandpaper after cutting. Safe cutting protects you and improves the wood’s finish.
Assembling The Bench Frame
Assembling the bench frame is a crucial step in building a sturdy kitchen bench. This frame will hold the seat and support the weight of people sitting on it. Take your time to ensure all parts fit well and are secure. A strong frame means a long-lasting bench.
Building The Legs
Start by cutting four legs from solid wood. Each leg should be the same length for balance. Sand the edges to smooth any rough spots. Attach angled supports near the top of each leg. These supports add strength and prevent wobbling. Use wood glue and screws for a tight fit. Make sure the legs stand straight and steady.
Connecting The Seat Support
Next, join the legs with long wooden beams to form the seat support. These beams run across the length of the bench. Position them evenly to spread the weight. Attach the beams to the legs using screws and glue. Check that the frame is square by measuring the corners. A well-connected seat support keeps the bench firm and safe.
Attaching The Bench Seat
Attaching the bench seat is a key step in building your kitchen table bench. This part makes sure the seat stays strong and steady. Proper attachment also keeps the bench safe to use every day. Take your time to secure the seat well and prepare it for a smooth finish.
Securing The Seat To Frame
Place the bench seat on the frame. Check that it fits evenly on all sides. Use clamps to hold the seat in place. Drill pilot holes through the seat into the frame. This prevents the wood from splitting. Next, use screws to fasten the seat firmly. Make sure the screws are flush with the wood. Tighten each screw without cracking the seat. Confirm the seat does not move or wobble.
Sanding For Smooth Finish
Start sanding with medium-grit sandpaper. Focus on the edges and corners first. Sand the top surface in even strokes. Switch to fine-grit sandpaper for a softer feel. Remove any rough spots or splinters. Wipe away dust with a clean cloth. Smooth sanding helps paint or stain stick better. It also makes the bench safer and more comfortable.
Adding Finishing Touches
Adding finishing touches to your kitchen bench brings the project to life. These final steps improve the bench’s look and protect it. Proper finishing makes your bench last longer and feel smooth to the touch. It is important to choose the right colors and coatings that match your kitchen style. Let’s explore how to stain or paint your bench and how to apply a protective coating for best results.
Staining Or Painting
Staining shows the natural wood grain while adding color. Choose a stain that suits your kitchen’s color scheme. Apply the stain evenly with a brush or cloth. Let the stain dry completely before adding more coats. Painting covers the wood with solid color. Use paint made for wood surfaces for better grip. Apply thin, even coats and allow drying time between layers. Both options can change the bench’s look dramatically. Pick one that fits your style and kitchen decor.
Applying Protective Coating
A protective coat shields the wood from spills and scratches. Use polyurethane or varnish for strong protection. Apply thin coats with a clean brush for smooth finish. Let each coat dry well before adding the next. Sand lightly between coats for a better bond. Protective coating keeps the bench looking new for years. It also makes cleaning easier and prevents water damage. This step is key to a durable and beautiful kitchen bench.
Maintaining Your Kitchen Bench
Maintaining your kitchen bench helps keep it looking good and lasting longer. Simple care routines protect the wood and finish. Regular attention prevents damage and keeps the bench safe for daily use.
Cleaning Tips
Use a soft cloth to wipe the bench daily. Avoid harsh chemicals that can harm the wood. A mild soap with warm water works well for cleaning. Dry the surface immediately after wiping to prevent water marks. Clean spills quickly to avoid stains. For sticky spots, gently scrub with a soft brush. Avoid soaking the bench with water to protect the wood.
Repair And Touch-up Advice
Small scratches can be fixed with a wood touch-up marker. Match the color to your bench for the best results. For deeper dents, use wood filler and sand lightly once dry. Reapply a protective finish after repairs to seal the surface. Tighten any loose screws or joints to keep the bench stable. Check the bench regularly for signs of wear or damage. Early repairs stop problems from getting worse.
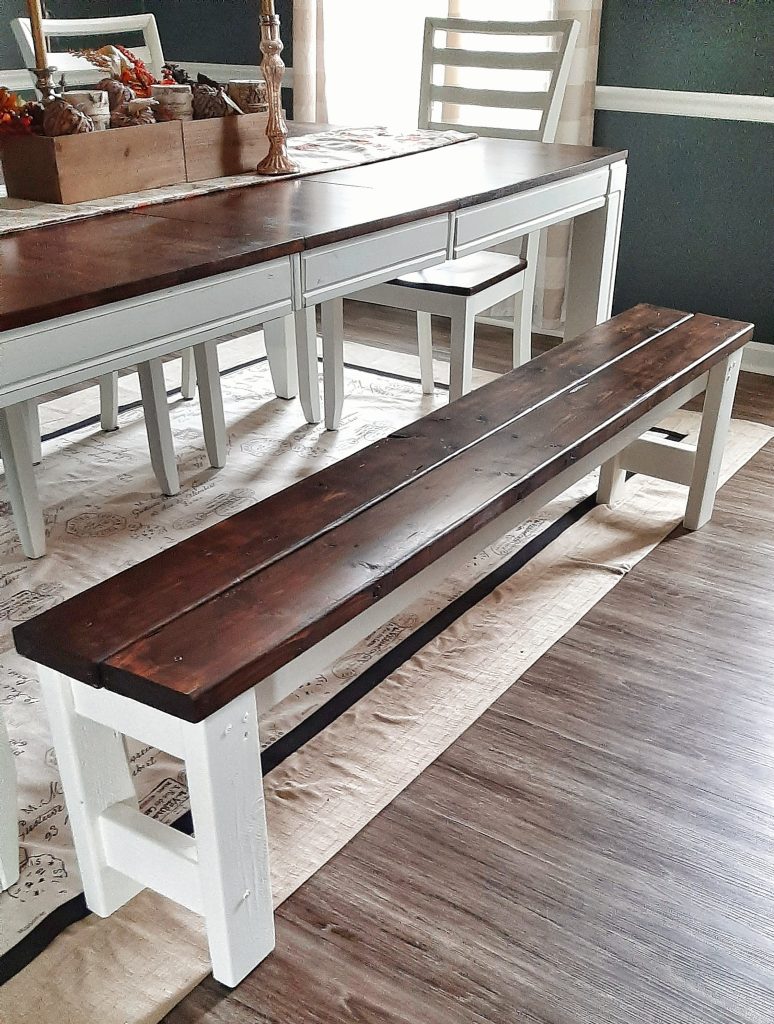
Credit: theperfectlyimperfectlife.com
Frequently Asked Questions
What Materials Do I Need To Build A Kitchen Bench?
You need wood boards, screws, wood glue, sandpaper, and paint or stain. A saw and drill are also important tools. These materials help create a sturdy and smooth bench.
How Long Does It Take To Build A Kitchen Bench?
Building a kitchen bench usually takes 3 to 5 hours. Time depends on your skill and tools. Simple designs are faster to complete.
What Size Should My Kitchen Bench Be?
A good bench height is about 18 inches from the floor. Length can match your kitchen table size. Width around 14 to 18 inches is comfortable to sit on.
Can I Build A Bench Without Professional Skills?
Yes, basic woodworking skills are enough to build a kitchen bench. Follow step-by-step guides and take your time. Simple tools and patience will help you finish the project.
How Do I Make My Kitchen Bench Look Nice?
Sand all surfaces smooth before painting or staining. Choose colors that match your kitchen décor. Adding cushions or pillows also improves comfort and style.
Conclusion
Building a bench for your kitchen table adds charm and function. It saves space and offers extra seating for guests. Use sturdy materials and follow simple steps for best results. Personalize the bench with paint or cushions to match your style.
This project suits beginners and saves money on furniture. Enjoy the satisfaction of making something useful by yourself. Start your bench project today and brighten your kitchen space.