
Are you ready to transform your bathroom with a sleek, modern curbless shower? Building one on a wood floor might sound tricky, but it’s easier than you think.
You’ll not only get a stylish, open look but also a safer, more accessible space. Imagine stepping into your shower without any barriers, with water flowing smoothly to the drain. In this guide, you’ll discover simple steps and smart tips to make your curbless shower both beautiful and waterproof.
Keep reading to learn how to protect your wood floor and create a stunning shower that lasts.
Planning Your Curbless Shower
Planning your curbless shower carefully is key for a smooth build. This step helps avoid costly mistakes and ensures a safe, water-tight space. Think about location, size, and materials before starting construction. Proper planning saves time and creates a stylish, functional shower.
Choosing The Right Location
Select a spot with easy access to plumbing lines. Avoid areas with heavy foot traffic or near electrical outlets. Pick a place with good natural light if possible. Ensure the location allows proper drainage to prevent water damage. Check the floor’s strength to support the shower’s weight.
Measuring And Designing The Space
Measure the area carefully in inches or centimeters. Plan for enough room to move comfortably inside the shower. Design a slight slope in the floor for water to drain easily. Think about the shower door or curtain placement. Keep clearance for cleaning and maintenance.
Selecting Materials For Wood Floors
Choose water-resistant wood or treat the floor with sealants. Use waterproof membranes under the shower base. Pick tiles or stone that work well with wood floors. Avoid materials that swell or warp with moisture. Make sure all materials fit the curbless shower design.
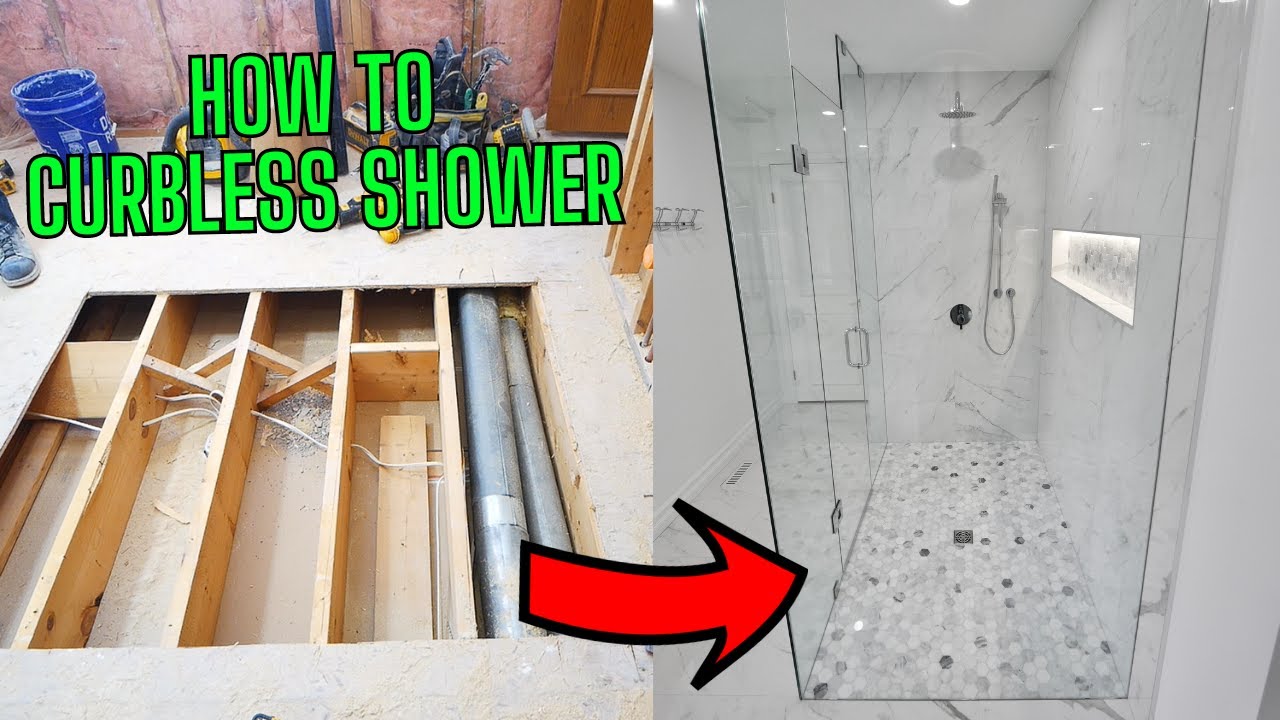
Credit: www.youtube.com
Preparing The Wood Floor
Preparing the wood floor is the first step to build a curbless shower. This step ensures the floor is strong and protected from water damage. A well-prepared floor helps avoid costly repairs later. Focus on checking the floor, making it stronger, and keeping it dry.
Assessing Floor Condition
Start by inspecting the wood floor closely. Look for soft spots, cracks, or signs of rot. Use a screwdriver to press the wood gently. Soft or spongy areas mean damage. Check if the floor is level. Uneven surfaces can cause water pooling. Mark any weak or uneven spots to fix later.
Reinforcing The Subfloor
Strengthen the floor before adding the shower base. Add plywood sheets over weak areas for extra support. Use screws to fasten new plywood tightly. Make sure the subfloor is flat and solid. Reinforcement prevents future sagging under water weight. It also helps secure the shower drain firmly.
Installing A Waterproof Membrane
Protect the wood from water with a waterproof membrane. Choose a membrane designed for wet areas. Roll it out smoothly, covering the entire shower floor. Seal all seams with waterproof tape. Extend the membrane up the walls slightly. This barrier stops water from reaching the wood below.
Creating The Shower Drainage
Creating proper shower drainage is key for a curbless shower on a wood floor. Water must flow away quickly to avoid damage. The right drain and slope keep the floor dry and safe. This section explains how to create effective drainage.
Choosing The Drain Type
Select a drain that fits a curbless shower design. Linear drains are popular for smooth water flow. They cover more area and look modern. Choose a drain that matches your shower size and style. Check for good quality materials to avoid leaks and rust.
Installing The Linear Drain
Set the linear drain at the shower entrance or along one side. Make sure it connects to the existing plumbing properly. Secure the drain to the wood floor using screws and sealant. Use waterproof membranes around the drain for protection. Test the drain to see if water flows freely.
Ensuring Proper Slope For Drainage
The shower floor must slope toward the drain. Aim for about a 1/4 inch drop per foot. This slope helps water move quickly without pooling. Use a level and straight edge to check the slope. Adjust the wood base and mortar bed as needed. Proper slope prevents water damage and mold growth.
Building The Shower Base
Building the shower base is a key step in creating a curbless shower on a wood floor. The base must be strong, level, and waterproof. This prevents water damage and keeps the shower safe to use.
Follow these steps to build a solid shower base that lasts.
Framing The Shower Area
Start by framing the shower area with treated lumber. Use pressure-treated wood to resist moisture. Ensure the frame is level and square. This provides a stable foundation for the shower base.
Add extra support beams if the floor joists are far apart. This stops the base from flexing. Secure the frame firmly to the subfloor. Double-check all corners and edges for accuracy.
Applying A Waterproofing System
Apply a waterproofing system to protect the wood floor. Use a liquid waterproof membrane or a waterproof sheet membrane. Cover the entire shower base area, extending a few inches up the walls.
Seal all seams and corners thoroughly. Use waterproof tape or mesh for extra strength. Let the waterproofing dry completely before moving on. This step prevents water from seeping into the wood.
Testing For Leaks
Test the shower base for leaks before finishing the installation. Plug the drain and fill the base with water. Let it sit for 24 hours. Check the wood below for signs of moisture.
Look for any damp spots or water stains. Fix any leaks by resealing or reapplying waterproof material. Confirm the base is fully watertight. This saves costly repairs later.
Tiling And Finishing
Tiling and finishing a curbless shower on a wood floor requires care and precision. This step ensures the shower looks great and stays waterproof. Proper tiling protects the wood from moisture damage. It also makes cleaning easier and enhances the bathroom’s style.
Selecting Tile Materials
Choose tiles that resist water well. Porcelain and ceramic tiles work best for showers. They are durable and easy to clean. Look for slip-resistant tiles to keep the shower safe. Avoid tiles that absorb water or stain easily. Pick a color and style that match your bathroom design.
Laying Tiles On The Floor And Walls
Start by preparing the wood floor with a waterproof membrane. This layer stops water from reaching the wood. Apply thin-set mortar evenly on the floor and walls. Press the tiles firmly into the mortar. Leave small gaps between tiles for grout. Use spacers to keep gaps even. Check the tiles with a level to keep them flat.
Sealing And Grouting
Once the tiles set, apply grout between the gaps. Choose grout that is water-resistant and mold-proof. Spread grout with a rubber float and press it into gaps. Wipe off extra grout with a damp sponge. After grout dries, seal the tiles and grout. This sealant prevents water from seeping through. Reapply sealant every few years for protection.
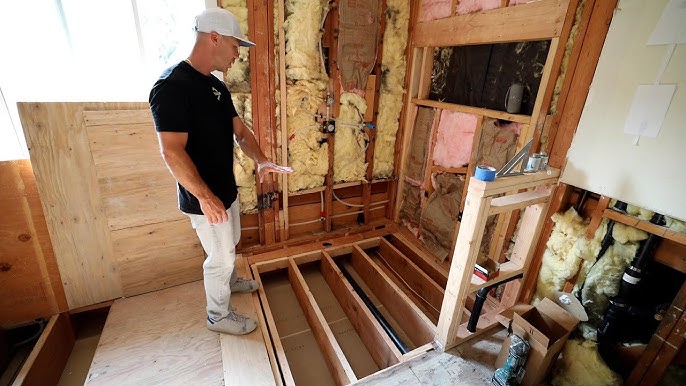
Credit: www.youtube.com
Installing Fixtures And Doors
Installing fixtures and doors is an important step in building a curbless shower on a wood floor. This phase brings the shower to life. Proper installation ensures the space is functional and stylish. It also prevents water leaks and damage to the wood floor.
Choose the right fixtures and doors carefully. Each piece must fit the space and work well with the curbless design. After installing, check all parts for stability and water tightness. Small mistakes here can cause big problems later.
Choosing Shower Fixtures
Select fixtures that match the bathroom style. Opt for water-efficient showerheads to save water. Consider a handheld shower for ease of use and flexibility. Choose materials like stainless steel or brass for durability. Make sure the fixtures can be securely mounted on the wall or ceiling. Proper placement helps avoid water splashing outside the shower area.
Fitting Glass Panels Or Doors
Glass panels keep water inside the shower without blocking light. Tempered glass is strong and safe for bathroom use. Measure the shower opening accurately before ordering glass doors. Use hinges and seals made for wet environments. Install the panels so water flows back into the shower. Check the door swings smoothly and seals tightly. Avoid gaps that could cause leaks.
Final Touches And Cleaning
Seal all edges with waterproof silicone to protect the wood floor. Check all fixtures and doors for tightness and proper function. Clean the glass with non-abrasive cleaners to avoid scratches. Remove dust and debris from the installation area. Make sure the drain is clear to prevent water buildup. A clean finish improves the shower’s look and longevity.
Maintenance Tips For Curbless Showers
Maintaining a curbless shower on a wood floor is key to keep it safe and beautiful. Proper care helps avoid water damage and keeps the shower clean. Regular attention makes the shower last longer and work better.
Regular Cleaning Practices
Clean the shower floor and walls often. Use mild soap and warm water. Avoid harsh chemicals that can damage wood or grout. A soft brush helps remove dirt from grout lines. Dry surfaces with a towel after each use. This stops mold and mildew growth.
Preventing Water Damage
Check seals around the shower regularly. Make sure silicone caulk stays intact to block water. Fix any cracks or gaps quickly. Use a water-resistant finish on wood floors. Keep the bathroom well-ventilated to reduce moisture. A fan or open window helps air circulate.
Addressing Common Issues
Look for signs of water pooling or stains on wood. Address leaks or slow drainage immediately. If mold appears, clean it with a vinegar solution. Tighten loose tiles or boards to avoid accidents. Call a professional for major repairs or persistent problems.
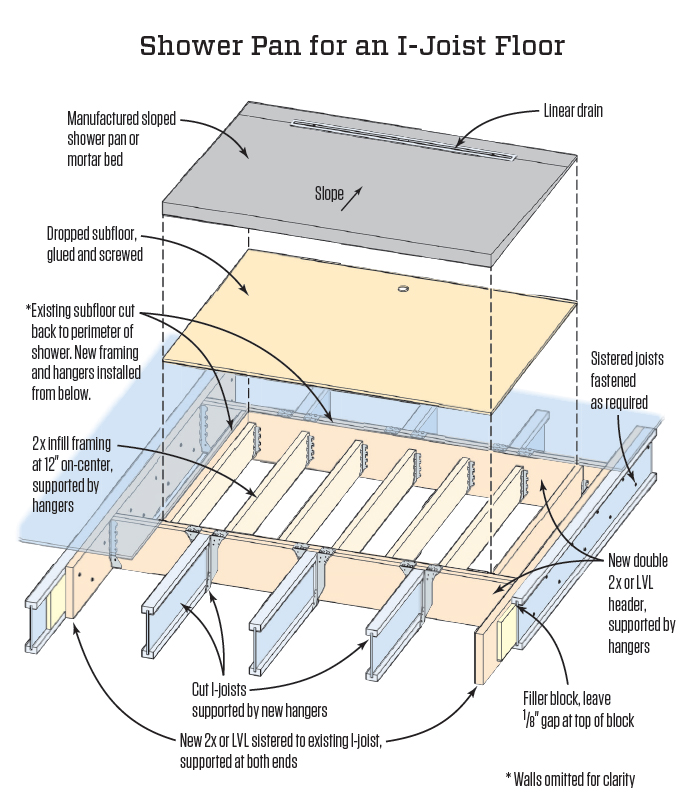
Credit: www.jlconline.com
Frequently Asked Questions
What Materials Are Needed For A Curbless Shower On Wood Floors?
You need a waterproof membrane, shower drain, mortar bed, and tiles. Also, use wood-friendly sealants and moisture barriers. Proper materials protect the wood from water damage.
How Do You Waterproof A Curbless Shower On Wood Floors?
Apply a waterproof membrane over the wood subfloor. Seal all seams and corners carefully. This stops water from seeping into the wood below.
Can I Build A Curbless Shower Without Removing The Wood Floor?
It’s best to remove or cover the wood floor to avoid water damage. A waterproof layer must be directly on the subfloor. Skipping this step risks mold and wood rot.
What Slope Is Needed For Drainage In A Curbless Shower?
The floor should slope about 1/4 inch per foot toward the drain. This helps water flow out quickly. Without a proper slope, water can pool and cause damage.
How Do I Maintain A Curbless Shower On A Wood Floor?
Clean the drain regularly to prevent clogs. Wipe water off the floor after use. Check the waterproofing seals yearly for any damage or leaks.
Conclusion
Building a curbless shower on a wood floor takes care and planning. Start with a strong, waterproof base to keep water safe. Use the right slope to guide water toward the drain. Choose materials that resist moisture and last long.
Small steps matter for a smooth, safe shower. Enjoy the open, modern look and easy access. With these tips, your shower will work well and look great for years. Simple, smart choices make all the difference.