
If you’ve ever struggled with a warped or uneven board, you know how frustrating it can be to get a smooth, flat surface. Using a hand planer is one of the best ways to fix this, but if you’re not sure where to start, it can feel intimidating.
The good news? With the right steps and a little practice, you can learn exactly how to use a hand planer to flatten your board like a pro. Keep reading, and by the end of this article, you’ll have the confidence and know-how to tackle your next woodworking project with ease.

Credit: www.youtube.com
Choosing The Right Hand Planer
Choosing the right hand planer is important for flattening a board effectively. The right tool helps you work faster and achieve smooth, even surfaces. Different planers fit different tasks and skill levels. Knowing what to pick makes your woodworking easier and safer.
Types Of Hand Planers
There are several types of hand planers. A block plane is small and good for trimming edges. A bench plane is larger and better for flattening big boards. A jack plane is versatile and can do rough or fine work. Pick the type that fits the size of your project.
Blade Selection And Maintenance
The blade is the most important part of a hand planer. Sharp blades cut cleanly and make your work smooth. Choose a blade made of high-quality steel for durability. Keep the blade sharp by honing it regularly. Dull blades cause tear-out and uneven surfaces.
Safety Gear Essentials
Safety is key when using a hand planer. Wear safety glasses to protect your eyes from flying wood chips. Use a dust mask to avoid breathing sawdust. Wear gloves for better grip, but avoid loose gloves that can catch in the tool. Keep your workspace clean to prevent accidents.
Preparing The Board
Preparing the board is the first step in using a hand planer. You must get the wood ready to make flattening easier. This process helps you work safely and achieve a smooth, even surface.
Selecting The Wood
Choose a board that fits your project needs. Look for wood that is dry and sturdy. Avoid wood that feels soft or crumbly. Hardwoods often work best for flattening tasks.
Checking For Warps And Defects
Look closely for twists, bends, or cracks. Warps make it hard to get a flat surface. Small knots or holes can cause problems too. Make sure the board is strong enough to plane safely.
Marking High Spots
Use a pencil to mark the high areas on the board. These are spots that stick out above the rest. Marking helps you focus your planing on these points. It saves time and effort while working.
Setting Up The Planer
Setting up the hand planer correctly is essential for smooth and even results. Before you start planing, make sure your tool and workspace are ready. A well-prepared planer helps you work faster and safer. The first steps focus on adjusting the blade, checking its alignment, and securing the board firmly. These steps prevent mistakes and make the board flat in fewer passes.
Adjusting Blade Depth
Start by setting the blade depth. A shallow blade depth removes thin layers of wood. This control helps avoid gouges or rough spots. Turn the depth adjustment knob or screw to set the blade. Test the cut on scrap wood to check thickness. Adjust the blade until it removes a small, even shaving. Too deep a cut can damage the board and strain your muscles.
Checking Blade Alignment
Check that the blade is straight and parallel to the sole of the planer. A misaligned blade causes uneven surfaces and chatter marks. Look along the blade edge to see if it lines up with the base. Use a ruler or straight edge for accuracy. Adjust the blade so it just touches the sole evenly. Proper alignment gives a smooth, consistent cut across the board.
Securing The Board
Hold the board firmly to keep it from moving. Use clamps or a workbench vise to lock the wood in place. A stable board allows controlled, even planing strokes. Avoid planing freehand, as the board can slip or shift. Check that the board sits flat and does not rock. Good support improves safety and helps you flatten the board faster.
Techniques For Flattening
Flattening a board with a hand planer requires specific techniques. These methods help you achieve a smooth, even surface. Using the right approach makes the job easier and gives better results. Follow these steps for effective flattening.
Proper Hand Placement
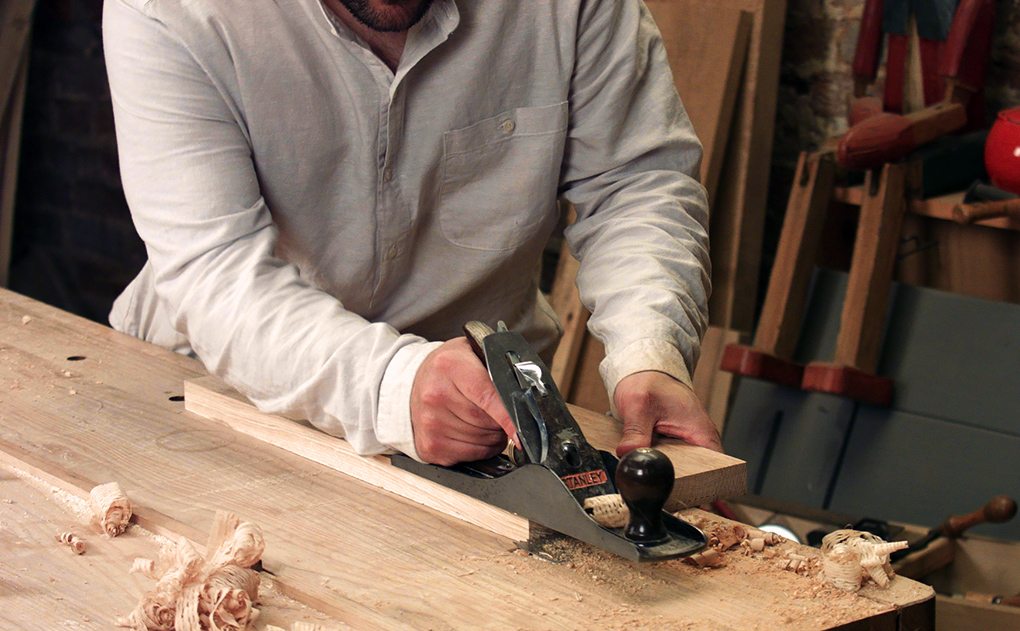
Hold the hand planer with both hands. One hand should grip the front knob firmly. The other hand pushes the rear handle. Keep your hands steady and balanced. This control prevents uneven cuts.
Planing With The Grain
Always plane in the direction of the wood grain. Planing against the grain causes tear-out and rough spots. Look closely to see the grain direction. Move the planer smoothly to follow the grain.
Maintaining Even Pressure
Apply steady pressure on the planer throughout the stroke. Press more on the front at first to start the cut. Then, shift pressure to the rear to finish smoothly. Avoid rocking the planer to keep the surface flat.
Multiple Passes Strategy
Remove small amounts of wood with each pass. Several light passes work better than one deep cut. Check the board often to track progress. Stop planing when the surface looks even and smooth.
Troubleshooting Common Issues
Troubleshooting common problems with a hand planer can save time and improve your results. Small issues often cause big frustrations. Knowing how to fix them helps keep your project on track. Below are common problems and simple solutions.
Dealing With Tear-out
Tear-out happens when wood fibers pull away instead of cutting cleanly. It leaves rough spots on the board. To reduce tear-out, always plane with the grain. Take lighter cuts instead of deep ones. Sharpen your blade regularly. Sometimes, putting tape on the wood surface helps hold fibers down.
Fixing Uneven Surfaces
Uneven surfaces show as high and low spots on the board. This happens when the planer blade is not flat or you apply uneven pressure. Check that your blade is set evenly across the planer. Apply steady and consistent pressure while planing. Move the planer slowly and keep it flat against the wood.
Blade Dullness Signs
Dull blades make planing hard and rough. You might hear a chattering noise or see tear-out more often. The planer will require extra force to move over the wood. Inspect the blade for nicks or dull edges. Replace or sharpen the blade quickly to keep smooth cuts and protect the wood.
Credit: www.theenglishwoodworker.com
Finishing Touches
After planing a board, the finishing touches make a big difference. These steps ensure the wood surface is smooth, even, and ready for use. Proper finishing also protects your tools and helps maintain quality work over time.
Sanding After Planing
Sanding removes small scratches and rough spots left by the planer. Use fine-grit sandpaper for a smooth finish. Sand along the grain of the wood to avoid scratches. Light, even strokes work best for a consistent surface. This step prepares the wood for painting or staining.
Checking Flatness
Check the board’s flatness with a straight edge or a level. Place the tool across the board at different points. Look for gaps or uneven spots under the straight edge. Mark any high or low areas to plane again if needed. This check ensures your board is perfectly flat.
Storing Your Planer
Store your hand planer in a dry, clean place to protect it. Clean the blades and remove any wood dust before storage. Cover the blades with a protective guard or cloth. Proper storage keeps the blades sharp and ready for the next use. Regular care extends the life of your tool.

Credit: www.popularwoodworking.com
Frequently Asked Questions
What Is The Best Way To Hold A Hand Planer?
Hold the hand planer firmly with both hands. One hand grips the front knob; the other holds the rear handle. Keep steady pressure for smooth planing.
How Do I Check If My Board Is Flat?
Use a straight edge or ruler across the board surface. Look for gaps or uneven spots. This shows where you need to plane.
How Many Passes Does It Take To Flatten Wood?
It usually takes several passes to flatten a board. Each pass removes a thin layer of wood. Check often to avoid over-planing.
What Blade Angle Is Ideal For Hand Planers?
Most hand planers use a blade angle between 37 and 45 degrees. This angle cuts wood smoothly and reduces tear-out. Adjust as needed for different woods.
Can I Use A Hand Planer On Rough Lumber?
Yes, a hand planer works well on rough lumber. It smooths and flattens the surface quickly. Start with light passes to avoid gouging.
Conclusion
Using a hand planer to flatten a board takes practice and patience. Start with small, even strokes to remove high spots. Check your progress often to avoid removing too much wood. Keep the blade sharp for smooth cuts. With time, your boards will become flat and ready for any project.
Enjoy the satisfaction of working with your hands and creating something useful. Keep practicing, and your skills will improve steadily.