
Are you working with wood and need to know if it’s too wet or dry? Checking the moisture content of wood is crucial for your project’s success.
But what if you don’t have a moisture meter? Don’t worry—you can still find out if your wood is ready to use with simple tricks you can do yourself. You’ll learn easy, practical ways to check wood moisture without any special tools.
Keep reading—you’ll save time, avoid costly mistakes, and make sure your wood is just right for your work.
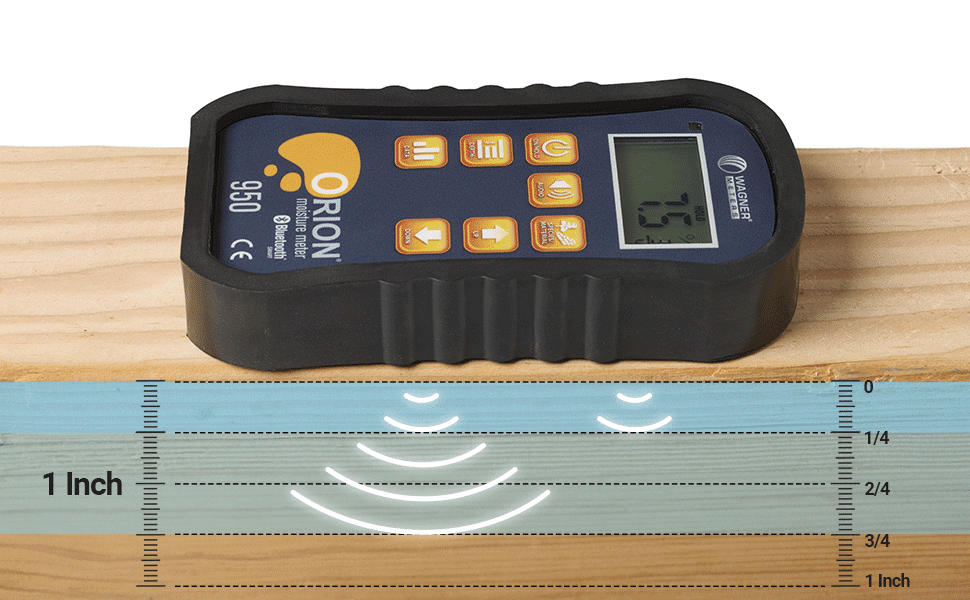
Credit: www.wagnermeters.com
Why Moisture Matters In Wood
Moisture content in wood plays a big role in its quality and use. Wood changes with moisture levels. It can expand, shrink, or even break. Knowing why moisture matters helps protect wood and makes projects last longer. This section explains the key reasons moisture is important.
Effects On Wood Strength
Wood with too much moisture loses strength. It becomes soft and weak. Dry wood holds nails and screws better. Wet wood may split or crack under pressure. Strength depends on the right moisture level.
Impact On Woodworking Projects
Wood with the wrong moisture can ruin projects. It might warp or bend after cutting. Pieces may not fit well together. Paint and finishes do not stick well on wet wood. Correct moisture keeps projects smooth and strong.
Risks Of High Moisture Levels
High moisture invites mold and rot. Wood can decay faster in damp places. Bugs like termites prefer wet wood. This causes damage that costs money. Keeping moisture low protects wood from these risks.

Credit: swwooddryer.com
Visual Signs Of Moisture
Wood with too much moisture shows clear visual signs. These signs help identify wet wood without special tools. Knowing these signs saves time and money. It also prevents damage in your projects. Observe the wood closely for these changes. They reveal the moisture content and wood condition.
Color Changes
Wet wood often looks darker than dry wood. The color may appear uneven or blotchy. Dark spots or stains can develop on the surface. Freshly cut wood with moisture shows a shiny look. These color changes suggest the wood holds water inside.
Surface Texture
Moist wood feels different to the touch. It can feel cool or damp, unlike dry wood. The surface may appear rough or swollen. Sometimes, the wood feels sticky or slimy. These texture changes indicate high moisture content.
Warping And Cracking
Wood absorbs water and changes shape. Warping causes the wood to bend or twist. Cracking happens as wood dries unevenly. Both warping and cracking show moisture problems. Check for these signs to avoid weak wood.
Touch And Feel Techniques
Touch and feel techniques help you check wood moisture without tools. You rely on your senses to judge moisture levels. These methods are simple and quick. They work well for rough estimates in everyday situations. Learning these tricks helps avoid mistakes when using wet wood.
Coldness Test
Touch the wood surface with your hand. Wet wood feels cooler than dry wood. This happens because water absorbs heat from your skin. If the wood feels cold, it likely has high moisture content. Dry wood feels closer to room temperature.
Weight Comparison
Pick up two similar pieces of wood. The heavier piece usually contains more moisture. Water adds extra weight to the wood. This test works best if you know the wood type. Always compare pieces of similar size and shape.
Flexibility Check
Bend the wood gently without breaking it. Wet wood bends more easily than dry wood. Dry wood feels stiff and may crack under pressure. This test helps see if wood is too moist for use. Handle the wood carefully to avoid damage.
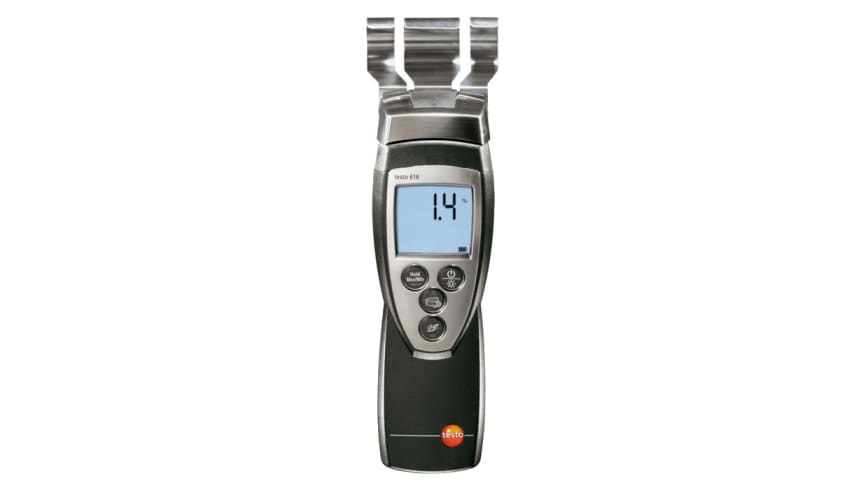
Credit: www.testo.com
Simple Home Tests
Checking the moisture content of wood is important before any project. You can use simple home tests without special tools. These tests help you avoid problems like warping or cracking. Try these easy methods at home to know if your wood is ready to use.
Plastic Wrap Method
Take a small piece of wood and wrap it tightly in plastic wrap. Leave it for 24 hours in a warm place. Check the inside of the wrap after a day. If you see water droplets, the wood has high moisture. No droplets mean the wood is dry enough for use.
Oven Drying Test
Cut a small wood sample and weigh it. Place the sample in an oven at 215°F (100°C) for about 24 hours. Remove and weigh it again. The difference in weight shows the moisture content. This test is more accurate but takes time and care.
Pin Prick Test
Press a pin or needle into the wood surface. If it goes in easily, the wood is likely soft and wet. Hard wood is usually dry and resists the pin. This quick test gives a rough idea of moisture without tools.
Using Common Tools
Checking wood moisture without a meter is simple with common tools. These methods use items you likely have at home. They help estimate moisture levels to avoid wood problems.
Using everyday tools can save time and money. These techniques require patience but give good results. Let’s explore three easy ways to check moisture content.
Weighing And Calculating Moisture
First, cut a small wood sample. Weigh it using a kitchen scale. Record the weight carefully.
Next, dry the sample in the sun or oven until it feels dry. Weigh it again after drying.
Subtract the dry weight from the wet weight. Divide this by the dry weight, then multiply by 100. This gives an estimate of moisture content in percentage.
Heat Gun Approach
Use a heat gun to warm a small wood spot. Heat for a few minutes.
Check if the wood darkens or changes. Darkening suggests moisture inside.
This method does not give exact numbers but shows if wood is damp or dry. Be cautious not to burn the wood.
Hair Dryer Method
A hair dryer works like a heat gun but is gentler. Heat a wood area for about five minutes.
Touch the wood to feel if it is warm and dry. Moist wood feels cooler longer.
This method helps check moisture in large wood pieces. It is safe and easy to try.
Tips For Accurate Results
Getting accurate moisture content from wood without a meter is tricky. It requires care and attention to detail. Simple steps can help improve your results. These tips focus on preparing samples, setting the right environment, and testing multiple times. Follow these to get as close to the real moisture level as possible.
Preparing Wood Samples
Start by cutting a small, clean piece of wood. Avoid wood with knots or cracks. Use a sharp tool for a smooth cut. Remove bark and any dirt from the surface. Let the sample dry at room temperature before testing. This helps avoid misleading moisture readings.
Choosing The Right Environment
Test wood in a dry, well-ventilated area. Avoid places with high humidity or direct sunlight. Extreme temperatures can change moisture levels quickly. Keep the wood away from water or damp surfaces. A stable environment gives more reliable results.
Repeating Tests For Consistency
Check moisture content more than once. Take samples from different parts of the wood. Repeat the test at different times of the day. Compare your results to find an average value. Consistency helps reduce errors and improves accuracy.
When To Consider A Moisture Meter
Knowing when to use a moisture meter is important for working with wood. Many people try to check wood moisture without tools. Simple methods can help but might not be enough for some projects. Using a moisture meter gives clear and accurate results. This section explains when a moisture meter is a better choice than DIY methods.
Limitations Of Diy Methods
DIY ways like the weight test or visual checks can give rough ideas. They do not measure exact moisture levels. Some wood types hide moisture well. Errors can happen easily with simple tests. This can lead to problems in woodworking or construction later.
Benefits Of Professional Tools
Moisture meters provide quick, reliable readings. They measure moisture inside the wood, not just on the surface. This helps avoid surprises after cutting or building. A meter helps find hidden moisture that causes damage. It saves time and protects your work.
Cost Vs Accuracy
Moisture meters cost more than DIY methods. Basic meters are affordable and good for many tasks. Expensive models offer higher accuracy and features. For small projects, a simple meter is enough. For big jobs, accuracy pays off to prevent costly mistakes.
Frequently Asked Questions
How Can I Test Wood Moisture Without A Meter?
You can use the oven-dry method by weighing wood before and after drying. Another way is the water drop test to see absorption speed.
What Household Items Help Check Wood Moisture Levels?
Items like an oven, scale, and plastic bag help test moisture. The oven dries the wood, and the scale measures weight changes.
Is There A Quick Way To Sense Wood Dampness?
Touch and smell can hint at moisture. Wet wood feels cool and may smell musty or damp.
Can Wood Color Indicate Its Moisture Content?
Yes, dark or uneven color may show higher moisture. Dry wood usually has a lighter, uniform color.
How Accurate Is The Water Drop Test For Wood Moisture?
It gives a rough idea by how fast water absorbs. It’s simple but less precise than drying or meters.
Conclusion
Checking wood moisture without a meter is simple and useful. You can use touch, weight, or even a small burn test to guess moisture levels. These methods help avoid problems like warping or mold. Practice makes it easier to tell dry wood from wet.
Always remember to test wood before starting any project. This way, your woodwork stays strong and lasts longer. Try these easy steps next time you work with wood.