
Are you ready to create a cheese board that stands out at your next gathering? Making a cheese board from wood is easier than you think, and it adds a personal touch that store-bought boards just can’t match.
Imagine serving your favorite cheeses on a beautiful, handcrafted board that you made yourself. You’ll learn simple steps to turn a plain piece of wood into a stunning cheese board. Whether you’re a beginner or just looking for a fun project, you’ll find tips and tricks that make the process smooth and rewarding.
Keep reading to discover how to craft your own unique cheese board and impress your friends with both style and skill.
Choosing The Right Wood
Choosing the right wood is key to making a great cheese board. The wood must be strong, safe, and look good. It also needs to resist moisture and stains. Picking the right wood type helps your board last longer and stay easy to clean.
Best Wood Types For Cheese Boards
Hardwoods are best for cheese boards. Maple is a top choice because it is tough and has a smooth surface. Walnut adds a dark, rich color and resists cuts well. Cherry wood has a warm tone and is also durable. Avoid softwoods like pine; they can scratch and absorb moisture easily.
Wood Safety And Food Compatibility
Wood must be safe to touch food directly. Choose woods that do not release harmful chemicals or odors. Hardwoods like maple and walnut are food-safe. Avoid woods treated with chemicals or finishes that can peel. Make sure to sand the surface smooth to avoid splinters. Use food-safe oils to protect the wood.
Sourcing Quality Wood
Buy wood from trusted suppliers. Look for hardwood that is dry and free from cracks. Check for consistent grain and color. Reclaimed wood can be used but clean it well first. Avoid wood with knots or sap spots. Quality wood ensures your cheese board looks great and lasts longer.

Credit: hardenbrookhardwoods.com
Tools And Materials Needed
Creating a wooden cheese board needs the right tools and materials. Having these ready makes the project easier and more fun. This section lists what you need for cutting, shaping, finishing, and decorating your board.
Essential Tools For Cutting And Shaping
Start with a good saw, like a jigsaw or a handsaw, to cut the wood. A sanding block or electric sander smooths rough edges. A drill helps add handles or holes if wanted. Clamps keep the wood steady while working. Measuring tape and pencil mark where to cut or shape.
Finishing Supplies And Sealants
Use fine-grit sandpaper to finish the surface smooth. Food-safe mineral oil or beeswax protects the wood. These sealants stop water and stains from soaking in. Apply with a clean cloth and let dry well. Avoid toxic finishes to keep the board safe for food use.
Optional Decorative Elements
Wood burning tools can create patterns or names. Paint or wood stain adds color or highlights grain. Small metal handles or leather straps give a stylish look. Felt pads on the bottom protect surfaces from scratches. Decorations make your board unique and personal.
Preparing The Wood
Preparing the wood is the first step to making a beautiful cheese board. This process makes sure the wood is safe and ready to use. It also gives the board a nice look and smooth feel. Proper preparation helps the cheese board last longer and stay clean.
Cutting To Size
Start by cutting the wood to the right size. Use a saw to cut the wood into a flat board. Choose a size that fits your needs and space. Make sure the edges are straight and even. This step sets the shape of your cheese board.
Sanding For Smoothness
Next, sand the wood to remove rough spots. Use sandpaper or a sanding block. Start with a coarse grit to smooth big bumps. Then, switch to finer grits for a soft finish. Sand all sides and edges until the wood feels smooth.
Removing Dust And Debris
After sanding, clean the wood carefully. Use a dry cloth or brush to wipe off dust. Make sure no particles remain on the surface. This step prevents dirt from mixing with your food. A clean board looks better and is safer to use.
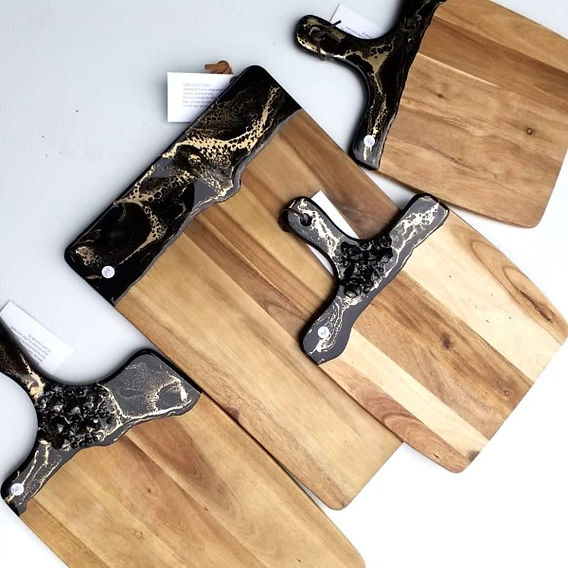
Credit: www.justresin.com.au
Shaping And Design
Shaping and design are important steps in making a wooden cheese board. They give the board its style and make it easier to use. This part lets you add your own touch and make the board fit your needs. You can create smooth edges, handy handles, or even special grooves to hold juices.
Each choice in shaping changes how the board looks and works. Think about how you want to use the board and what fits your style best. The design should be both pretty and practical. Let’s explore some ways to shape and design your cheese board.
Creating Edges And Handles
Start by shaping the edges to make the board safe and nice. Rounded edges feel smooth and stop cuts. Square edges look modern and strong. Choose the style that fits your kitchen.
Adding handles helps carry the board easily. You can cut out holes or attach wooden handles. Make sure handles are big enough to hold comfortably. Handles add style and make serving easier.
Adding Grooves Or Juice Wells
Grooves are small cuts around the board’s edge. They catch juices from cheese or fruit. This keeps your table clean. Juice wells are small dips or bowls carved into the board. They hold liquids or small snacks. Both grooves and wells add function and charm.
Use simple tools like a router or chisel to make grooves. Keep the depth shallow to avoid weakening the board. Grooves should guide liquids without spilling. Juice wells can be round or square, depending on your design.
Personalizing Your Board
Make your cheese board unique with personal touches. Carve names, dates, or special shapes into the wood. Use wood burning tools for fine details. Personalizing makes the board a special gift or keepsake.
Try different wood stains or finishes to change color. Mix light and dark woods for a cool look. Adding patterns or textures can also make your board stand out. Personal design adds meaning and beauty.
Finishing Touches
Finishing touches bring out the beauty and durability of your wooden cheese board. They protect the wood from moisture and stains. They also make the surface smooth and safe for food use. Follow these simple steps to give your cheese board a perfect finish.
Applying Food-safe Oil Or Finish
Choose a food-safe oil like mineral oil or beeswax. These oils soak into the wood and prevent cracking. Apply the oil with a clean cloth, rubbing it in the direction of the grain. Cover the entire surface, including edges and sides. Let the oil soak for about 20 minutes, then wipe off any excess. Repeat this process two or three times for the best protection.
Curing And Drying Times
Allow your cheese board to dry completely after oiling. This usually takes 12 to 24 hours. Keep it in a warm, dry place. Avoid using the board until it feels dry to the touch. Proper curing helps the finish last longer. It also prevents sticky or oily surfaces.
Maintaining Your Cheese Board
Clean your board with warm water and mild soap after each use. Avoid soaking it in water or putting it in the dishwasher. Reapply food-safe oil every few weeks to keep the wood nourished. Sand lightly if the surface feels rough. Proper care extends your cheese board’s life and keeps it safe for serving.
Tips For Use And Care
Using and caring for a wooden cheese board keeps it looking good and lasting longer. Proper care stops cracks, stains, and bad smells. Follow simple tips to keep your board safe and clean.
Cleaning Without Damage
Use warm water and mild soap to clean the board. Avoid soaking it in water. Dry it quickly with a soft cloth. Never put the board in a dishwasher. Strong detergents can ruin the wood’s surface.
Avoiding Common Mistakes
Do not cut directly on the board with very sharp knives. Avoid leaving wet food on the board for too long. Keep the board away from direct sunlight and heat. Avoid using harsh chemicals or bleach.
Extending Board Longevity
Oil the board regularly with food-safe mineral oil. This keeps the wood moist and prevents cracks. Store the board in a dry place. Rotate the board’s use to avoid uneven wear. Sand lightly if the surface becomes rough.

Credit: www.youtube.com
Frequently Asked Questions
What Wood Is Best For Making A Cheese Board?
Hardwoods like maple, walnut, and cherry are ideal for cheese boards. They resist cuts and are safe for food use.
How Do You Finish A Wooden Cheese Board Safely?
Use food-safe oils like mineral oil or beeswax to finish the board. This protects the wood and keeps it safe for food.
How Thick Should A Wooden Cheese Board Be?
A thickness of about 1 to 1. 5 inches is good. It’s sturdy enough and easy to handle.
Can I Add Handles To My Cheese Board?
Yes, adding handles makes carrying easier and adds a nice touch. Use wood or metal handles for durability.
How Do I Clean A Wooden Cheese Board?
Clean with warm water and mild soap. Avoid soaking it to prevent warping or cracking.
Conclusion
Making a cheese board from wood is simple and fun. Choose the right wood and tools carefully. Sand the board smooth for safety and style. Add your favorite design or keep it plain. Seal the wood to protect it from moisture.
Your handmade board will be perfect for parties or gifts. Enjoy the pride of creating something useful and beautiful. Try it yourself and see how easy it can be. A wooden cheese board adds charm to any gathering.