
Are you ready to give your home a fresh, timeless look? Installing wood siding can transform your house, adding warmth and charm that lasts for years.
But if you’re worried it sounds too complicated, don’t be. With the right steps and a bit of patience, you can tackle this project yourself—and enjoy the pride that comes with it. Keep reading, and you’ll discover exactly how to install wood siding on your house, step by step, so you can start turning your vision into reality today.
Choosing The Right Wood Siding
Choosing the right wood siding for your house is an important step. It affects the home’s look and how long the siding will last. The right wood siding can protect your home and add to its value. Understanding the options helps you make a smart choice.
Types Of Wood Siding
Wood siding comes in several styles. Clapboard siding has long, thin boards that overlap. Shiplap siding fits together with a groove for a tight seal. Board and batten uses wide boards with narrow strips covering the seams. Each type gives a unique look and has different installation needs.
Selecting Quality Materials
Choose wood that is strong and free of defects. Cedar and redwood resist rot and insects well. Pine is affordable but needs treatment to last. Check for smooth surfaces and straight boards. Good quality wood lasts longer and looks better over time.
Considering Climate And Durability
Climate impacts wood siding performance. Wet or humid areas need wood that resists moisture well. Dry climates allow for more wood choices but still require protection from sun damage. Consider wood treatments and finishes to improve durability. Properly chosen wood siding stands up to weather and keeps your home safe.
Credit: www.thinkwood.com
Gathering Tools And Materials
Gathering the right tools and materials is the first step to install wood siding on your house. Having everything ready helps the work go smoothly. It also keeps you safe and saves time. Prepare carefully before starting the project.
Essential Tools For Installation
Start with a tape measure to get accurate siding lengths. Use a level to keep the boards straight. A hammer or nail gun drives nails into the wood. A saw cuts siding to the right size. A chalk line helps mark straight lines on walls. A utility knife trims small pieces. A pry bar removes old siding or adjusts boards.
Required Safety Gear
Protect your eyes with safety goggles. Wear gloves to avoid splinters and cuts. Use ear protection if you work with loud tools. A dust mask prevents inhaling wood dust. Wear sturdy shoes to protect your feet. Dress in long sleeves and pants to avoid scratches.
Preparing Your Workspace
Clear the area around the house. Remove plants, furniture, and other obstacles. Lay down drop cloths to catch debris. Keep tools organized and within reach. Check the weather forecast for dry days. Good lighting helps you see details clearly.
Preparing The House Exterior
Preparing the house exterior is the first step to a strong wood siding installation. A clean, solid surface makes the siding last longer. Taking time to prepare helps avoid problems later. This stage includes checking the wall, fixing damage, and setting up a barrier to keep water out. Marking guides also make sure the siding goes on straight and even.
Inspecting And Repairing The Surface
Start by looking closely at the wall where you will install siding. Check for cracks, holes, or rotten wood. Remove any loose paint or old siding pieces. Fix small damages with wood filler or replace bad sections. The surface must be smooth and dry before adding siding. This step stops future damage and helps siding stick well.
Installing A Weather-resistant Barrier
Next, add a weather-resistant barrier over the wall. This barrier stops water from entering the house. Use house wrap or a similar material. Wrap it tightly around the wall, covering all areas. Seal edges with tape made for outdoor use. This layer protects wood from moisture and keeps your home dry.
Marking Guidelines For Installation
Marking guidelines helps keep siding straight and neat. Use a level and a pencil to draw horizontal lines on the wall. Space lines according to the siding size. These marks guide you where to place each board. Clear guidelines make installation faster and look professional.
Cutting And Measuring Wood Siding
Cutting and measuring wood siding are critical steps in siding installation. Accurate measurements and precise cuts ensure a smooth fit and a professional look. Taking time to measure and cut properly saves time and materials later.
Measuring Wall Dimensions
Start by measuring the height and width of each wall. Use a tape measure and write down each number carefully. Measure at several points along the wall. Walls may not be perfectly square. Note any irregular spots to adjust siding pieces later.
Double-check measurements before cutting. Measure twice, cut once is a good rule. Remember to subtract space for trim or corner boards if needed.
Cutting Techniques For Accuracy
Use a sharp saw for clean cuts. A miter saw or circular saw works well. Mark cut lines clearly with a pencil. Cut slowly and steadily along the line. Avoid rushing to prevent splintering or mistakes.
Wear safety gear like goggles and gloves. Keep siding pieces stable while cutting. Support long boards on sawhorses or a flat surface.
Handling Different Wood Profiles
Wood siding comes in various profiles like clapboard, shiplap, or board-and-batten. Each profile needs a specific cutting approach. Clapboard siding requires angled cuts at ends. Shiplap siding has grooves that must stay intact.
Study the siding profile before cutting. Follow manufacturer guidelines for best results. Test cuts on scrap pieces can help avoid errors. Proper handling keeps the siding looking neat and durable.
Installing The Wood Siding
Installing wood siding on a house adds charm and protects the walls. This step requires care and the right technique. Proper installation ensures the siding lasts long and looks great. Follow simple steps for a smooth process.
Starting From The Bottom
Begin installation at the lowest part of the wall. Use a level to keep the first board straight. This first row sets the line for all other boards. Secure it firmly to the wall studs. A strong start prevents problems later.
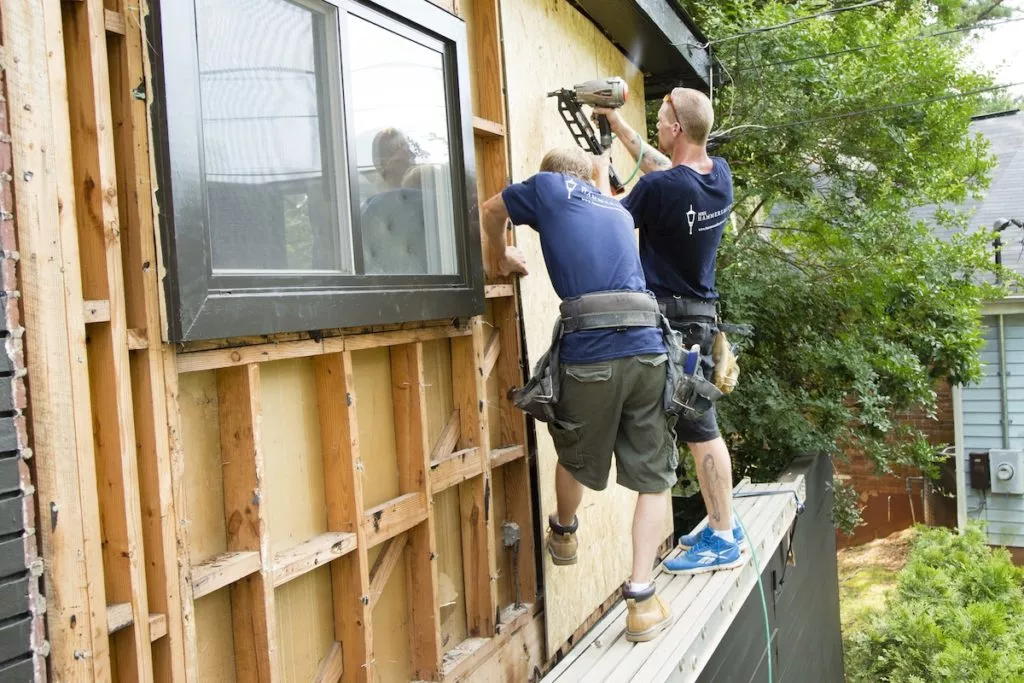
Nailing And Securing Boards
Use nails designed for wood siding. Nail near the top edge of each board. Avoid nailing too close to the edges. This prevents the wood from splitting. Drive nails straight and flush with the wood surface. Check each board stays tight against the wall.
Maintaining Proper Overlaps And Spacing
Overlap boards to protect against water. A common overlap is about one inch. Leave a small gap for wood expansion. This gap stops warping and cracking. Measure consistently for neat rows. Proper spacing keeps siding strong and weatherproof.

Credit: www.thinkwood.com
Finishing Touches
Finishing touches make your wood siding look complete and protect it. These steps keep water out and stop damage from weather. Proper finishing also boosts your home’s curb appeal. Follow each step carefully to get the best results.
Trimming And Sealing Edges
Cut wood trim to fit around windows and doors. Use a sharp saw for clean edges. Attach trim firmly with nails or screws. Seal all edges with high-quality caulk to block moisture. Check corners and joints to avoid gaps. Sealing prevents wood from warping or rotting.
Applying Stain Or Paint
Choose stain or paint designed for exterior wood. Apply evenly with a brush or sprayer. Cover all surfaces, including edges and corners. Let the first coat dry completely. Add a second coat for stronger protection. Stain highlights the wood grain, while paint offers solid color and coverage.
Inspecting And Cleaning Up
Look over the siding for missed spots or damage. Fill nail holes with wood filler and sand smooth. Remove debris, dust, and leftover materials from the site. Clean your tools right after use to keep them in good shape. A tidy work area shows quality and care.
Maintenance Tips For Longevity
Wood siding adds charm and warmth to any home. To keep it looking great, regular maintenance is key. Simple care steps help protect your siding from weather and wear. This extends its life and keeps your house safe and beautiful.
Regular Cleaning
Clean wood siding at least once a year. Use a soft brush or cloth to remove dirt and dust. Avoid harsh chemicals that can damage the wood. Rinse with water gently to clear away grime. Clean siding prevents mold and keeps the wood healthy.
Checking For Damage
Inspect siding regularly for cracks, splits, or rot. Look closely at corners and edges. Fix small problems quickly to stop them from getting worse. Replace damaged boards to protect your home from moisture. Early repairs save money and effort later.
Reapplying Protective Coatings
Apply a fresh coat of paint or stain every few years. These coatings shield the wood from sun and rain. Choose products designed for wood siding. Follow the instructions carefully for best results. A good finish helps wood last longer and look new.

Credit: basc.pnnl.gov
Frequently Asked Questions
What Tools Do I Need To Install Wood Siding?
You need a hammer, nails, measuring tape, level, saw, and safety gear. These tools help you cut and fix the siding correctly. Having the right tools makes the job easier and safer.
How Do I Prepare The House For Wood Siding?
Clean the surface and fix any damage before starting. Install a weather-resistant barrier to protect the house from moisture. Proper prep ensures siding lasts longer and works well.
What Type Of Wood Is Best For Siding?
Cedar and redwood are popular for wood siding because they resist rot. Pine and fir are cheaper but need more maintenance. Choose wood that suits your climate and budget.
How Should I Space Wood Siding Boards?
Leave a small gap of about 1/8 inch between boards. This allows for wood expansion when it gets wet or hot. Proper spacing prevents warping and damage over time.
How Long Does Wood Siding Installation Usually Take?
Installation time varies but often takes 3 to 7 days for an average house. It depends on the house size and your experience level. Planning helps finish the job smoothly and on time.
Conclusion
Installing wood siding on a house can improve its look and value. Follow each step carefully for the best results. Use the right tools and materials to avoid problems later. Take your time to measure and cut pieces accurately. Keep safety in mind while working on ladders or with tools.
Regular maintenance will help your siding last longer. Wood siding adds charm and warmth to any home. Enjoy the process and the new look of your house.