
Are you looking to add more space to your shed without expanding its footprint? Building a loft inside your shed is a smart way to maximize storage or create a cozy area for work or hobbies.
Imagine having that extra level to organize tools, stash seasonal items, or even set up a small workspace. This guide will show you exactly how to build a loft in your shed, step by step, so you can make the most of every inch.
Ready to transform your shed and unlock new possibilities? Keep reading to discover simple tips and tricks that anyone can follow.

Credit: homesteadsupplier.com
Planning Your Loft
Planning your loft is the first important step in building it inside your shed. It helps ensure the loft fits well and stays strong. Careful planning saves time and avoids mistakes during construction. Consider the shed’s current setup, available space, and the design that suits your needs best.
Assessing Shed Structure
Start by checking the shed’s frame and walls. Look for strong beams and posts that can support extra weight. Weak or damaged parts need repair before adding a loft. A sturdy base keeps the loft safe and stable over time. Note where the supports are placed for your design plan.
Measuring Available Space
Measure the shed’s width, length, and height accurately. Note any windows, doors, or obstructions inside. Calculate how much space you can use for the loft floor. Enough headroom above the loft is important for comfort. Write down all measurements for easy reference during building.
Choosing Loft Design
Pick a loft style based on your needs and shed size. Simple platforms work well for storage or light use. Stronger lofts with railings suit heavier items or small workspaces. Consider access methods like ladders or stairs. The design should blend with the shed and be easy to build.
Gathering Materials
Gathering the right materials is the first step to building a loft in a shed. You need strong, reliable supplies to make the loft safe and sturdy. Planning your materials helps avoid delays during construction.
Prepare a clear list before starting. This makes shopping easier and keeps the project on track. Focus on quality materials that fit your shed’s size and style.
Lumber And Fasteners
Choose lumber that supports weight well, like pine or fir. Use 2×6 or 2×8 boards for the loft frame. Get plywood sheets for the floor surface.
Pick fasteners like screws and nails that resist rust. Galvanized or stainless steel fasteners last longer outdoors. Have enough to secure all parts tightly.
Tools Needed
Gather essential tools before starting work. A drill and screwdriver help drive screws easily. A saw is necessary to cut lumber accurately.
Use a tape measure for precise measurements. A level ensures the loft is straight and balanced. Have a hammer ready for nails and adjustments.
Safety Gear
Wear safety glasses to protect your eyes from dust and debris. Gloves prevent splinters and improve grip on tools. Use ear protection if cutting wood loudly.
Wear a dust mask to avoid breathing sawdust. Choose sturdy shoes to protect your feet from sharp objects. Safety gear keeps you safe during every step.
Preparing The Shed
Preparing the shed is the first step in building a loft. A well-prepared space makes the project easier and safer. You need to clear the area, check the structure, and mark where the loft will go. This ensures the loft fits well and stays strong over time.
Clearing The Interior
Remove all items from inside the shed. This gives you space to work freely. Sweep the floor to clear dust and dirt. Check for any nails or screws sticking out. These can cause injuries or damage tools. A clean space helps you see the walls and floor clearly.
Reinforcing Walls And Floor
Check if the walls and floor are strong. Look for weak spots or cracks. Add extra wooden beams to support heavy weight. Use metal brackets to hold beams firmly in place. Reinforcing prevents the shed from collapsing under the loft’s weight. A solid base is key for safety.
Marking Loft Dimensions
Decide how big the loft will be. Use a tape measure to mark the length and width. Draw lines on the walls and floor with a pencil. These marks guide you during construction. Make sure the loft fits inside the shed without blocking doors or windows.
Building The Loft Frame
Building the loft frame is a key step in creating extra space inside your shed. A strong frame supports the loft floor and keeps everything stable. Take time to measure and fit each part carefully. Safety matters, so use good quality wood and tools.
Installing Support Beams
Start by placing the support beams along the shed walls. These beams hold up the loft floor. Use sturdy wood like 2×6 or 2×8 boards. Fix them securely to the shed’s frame with screws or nails. Check that the beams are level. Use a spirit level to ensure even placement.
Constructing Joists
Joists run across the support beams and carry the loft floor. Cut the joists to fit between the beams. Space the joists about 16 inches apart for strong support. Attach each joist to the beams with metal joist hangers or nails. Make sure all joists are level and straight.
Securing The Frame
Secure the entire frame by adding extra screws or nails at all joints. Use metal brackets for added strength on corners. Double-check all connections to avoid any movement. This keeps the loft frame solid and safe for use. A well-secured frame lasts longer and handles weight better.
Adding The Loft Floor
Adding the loft floor is an important step in building a loft in your shed. It creates a strong base for storage or other uses. The floor needs to be sturdy and safe to hold weight. This section explains how to choose the right flooring material, cut the boards, and fasten everything securely.
Choosing Flooring Material
Choose a material that is strong and easy to work with. Plywood is a popular choice for loft floors. It is affordable and provides good strength. Make sure the plywood is thick enough, at least 3/4 inch. Avoid soft woods that may bend or break under weight. Treated wood can resist moisture and last longer in sheds.
Cutting And Laying Boards
Measure the loft area carefully before cutting. Use a saw to cut the boards to the right size. Cut slowly to avoid splintering the wood. Lay the boards evenly over the loft frame. Leave a small gap between boards for air circulation. Check that the boards fit snugly without gaps or overlaps.
Fastening Floor Securely
Secure the boards with screws or nails. Screws hold better and allow easy adjustments. Use a drill to drive screws into the wood frame below. Space screws about every 8 inches along each board. Ensure the boards do not move or shift. Tight fastening creates a safe and solid loft floor.
Installing Access
Installing access to your shed loft is essential for easy and safe entry. It connects the ground level with the new loft space. Good access improves convenience and usability.
Choosing the right access type depends on your shed size and loft height. Positioning the access point correctly makes moving in and out smooth. Adding safety features protects users and prevents accidents.
Selecting Ladder Or Stairs
Decide between a ladder or stairs based on space and comfort. Ladders save space but can be harder to climb. Stairs require more room but provide safer, easier access.
Consider who will use the loft. Children or elderly users might need stairs. For occasional use, a sturdy ladder might be enough. Pick materials that match your shed’s style and strength needs.
Positioning Access Point
Place the access point where it is easy to reach. Avoid locations that block windows or doors. Choose a spot with enough headroom and floor space.
Think about the loft layout and how you plan to use it. Positioning near the shed entrance often works well. Ensure the access does not interfere with storage or work areas.
Ensuring Safety Features
Safety is a top priority for your loft access. Add handrails on stairs or ladders for better grip. Use non-slip treads or steps to prevent falls.
Check that all parts are securely fixed and stable. Test the access regularly to catch any issues early. Good lighting around the access point helps avoid accidents.
Finishing Touches
Finishing touches make your loft safe, comfortable, and attractive. They turn a simple space into a useful part of your shed. These small details improve the look and function of your loft. Focus on safety, comfort, and style for the best results.
Adding Railings
Railings protect you from falling off the loft. Use strong wood or metal for safety. The height should be at least 36 inches. Secure the railings firmly to the loft frame. Choose a design that matches your shed’s style. Railings add both safety and charm.
Insulating And Ventilating
Insulation keeps your loft warm in winter and cool in summer. Use foam boards or fiberglass insulation between the joists. Cover insulation with plywood or drywall for a neat finish. Ventilation helps air flow and reduces moisture. Add vents or small windows to keep air fresh. Good insulation and ventilation improve comfort year-round.
Painting Or Staining
Painting or staining protects the wood from weather and wear. Choose a color that fits your shed’s look. Use outdoor paint or wood stain for durability. Apply at least two coats for good coverage. Let each coat dry before adding the next. A fresh finish keeps your loft looking new and strong.
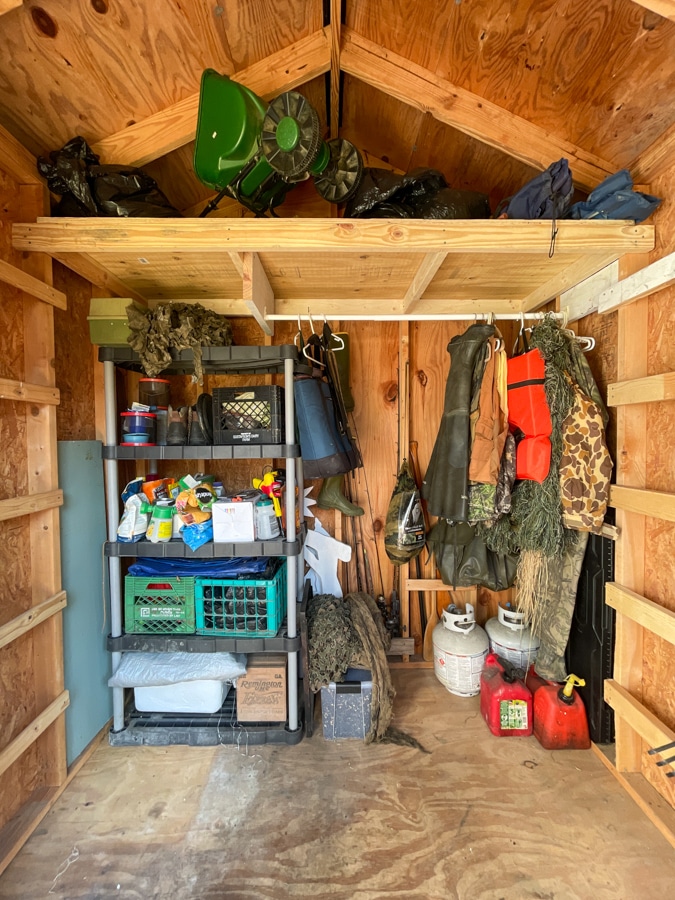
Credit: lifeonsummerhill.com
Maximizing Loft Use
Maximizing the use of your loft in a shed makes the space more useful and organized. The loft can serve many purposes beyond simple storage. With smart planning, it can become a neat storage area or a small, cozy workspace. Proper lighting helps you use the loft safely and comfortably at any time.
Organizing Storage
Use shelves and boxes to keep items tidy in the loft. Label containers for easy finding. Store rarely used items higher up. Keep heavy things close to the floor for safety. Clear walkways prevent accidents and save space.
Setting Up Workspace
A loft workspace can be quiet and private. Add a small desk or workbench. Use foldable furniture to save space. Keep tools and materials organized nearby. A comfortable chair helps you work longer without strain.
Lighting Solutions
Good lighting is key in a loft. Use LED strip lights or small lamps. Natural light through windows brightens the area during the day. Install lights with easy switches or motion sensors. Proper lighting helps avoid accidents and eye strain.
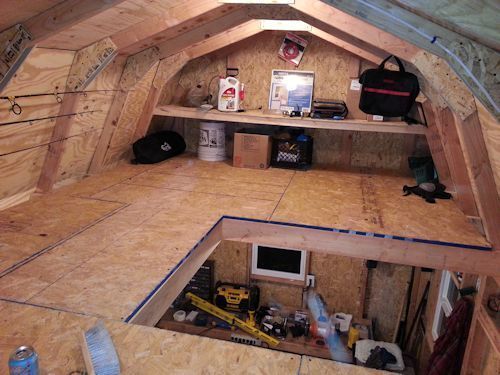
Credit: www.shedking.net
Frequently Asked Questions
What Tools Do I Need To Build A Loft In A Shed?
Basic tools include a saw, drill, hammer, measuring tape, and level. These help cut, join, and secure the loft structure safely. Having the right tools makes the job easier and safer.
How Much Weight Can A Shed Loft Hold?
A well-built shed loft can hold between 250 to 500 pounds. The exact weight depends on materials and support used. Always check your shed’s frame strength before adding heavy items.
What Materials Are Best For Building A Shed Loft?
Use strong, lightweight wood like pine or spruce for framing. Plywood is good for the loft floor as it is sturdy and easy to work with. Avoid heavy or weak materials to ensure safety.
How Do I Secure The Loft To The Shed Walls?
Use sturdy brackets and screws to attach the loft frame to the walls. Make sure the connections are tight and level for stability. Proper fixing prevents wobbling and accidents.
Can I Build A Loft In Any Size Shed?
Most sheds over 8 feet wide can support a loft. Smaller sheds may not have enough space or support for a safe loft. Measure carefully before planning your build.
Conclusion
Building a loft in your shed adds valuable space quickly. It creates room for storage or a cozy retreat. Follow the steps carefully to ensure safety and stability. Use strong materials and proper tools for best results. Take your time measuring and cutting for a good fit.
A loft can change how you use your shed entirely. Enjoy the extra space and keep it organized. This simple upgrade makes your shed more useful every day.