
Are you looking to give your railing a polished, finished look? Attaching wood end caps can be the perfect way to achieve that clean, professional touch.
But if you’re unsure how to do it right, don’t worry—you’re in the right place. In this guide, you’ll learn simple, step-by-step tips to attach wood end caps securely and beautifully. By the time you finish reading, you’ll feel confident to tackle the project and transform your railing into something you’ll be proud to show off.
Let’s get started!
Credit: thriftdiving.com
Choosing The Right Wood End Caps
Choosing the right wood end caps is important for a strong and attractive railing. The end caps protect the railing edges from damage. They also add a clean, finished look. Picking the best type depends on the style of your railing and the wood used. Accurate measurements help the end caps fit perfectly without gaps or overhangs.
Types Of Wood End Caps
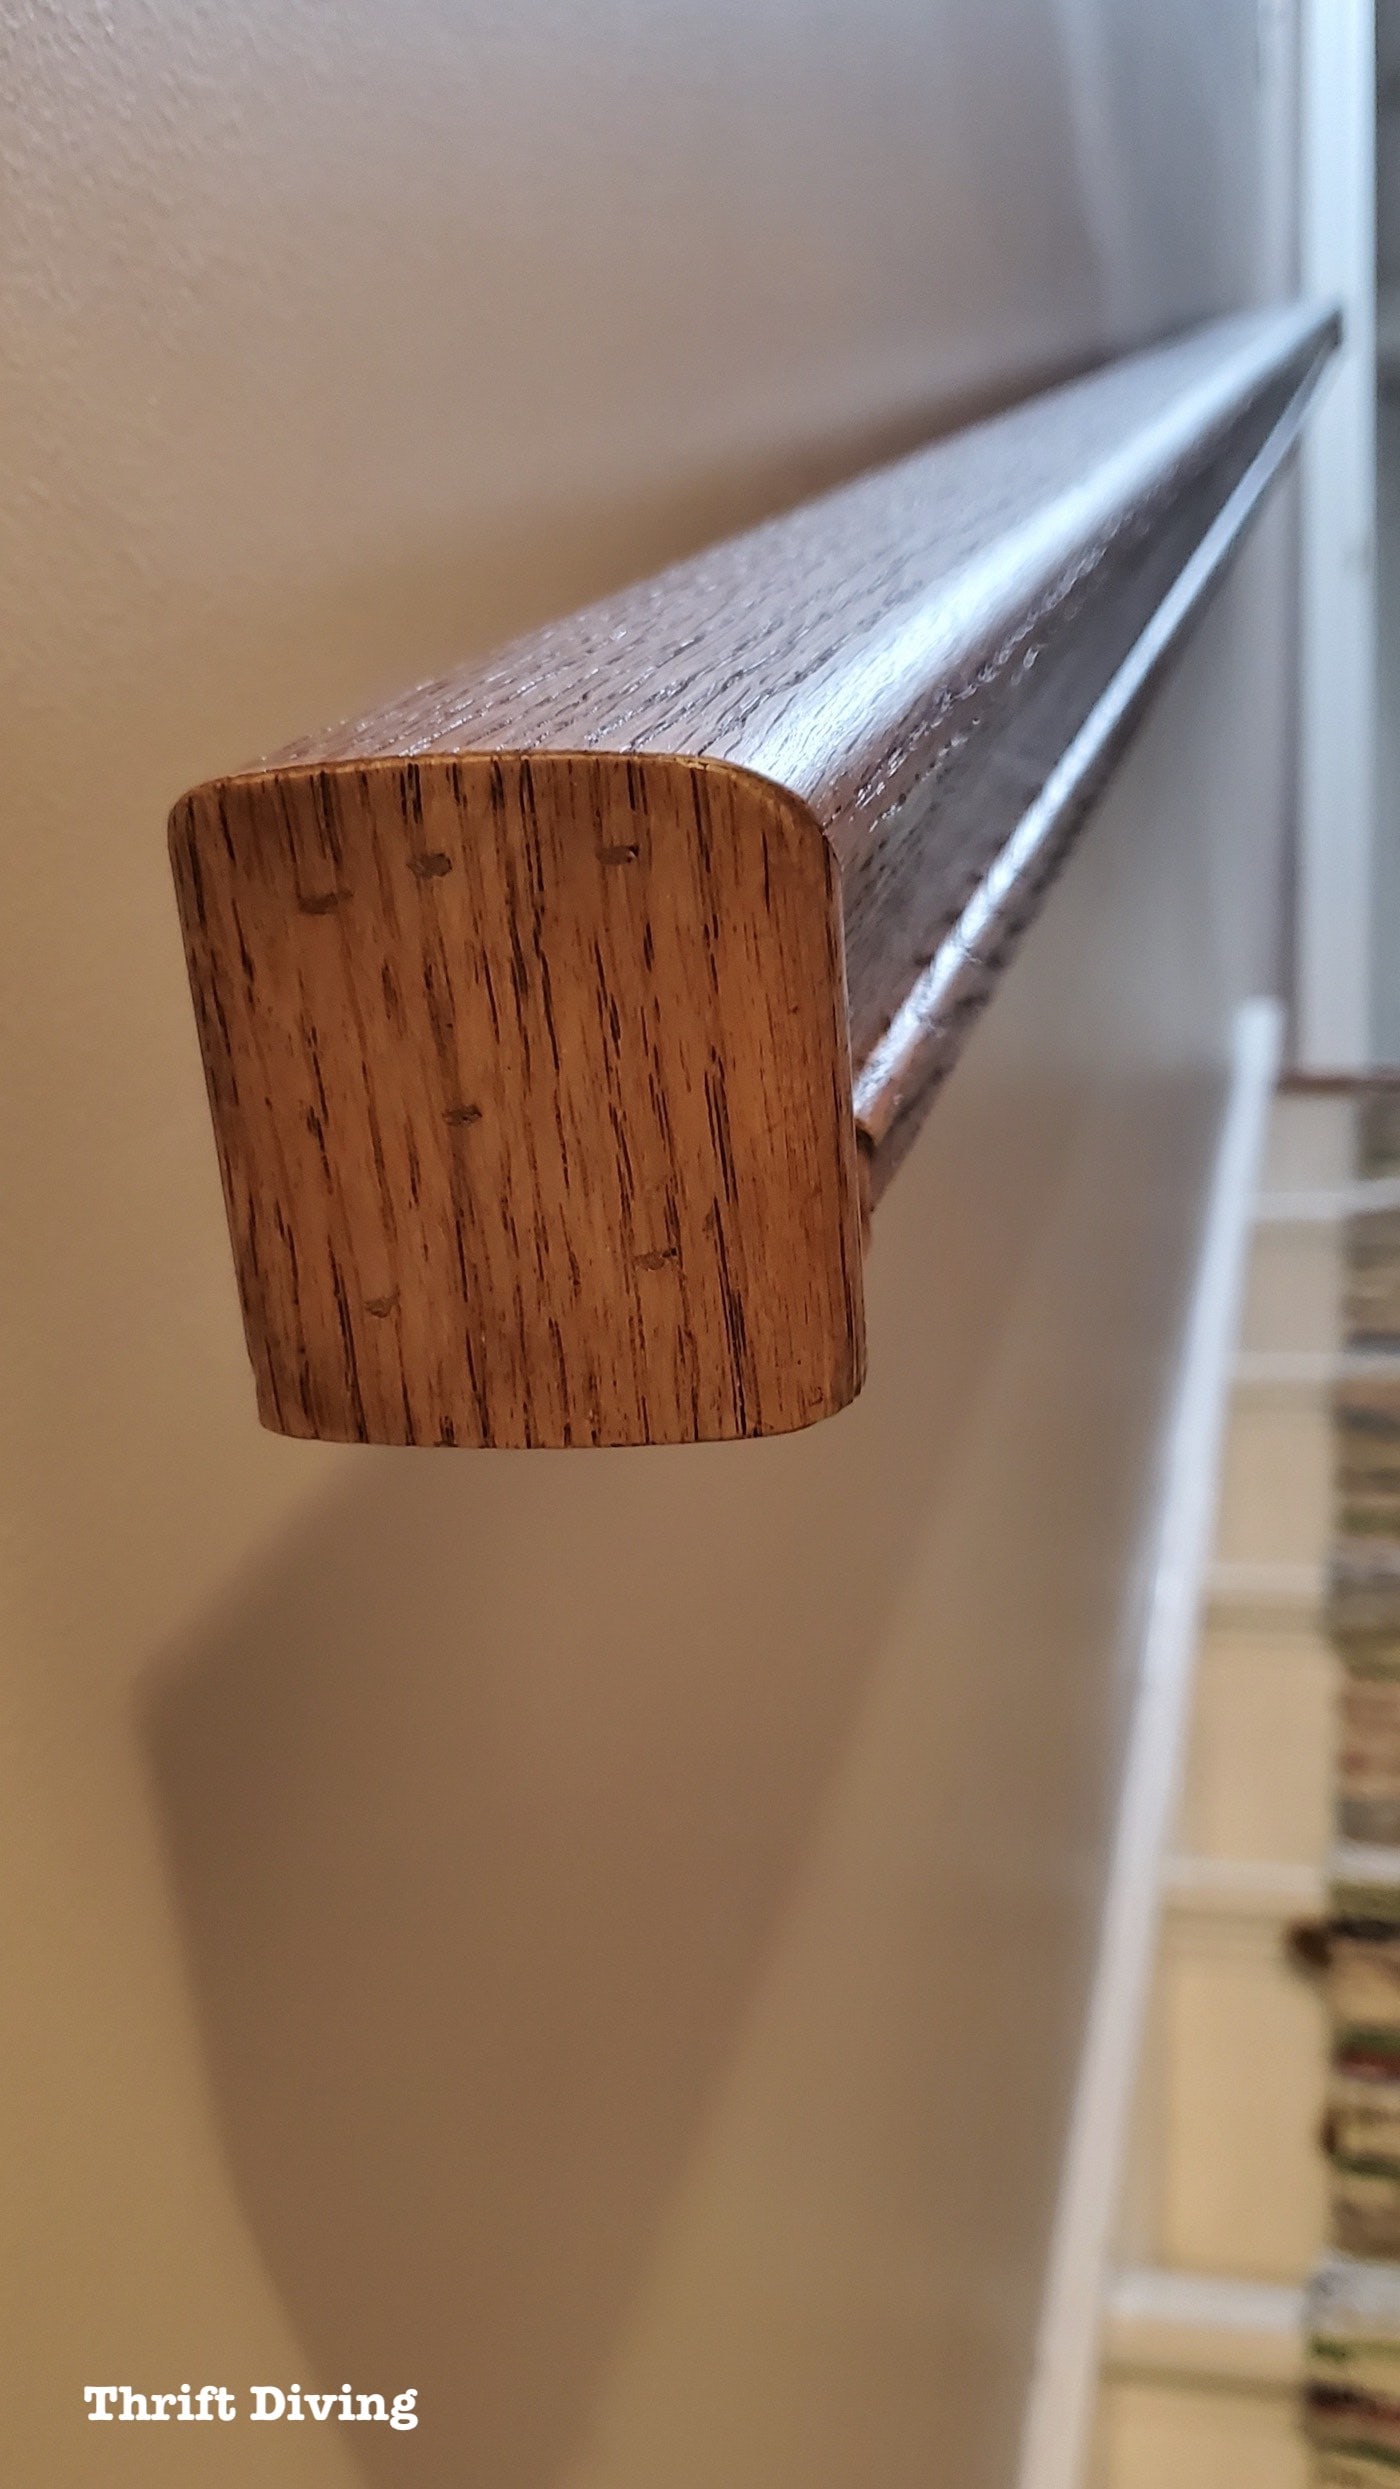
Wood end caps come in several shapes and sizes. Some common types include square, round, and chamfered edges. Square caps give a modern, sharp look. Round caps soften the railing corners. Chamfered caps have angled edges for a subtle detail. Choose a type that fits your taste and railing design.
Matching End Caps To Railing Style
End caps should match the railing’s style for a unified look. Traditional railings often pair well with classic square or rounded caps. Modern railings look best with simple, straight-edged caps. Rustic railings may benefit from rougher, natural wood end caps. Consider the color and finish too. Matching wood tones helps the end caps blend smoothly.
Measuring For A Perfect Fit
Measure the railing end carefully before buying caps. Measure both width and thickness of the wood. Double-check measurements to avoid mistakes. Some end caps fit inside the railing end; others cover the outside. Know which type you need. A perfect fit ensures the caps stay secure and look clean.
Credit: www2.parklanejewelry.com
Tools And Materials Needed
Attaching wood end caps to railing requires the right tools and materials. This step is important for a secure and neat finish. Using proper tools makes the job easier and safer. Choosing the best adhesives and fasteners ensures a long-lasting hold. Safety gear protects you from possible injuries during work.
Essential Tools
- Measuring tape to get exact dimensions
- Pencil for marking cut and drill points
- Hand saw or miter saw to cut wood end caps
- Drill with drill bits for pilot holes
- Screwdriver or power driver to insert screws
- Sandpaper or sanding block to smooth edges
- Clamps to hold pieces in place while working
Recommended Adhesives And Fasteners
- Wood glue for a strong bond between surfaces
- Exterior-grade wood screws to secure end caps
- Finishing nails for small, hidden attachments
- Construction adhesive for added strength in tough spots
Safety Gear
- Safety glasses to protect eyes from dust and debris
- Work gloves to prevent splinters and cuts
- Dust mask to avoid inhaling wood particles
- Ear protection if using loud power tools
Preparing The Railing Surface
Preparing the railing surface is an important step before attaching wood end caps. A clean, smooth surface helps the end caps stick better and last longer. Take time to prepare well. It saves effort later and improves the look of your railing.
Cleaning And Sanding
First, clean the railing surface. Remove dirt, dust, and old paint flakes. Use a brush or cloth to wipe it down. Sand the surface with medium-grit sandpaper. This removes rough spots and creates a smooth area for better adhesion. Sanding also helps the primer and glue stick well.
Checking For Damage
Inspect the railing closely. Look for cracks, splits, or rot in the wood. Small cracks can cause problems later. Repair any damage before attaching the end caps. Use wood filler for minor cracks. Replace parts that are too damaged. A solid base is key for a strong hold.
Priming The Surface
Apply a coat of primer to the cleaned and sanded railing. Primer seals the wood and improves glue adhesion. It also prevents moisture from seeping in. Use a brush or roller for even coverage. Let the primer dry completely before adding the wood end caps.
Attaching Wood End Caps
Attaching wood end caps to railing adds a neat finish and protects the wood edges. This task requires care to ensure the end caps stay secure and look good. Follow simple steps to attach them firmly and cleanly.
Applying Adhesive Properly
Start with clean, dry surfaces on both the railing and end cap. Use a strong wood adhesive made for outdoor use. Apply a thin, even layer of glue to the inside edges of the end cap. Avoid using too much adhesive to prevent mess and weak bonds.
Positioning The End Caps
Place the end cap carefully at the railing’s end. Align it so the edges meet perfectly without gaps. Press the end cap firmly against the railing to spread the glue evenly. Hold it steady for a few seconds to ensure it sticks well.
Securing With Nails Or Screws
Use small nails or screws to hold the end cap in place while the glue dries. Pre-drill holes to avoid splitting the wood. Insert nails or screws evenly around the cap edge. Check that the fasteners sit flush to keep a smooth look.
Finishing Touches
Finishing touches make your wood end caps look neat and complete. These final steps improve both appearance and durability. Taking time on these details shows in the final result. Let’s explore how to perfect your railing end caps.
Filling Gaps And Holes
Fill any gaps or holes with wood filler. Choose a filler that matches your wood color. Use a putty knife to press filler into cracks. Let it dry fully before moving on. This step hides imperfections and creates a smooth surface.
Sanding For Smoothness
Sand the end caps with fine-grit sandpaper. Sand in the direction of the wood grain. This removes rough spots and excess filler. Wipe away dust with a clean cloth. Smooth surfaces help paint or stain stick better.
Painting Or Staining
Apply paint or stain evenly on the wood end caps. Use a brush or cloth depending on your finish choice. Allow the first coat to dry before adding more. Multiple coats give better color and protection. Choose a finish that suits your railing style.
Common Mistakes To Avoid
Attaching wood end caps to railing may seem simple, but many people make mistakes. These errors can cause poor fit, weak hold, or damage. Avoiding common pitfalls helps achieve a neat, lasting finish. Focus on key areas to ensure success.
Misalignment Issues
Placing end caps crookedly is a frequent error. It affects the look and fit of the railing. Check alignment carefully before fixing the caps. Use a level or square tool for accuracy. Take your time to position the caps properly.
Using Wrong Adhesives
Choosing the wrong glue weakens the bond. Some adhesives do not work well with wood or outdoor conditions. Use wood glue or construction adhesive designed for outdoor use. Follow the instructions on the adhesive packaging for best results. Avoid using nails alone as they can split the wood.
Overlooking Surface Prep
Skipping surface preparation reduces adhesive strength. Dirt, dust, and old paint stop glue from sticking. Clean the railing and cap surfaces with sandpaper or a cloth. Make sure both surfaces are dry before applying glue. This step helps the caps stay firmly attached longer.
Maintaining Wood End Caps
Maintaining wood end caps on your railing keeps them looking good and lasting longer. These small parts protect the wood and add a nice finish. Regular care helps prevent damage from weather and daily use. Simple steps can keep your end caps strong and attractive for years.
Regular Cleaning Tips
Clean wood end caps often to remove dirt and dust. Use a soft cloth or brush with mild soap and water. Avoid harsh chemicals that can hurt the wood. Rinse well and dry with a clean cloth. Clean surfaces prevent mold and keep the wood fresh.
Inspecting For Wear And Damage
Check end caps regularly for cracks, splits, or loose parts. Look for signs of wood decay or insect damage. Tighten screws or nails if they feel loose. Early repairs stop small problems from getting worse. Keep an eye on areas exposed to rain or sun.
Repainting And Sealing
Repaint or seal wood end caps every few years to protect them. Sand the surface lightly before applying paint or sealant. Choose a product made for outdoor wood. A fresh coat blocks moisture and sun damage. This step keeps the wood strong and looking new.

Credit: www.amazon.com
Frequently Asked Questions
How Do I Choose The Right Wood End Caps For Railing?
Pick end caps that match your railing’s size and wood type. Make sure the style fits your railing’s design for a neat look.
What Tools Are Needed To Attach Wood End Caps?
You need wood glue, clamps, a drill, screws, and sandpaper. These tools help secure and finish the end caps properly.
Can I Attach Wood End Caps Without Screws?
Yes, using strong wood glue and clamps can hold end caps. Screws add extra strength, but glue alone works for light use.
How Long Should Wood Glue Dry On End Caps?
Wood glue usually dries in 30 minutes but needs 24 hours to cure. Avoid moving the caps until fully dry for best hold.
How Do I Prevent Wood End Caps From Splitting?
Drill pilot holes before screwing to avoid splitting the wood. Use gentle pressure and smooth screws for safe attachment.
Conclusion
Attaching wood end caps to railing adds a neat, finished look. Choose the right tools and materials first. Measure carefully to ensure a perfect fit. Apply glue or screws to secure the caps firmly. Take your time to avoid mistakes.
A well-attached end cap can last many years. It also protects the railing ends from damage. This simple step improves both safety and style. Try it yourself and enjoy the difference.