
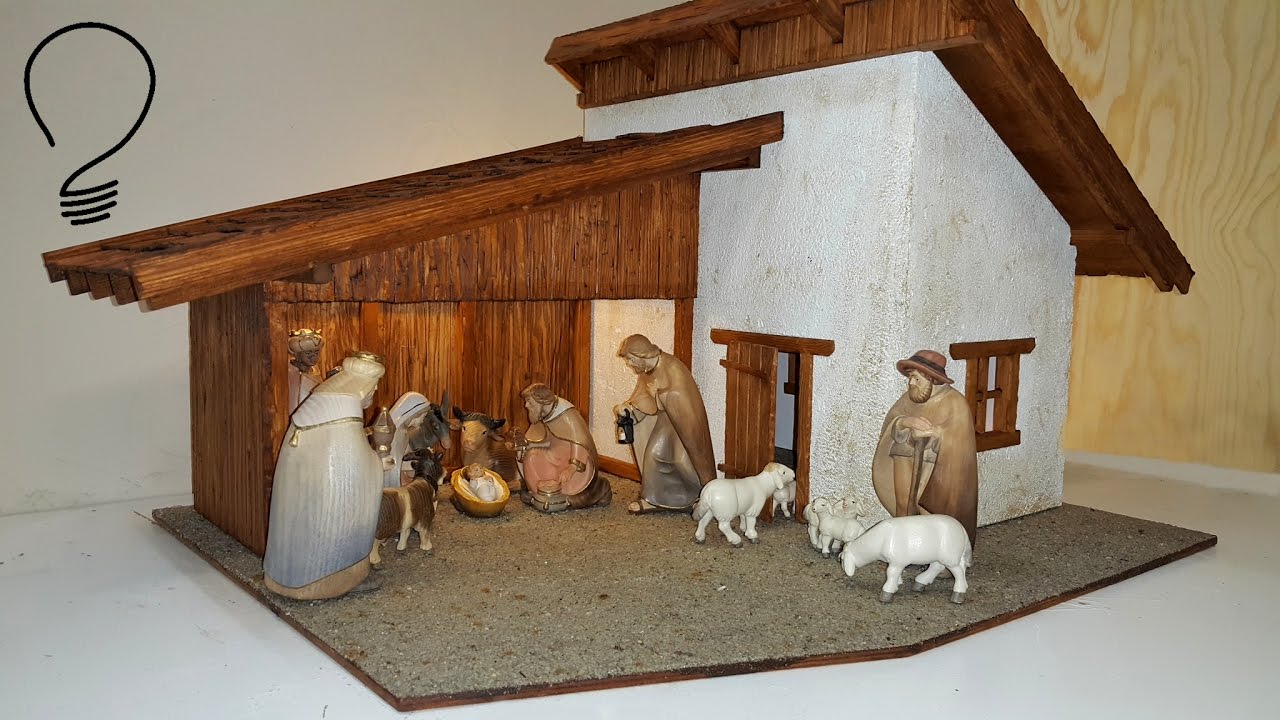
Are you looking for a unique way to bring the magic of Christmas into your home? Making a nativity scene out of wood is a beautiful and meaningful project you can create yourself.
Imagine crafting each figure with your own hands, adding a personal touch that store-bought sets just can’t match. Whether you’re a beginner or have some woodworking experience, this guide will walk you through simple steps to build a charming wooden nativity scene.
By the end, you’ll have a heartfelt decoration that tells the timeless story of Christmas, ready to share with your family year after year. Keep reading to discover how easy and rewarding this project can be!

Credit: rhythmsofplay.com
Choosing The Right Wood
Choosing the right wood is very important for making a beautiful nativity scene. Wood affects how your project looks and lasts. Some woods are easier to carve. Others are stronger or have nice colors. Knowing which wood to pick helps your nativity scene stand out. It also makes the work easier and more fun.
Types Of Wood For Nativity Scenes
Softwoods like pine and cedar are easy to carve. They are light and have a smooth surface. Hardwoods such as oak, maple, and walnut are stronger. These woods last longer but can be harder to shape. Basswood is popular for carving because it is soft and fine-grained. Choose wood that fits your skill and the look you want.
Where To Source Wood
Local lumber yards offer many types of wood. You can find softwoods and hardwoods there. Craft stores sometimes sell small wood pieces for carving. Recycled wood is a good choice for an eco-friendly project. Old furniture or pallets may have usable wood. Check the wood for damage or nails before using it.
Wood Preparation Tips
Start by sanding the wood smooth to avoid splinters. Remove any rough spots or dirt. Cut the wood into the shapes you need. Keep your tools sharp for clean cuts. If the wood is dry, soak it slightly to make carving easier. Always work in a safe, well-lit area.

Credit: www.yonderstar.com
Designing Your Nativity Scene
Designing your nativity scene is the first step in creating a meaningful display. It helps you plan the look and feel before cutting any wood. A good design guides your work and keeps things organized. Think about the style you want and how much space you have. This planning makes the building process easier and more fun.
Start by imagining what your nativity scene will look like. Simple sketches can help you see ideas clearly. Decide on the size and which figures to include. These choices shape the entire project.
Simple Sketch Ideas
Draw rough outlines of your nativity scene on paper. Use basic shapes like squares and circles. Focus on the main parts: the stable, figures, and background. Keep sketches simple to avoid confusion. You can add details later. Sketching helps you try different ideas fast. It shows how everything fits together.
Sizing And Scale
Decide how big your nativity scene will be. Measure the space where you want to place it. Make sure the scene fits well in that space. Keep the figures in proportion to each other. If the stable is large, figures should be bigger. If space is small, keep everything small too. Proper sizing makes the scene look balanced and neat.
Selecting Figures To Include
Choose which figures you want in your nativity scene. Common ones are Mary, Joseph, and baby Jesus. Add animals like sheep or donkeys if you wish. The three wise men and angels are popular choices. Think about how many figures fit your space. Pick figures that match your skill level for carving or assembling. Fewer figures can keep the scene simple and clear.
Tools And Materials Needed
Creating a nativity scene out of wood needs specific tools and materials. Preparing these items before starting will make your work easier. This section covers the main tools, extra supplies, and safety gear needed for the project.
Essential Woodworking Tools
A good saw is needed to cut the wood pieces accurately. A jigsaw or handsaw works well for detailed cuts. Sandpaper or a sanding block smooths rough edges and surfaces. Clamps hold wood pieces steady while gluing or drilling. A drill with bits helps make holes for assembly. Wood glue is important to join pieces securely. Measuring tape and pencil are necessary for marking cuts.
Additional Supplies
Wood stain or paint adds color and protects the wood. Brushes or rags help apply these finishes evenly. Small nails or screws give extra strength to the joints. Wood filler fills any gaps or holes for a neat look. A ruler or square helps keep lines straight and corners right. Fine detail tools like files or carving knives enhance shapes and designs.
Safety Equipment
Safety goggles protect your eyes from dust and wood chips. Ear protection reduces noise from power tools. A dust mask stops you from inhaling sawdust. Work gloves guard your hands against splinters and cuts. Wear closed-toe shoes to protect your feet. Keep a first aid kit nearby in case of minor injuries.
Credit: www.youtube.com
Cutting And Shaping Wood Pieces
Cutting and shaping wood pieces is a key step in making a nativity scene. This part needs care and focus. Each piece must fit well with others. The right cuts and shapes bring the scene to life. Wood must be handled carefully to get the best results.
Start with simple cuts, then move to shaping details. Smooth edges make the figures look nice and safe to touch. The right tools help a lot. Take your time and work step by step.
Basic Cutting Techniques
Use a handsaw or jigsaw for cutting wood. Mark your lines clearly before cutting. Cut slowly to keep the lines straight. Always cut away from your body. Use clamps to hold wood steady. Small pieces need extra care. Make sure cuts match your design exactly.
Shaping Figures And Structures
Shape wood with chisels and carving knives. Start by removing large wood parts. Then work on finer details. Pay attention to the faces and clothes of figures. For buildings, shape roofs and walls clearly. Keep shapes simple for easy assembly. Check shapes often against your plan.
Sanding For Smooth Finishes
Sanding removes rough spots and sharp edges. Use coarse sandpaper first, then fine. Sand in the direction of the wood grain. Check pieces by touch for smoothness. Smooth pieces fit together better. Sanding also makes wood ready for painting or staining. Take time to sand all parts well.
Assembling The Nativity Scene
Assembling the nativity scene is a key step in this woodworking project. It brings all the carefully cut pieces together. This stage requires patience and attention to detail. The goal is to create a sturdy and beautiful display that lasts for years. Proper assembly ensures the figures stand firm and look neat.
Joining Wood Pieces
Start by fitting the wood pieces together. Check each part’s edges for smoothness. Use clamps to hold pieces in place. This helps keep everything aligned during assembly. Test how the pieces fit before gluing or nailing. This avoids mistakes and makes the process easier.
Using Wood Glue And Nails
Apply wood glue along the edges to bond the pieces. Spread the glue evenly for a strong hold. Press the parts firmly together after applying glue. Use small nails to secure the joints. Nails add extra strength and prevent shifting. Be careful not to split the wood while nailing.
Ensuring Stability
Check the entire scene for balance and steadiness. Add extra support if any part feels loose. Use corner braces or small blocks inside the structure. This keeps the nativity scene from wobbling. Let the glue dry completely before moving the scene. Stability is important for safe display and durability.
Painting And Finishing Touches
Painting and finishing touches bring your wooden nativity scene to life. This step adds color, detail, and protects the wood. It makes your scene look complete and ready to display. Careful painting and finishing create a warm, inviting look.
Choose colors that suit the style and mood you want. Add small details to each figure for character. Finally, apply a protective coating to keep the wood safe for years.
Choosing Paint And Stains
Pick paints that work well on wood. Acrylic paints are a good choice because they dry fast and are easy to use. Stains highlight the wood’s natural grain and color. Use light stains for a soft look or dark stains for a richer tone. Test colors on a scrap piece of wood before painting your figures.
Adding Details To Figures
Use fine brushes to add facial features and clothing details. Simple lines can show eyes, noses, and mouths. Paint small patterns on robes or blankets for extra charm. Let each layer dry before adding more. Details make your nativity scene unique and beautiful.
Applying Protective Coatings
Apply a clear varnish or sealant to protect your work. Choose a matte finish for a natural look or glossy for shine. Use a brush or spray for even coverage. This coating guards against dust, moisture, and fading. It helps your nativity scene stay beautiful for many Christmas seasons.
Displaying Your Wooden Nativity
Displaying your wooden nativity scene is an important step to showcase your work and bring holiday spirit to your space. Proper placement and care can make your nativity look charming and last for years. Think about where and how you want others to see it. Create a warm, inviting spot that highlights the natural beauty of the wood.
Best Placement Ideas
Choose a stable surface to keep your nativity safe. A mantel, shelf, or table works well. Place it where it catches soft light but avoids direct sunlight. Near a window with filtered light is ideal. Keep it away from areas with heavy foot traffic or pets. A cozy corner can make the scene feel special and peaceful.
Lighting Options
Soft lighting enhances the wooden figures’ details. Use warm white LED lights to highlight the scene gently. Fairy lights or small spotlights create a magical glow. Avoid harsh or bright lights that cause shadows or glare. Battery-powered lights work well for flexible placement. Position lights to focus on the key characters like Mary and Joseph.
Seasonal Care Tips
Dust your wooden nativity regularly with a soft cloth. Avoid water or harsh cleaners that can damage the wood. Store it in a dry place when not in use. Use a protective cover or box to prevent scratches. Check for cracks or loose parts before each season. Treat the wood with natural oils to keep it looking fresh.
Frequently Asked Questions
What Tools Do I Need To Make A Wooden Nativity Scene?
You need basic woodworking tools like a saw, hammer, nails, and sandpaper. A pencil and ruler help with measurements. Optional: wood glue for stronger joints.
Which Type Of Wood Is Best For A Nativity Scene?
Softwoods like pine or cedar are easy to cut and shape. They also take paint well. Hardwood can be used but is harder to work with.
How Do I Design A Simple Wooden Nativity Scene?
Start by drawing basic shapes for each figure on paper. Cut out wood pieces following these shapes. Assemble with nails or glue carefully.
Can I Paint The Wooden Nativity Scene?
Yes, use acrylic or wood paint for bright, lasting colors. Let each layer dry before adding another. Seal with clear varnish to protect the paint.
How Long Does It Take To Build A Wooden Nativity Scene?
It can take a few hours to a few days, depending on size. Simple designs take less time. Detailed scenes need more careful work.
Conclusion
Creating a wooden nativity scene brings warmth to your holiday decor. Each piece adds a special touch to your home. Crafting it yourself makes the experience even more meaningful. You can choose simple shapes or add fine details. The project is fun and rewarding for all skill levels.
Enjoy the process and celebrate the season with your creation. This wooden nativity will become a cherished part of your Christmas tradition.