
If you’re planning to install recessed lights in your wood ceiling, one of the biggest challenges is cutting the perfect holes. You want clean, precise cuts that fit your lights snugly without damaging the wood.
But how do you make sure your holes look professional and save you time and frustration? You’ll learn simple, step-by-step methods to cut recessed light holes in wood like a pro—even if you’ve never done it before. Keep reading, and you’ll gain the confidence and skills to transform your space with flawless lighting.
Tools You’ll Need
Cutting recessed light holes in wood requires specific tools to ensure accuracy and safety. Having the right equipment makes the job easier and produces clean, professional results. Below are the key tools needed to get started.
Essential Cutting Tools
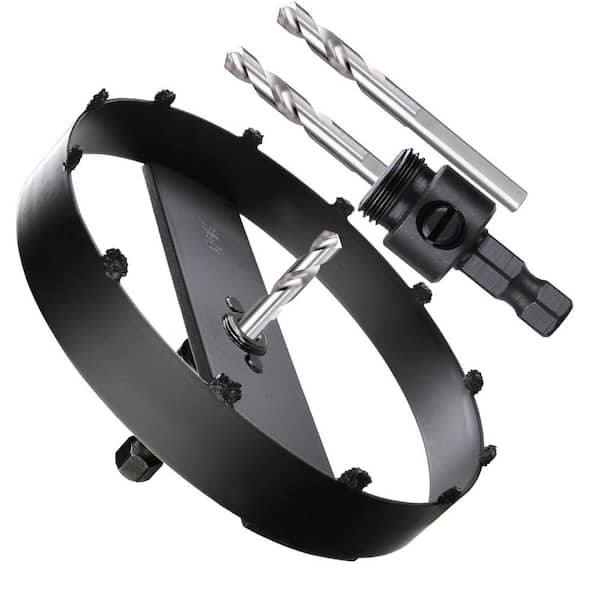
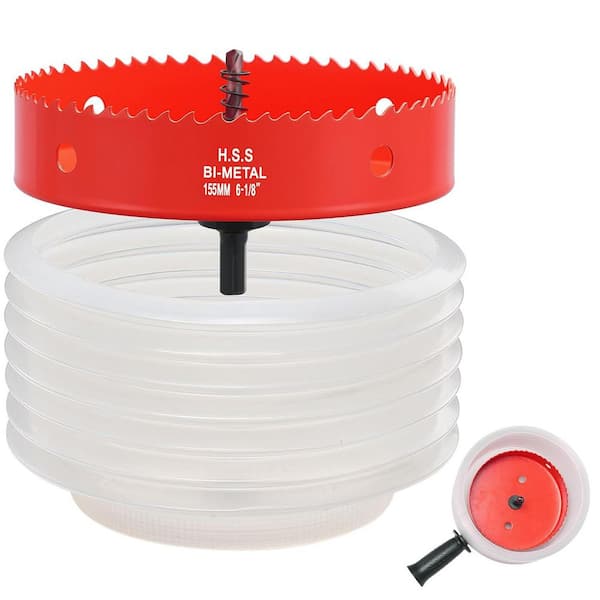
A hole saw drill bit is the primary tool for cutting round holes. Choose a size that matches your recessed light’s diameter. A power drill with enough speed and power works best. For fine adjustments, a jigsaw with a fine blade can help smooth edges. A coping saw may also be useful for small corrections.
Measuring And Marking Supplies
Accurate measurements are critical. Use a tape measure or ruler to find the exact hole location. A pencil or marker helps draw clear cutting lines. A compass or circle template ensures perfect round shapes. Mark twice, cut once.
Safety Gear
Safety comes first. Wear safety goggles to protect your eyes from wood chips. Use ear protection to guard against loud drill noise. Dust masks prevent inhaling sawdust. Work gloves protect hands from splinters and sharp tools.
Choosing The Right Recessed Light
Choosing the right recessed light matters for a clean, safe install. It affects the hole size and how well the light fits in the wood. Picking the correct light helps avoid damage and ensures a neat look. Understanding the sizes and types helps you match the light to your project.
Sizes And Types
Recessed lights come in many sizes. Common sizes include 3, 4, 5, and 6 inches. The size refers to the diameter of the trim or the hole needed. Select a size that fits your room and the wood panel.
There are different types too. Some lights are LED, others use halogen bulbs. LED lights are energy-saving and last longer. Some models have adjustable trims to direct light where needed. Choose a type that suits your lighting goals.
Compatibility With Wood Thickness
Wood thickness affects which recessed light you can install. Thicker wood needs lights with longer housing to fit inside. Thin wood requires shallower lights to avoid poking through.
Check the light’s housing depth before buying. The light must sit flush with the wood surface. Measure your wood thickness and compare it to the light’s specs. This step ensures a secure, professional finish.
Preparing The Wood Surface
Preparing the wood surface is an important step before cutting recessed light holes. It helps to make sure the cut is clean and precise. Taking time to prepare the wood reduces mistakes and damage. Follow these simple steps to get the wood ready.
Cleaning And Securing
Start by cleaning the wood surface. Remove dust, dirt, and debris using a dry cloth. A clean surface helps you see the wood grain and marks clearly. Next, secure the wood firmly. Use clamps or a workbench to hold the wood in place. This stops movement during cutting. A steady surface prevents slips and ensures safety.
Marking The Cut Area
Mark the exact spot for the hole. Use a pencil and a template or the light fixture’s outline. Draw clear, precise lines on the wood. Double-check the measurements before cutting. Accurate marking guides your saw and keeps the hole neat. Avoid guessing the size or position.
Credit: www.homedepot.com
Measuring And Marking The Hole
Measuring and marking the hole for recessed lighting is the first step in a smooth installation. Accurate measurements prevent mistakes and save time. Take your time to measure carefully and mark the spot clearly. This ensures the light fits perfectly and looks professional.
Finding The Center Point
Start by finding the exact center of the spot where the light will go. Use a tape measure to find the midpoint of the wood panel or ceiling. Mark this point with a pencil. This center mark guides your cutting and keeps the hole even. Double-check the measurement to avoid errors.
Drawing The Cut Outline
Next, draw the outline of the hole around the center point. Use the template that comes with the recessed light. Place it on the center mark and trace around it with a pencil. Make sure the line is clear and easy to see. This outline shows where you will cut the wood.
Cutting Techniques
Cutting holes for recessed lights in wood requires precise techniques. The right tool makes the job easier and cleaner. This section covers three common methods for cutting these holes. Each tool suits different project needs and skill levels.
Using A Hole Saw
A hole saw is a popular choice for cutting round holes. Attach it to a drill and align it with your marked spot. Start drilling slowly to avoid splintering the wood. Keep steady pressure and let the saw do the work. Stop once the hole saw passes through the wood. This method gives a clean and smooth edge, perfect for recessed lights.
Using A Jigsaw
A jigsaw is useful for cutting larger or irregular holes. First, drill a starter hole inside the marked circle. Insert the jigsaw blade into this hole. Follow the marked line carefully to cut out the shape. Move the jigsaw slowly to keep control. Sand the edges after cutting for a neat finish. This method works well if you don’t have a hole saw.
Using A Router
A router provides precise and smooth cuts for recessed light holes. Use a circle cutting jig attached to the router base. Set the jig to match the hole size needed. Start the router and carefully guide it along the jig. This tool reduces splintering and creates clean edges. It requires a steady hand and some practice. A router is ideal for professional-looking results.

Credit: www.familyhandyman.com
Ensuring A Precise Cut
Ensuring a precise cut is key when cutting recessed light holes in wood. A clean, exact hole makes installation easier and looks professional. Avoid rough edges or uneven shapes that can ruin the finish. Taking time and care during cutting prevents mistakes and saves effort later.
Drilling Pilot Holes
Start by drilling pilot holes inside the marked circle. These small holes guide the saw blade and help control the cut. Drill several holes around the edge for better accuracy. Pilot holes reduce wood splintering and make the cutting smoother. Use a drill bit slightly smaller than the saw blade.
Controlling Depth And Angle
Set the saw blade depth to match the wood thickness. Cutting too deep can damage surfaces below the wood. Keep the saw straight and steady for a clean edge. Tilted or angled cuts cause uneven holes and poor fit. Move the saw slowly to maintain control and precision.
Finishing The Hole
After cutting the hole for your recessed light, the edges need attention. Finishing the hole correctly makes your work look neat and professional. It also helps the light fixture fit properly and safely.
Sanding Edges Smooth
Use fine-grit sandpaper to smooth the edges of the hole. Sand gently to remove rough spots and splinters. Smooth edges prevent damage to the light trim and wiring. Take your time to make the circle even and clean.
Cleaning Debris
Clear all dust and wood chips from the hole and surrounding area. Use a brush or vacuum to remove tiny particles. Clean surfaces help the light fit better and avoid problems later. Check carefully for any leftover debris before installing the light.
Credit: www.homedepot.com
Installing The Recessed Light
Installing recessed lights in wood adds a clean, modern look to any room. This process needs care to avoid damage and ensure safety. Proper installation also helps the light work well and last longer. Follow these steps to fit the light fixture and handle wiring safely.
Fitting The Light Fixture
First, check the hole you cut for size and shape. It should match the light fixture’s specifications exactly. Gently insert the light into the hole. The fixture should fit snugly without forcing it. Use the clips or brackets that come with the fixture to hold it securely. These keep the light from moving or falling out. Make sure the fixture sits flush with the wood surface. This gives a neat, finished look.
Securing And Wiring Tips
Turn off the power before you start any wiring work. Connect the wires carefully, matching colors: black to black, white to white, and green or copper to ground. Use wire nuts to secure each connection tightly. Push the wires back into the electrical box gently. Avoid pinching or damaging the wires. Double-check all connections before restoring power. Secure the fixture firmly to avoid any wobbling. Proper wiring and securing prevent shorts and fire hazards.
Common Mistakes To Avoid
Cutting recessed light holes in wood requires precision and care. Mistakes can lead to wasted materials and extra work. Avoid common errors to ensure your project looks professional and functions well. Pay attention to the details below to improve your results.
Misaligned Cuts
Mark the hole location carefully before cutting. Misaligned cuts make the light fixture fit poorly. Double-check measurements to avoid mistakes. Use a template or stencil for accuracy. Cutting in the wrong spot damages the wood and wastes time.
Overcutting
Cutting too large a hole weakens the wood around it. Overcutting causes the light to fall through or look uneven. Use the correct hole saw size for your fixture. Cut slowly and stop often to check your work. Smaller adjustments work better than large cuts.
Ignoring Safety Precautions
Wear safety glasses to protect your eyes from wood chips. Use a dust mask to avoid breathing sawdust. Secure the wood firmly before cutting to prevent slips. Keep hands clear of the cutting blade. Follow tool instructions carefully to avoid accidents.
Tips For Working With Different Wood Types
Cutting holes for recessed lights in wood requires care. Different wood types behave in unique ways. Knowing how to handle each type makes the job easier. It helps avoid damage and ensures a clean cut.
Some woods are soft and easy to cut. Others are hard and need more effort. Veneered surfaces need special attention to keep them smooth and neat.
Softwoods Vs Hardwoods
Softwoods like pine or cedar cut quickly with less force. They may splinter if you push too hard. Use a sharp drill bit and move slowly. Sand the edges gently for a smooth finish.
Hardwoods like oak or maple are dense and tough. They need stronger tools and slower cutting. Use a drill bit designed for hardwood to avoid burning. Take breaks to keep your tools cool and sharp.
Dealing With Veneered Surfaces
Veneered wood has a thin wood layer glued on top. Cutting can cause chipping or peeling. Score the outline with a sharp knife before drilling. Use painter’s tape over the cut area for protection.
Drill slowly and steady. Avoid forcing the drill to keep the veneer intact. Clean up with fine sandpaper to smooth any rough edges carefully.
Frequently Asked Questions
How Do I Measure Wood For Recessed Light Holes?
Measure the light fixture’s diameter first. Mark the center spot on the wood. Use a template or compass to draw the exact circle.
What Tools Are Best For Cutting Recessed Light Holes?
A hole saw or jigsaw works well for cutting wood. Choose the size that matches your light fixture. Always wear safety gear during cutting.
How Can I Avoid Splintering Wood When Cutting Holes?
Use painter’s tape over the cutting area. Cut slowly and steadily for a clean edge. Sand edges lightly after cutting for smoothness.
What Wood Thickness Suits Recessed Lighting Installation?
Most recessed lights fit wood between ½ inch and 1 ¼ inches thick. Check your light’s specifications for exact thickness needs. Thicker wood may need special mounting.
Can I Cut Recessed Light Holes Without A Template?
Yes, but templates ensure accuracy and neatness. You can trace the light’s base or use a compass. Templates help avoid mistakes and save time.
Conclusion
Cutting recessed light holes in wood takes patience and care. Use the right tools and follow the steps closely. Measure twice to avoid mistakes. Keep the cuts clean and smooth for a better fit. Safety matters—wear goggles and work slowly.
With practice, your work will look neat and professional. This simple skill can improve your home lighting projects. Try it yourself and see the difference it makes.