
Are your coffee mugs cluttering up your kitchen counter or cupboard? Imagine having a beautiful wooden rack that neatly holds your favorite mugs, making them easy to grab and adding charm to your space.
You don’t need to buy an expensive one or hire someone to make it. With a few simple tools and easy steps, you can create your own wooden coffee mug rack. Keep reading, and you’ll discover how to turn plain wood into a stylish and practical piece that fits perfectly in your home.
By the end, you’ll have a project that’s both useful and satisfying to build. Ready to get started?
Materials And Tools Needed
Building a wooden coffee mug rack is a fun and useful project. Before starting, gather all materials and tools. Having everything ready makes the process smooth and enjoyable. This section covers the key materials and tools you need for your mug rack.
Choosing The Right Wood
Pick wood that is strong and easy to work with. Pine and cedar are good choices for beginners. They are light and simple to cut. Avoid soft woods that may break easily. Also, consider the wood’s finish. A smooth surface helps protect your mugs.
Essential Tools
A saw is necessary to cut the wood to size. Use a hand saw or a power saw for faster work. A drill will help make holes for screws or hooks. Sandpaper smooths rough edges and surfaces. A measuring tape ensures accurate cuts and placements. A screwdriver is needed to secure parts together.
Additional Supplies
Wood screws hold the rack parts firmly. Hooks or pegs will hold your coffee mugs. Wood glue adds extra strength to joints. A wood finish or sealant protects the wood from moisture. Paint or stain can enhance the rack’s look. Use a brush or cloth to apply finishes evenly.

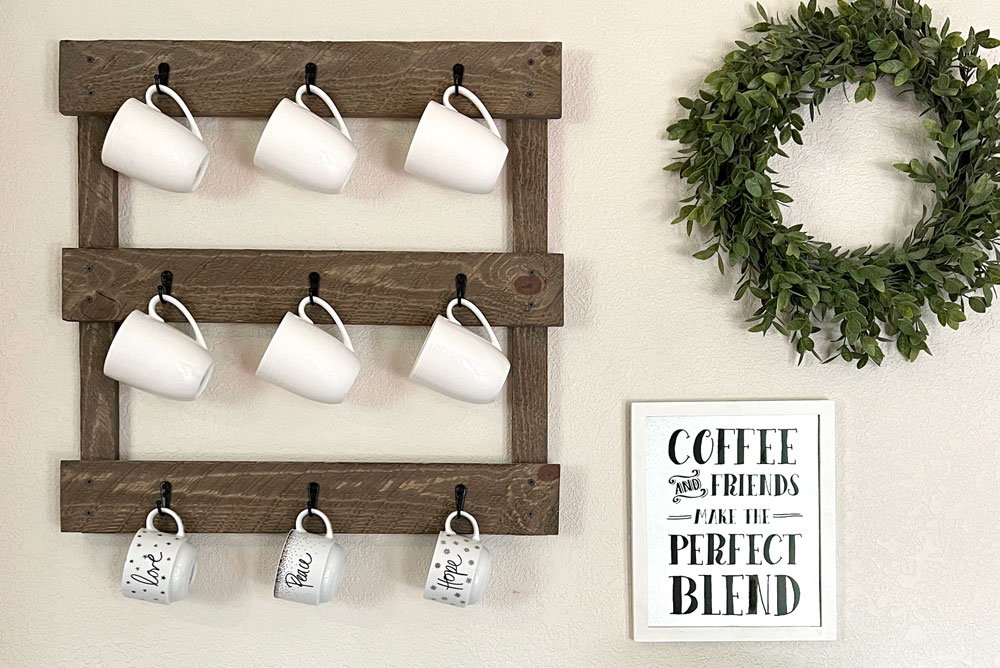
Credit: www.funkyjunkinteriors.net
Designing Your Coffee Mug Rack
Crafting a wooden coffee mug rack is simple and practical. Choose sturdy wood, measure your space, and design slots for each mug. This project keeps mugs organized and adds charm to your kitchen.
Designing a wooden coffee mug rack starts with clear planning. It helps to know exactly what you want before cutting any wood. A good design saves time and materials. It also makes the rack sturdy and attractive.
Think about how many mugs you have. Consider the space where you will place the rack. Keep these points in mind as you design your rack.
Determining Size And Capacity
First, count your mugs. Decide how many mugs the rack must hold. Leave space for a few extra mugs. This allows for new mugs or guests’ cups.
Measure the mugs’ height and width. Add a bit of room between each mug. This prevents mugs from touching or falling. Also, think about the rack’s overall size. It should fit well on your wall or countertop.
Selecting A Style
Choose a style that matches your kitchen or room. Simple racks with straight lines suit modern spaces. Curved or carved racks fit rustic or classic decor. You can pick open racks or ones with shelves.
Decide if you want hooks, slots, or pegs for hanging mugs. Hooks are easy to use and hold mugs well. Slots keep mugs in place but need precise cutting. Pegs offer a unique look but need strong wood.
Sketching Your Plan
Draw a rough sketch of your rack. Start with a basic shape and add details. Mark where each mug will hang or sit. Include measurements to guide your cutting.
Use simple lines and labels. This helps you see the design clearly. A good sketch makes building easier and faster. Keep it close while working on your project.
Preparing The Wood
Preparing the wood is the first step to make a wooden coffee mug rack. It sets the base for a strong and neat rack. Good preparation helps avoid mistakes later. Take your time to get this part right.
Measuring And Marking
Start by measuring the wood pieces you need. Use a tape measure for accuracy. Mark the wood with a pencil. Mark clearly where each cut will be. Double-check your measurements before cutting. This step ensures the pieces fit well together.
Cutting The Pieces
Cut the wood along the marks using a saw. Use a handsaw or power saw depending on your tools. Cut slowly to avoid rough edges. Keep the cuts straight and clean. Wear safety glasses to protect your eyes. Precise cuts make assembly easier and stronger.
Sanding For Smoothness
Sand all the wood pieces to smooth rough surfaces. Use medium-grit sandpaper first, then fine-grit for a soft finish. Sand edges and corners carefully. This step removes splinters and improves the look. Smooth wood is safer and more pleasant to touch.
Assembling The Rack
Assembling the wooden coffee mug rack is an important step. This process brings all parts together to form a sturdy rack. Careful assembly ensures the rack holds your mugs safely.
Joining Techniques
Start by choosing the right method to join wood pieces. Use wood glue for a strong bond. Apply glue evenly on the edges to join. For extra strength, use nails or screws. Pre-drill holes to avoid splitting the wood. Clamp the pieces together until the glue dries. This keeps the rack stable and secure.
Securing The Parts
Secure each part tightly to avoid wobbling. Use screws for better hold than nails. Countersink screws to keep surfaces smooth. Check alignment before tightening screws fully. Tight connections increase the rack’s durability. Double-check all joints after assembly.
Adding Support Elements
Add support pieces to strengthen the rack. Small wooden braces work well at corners. Attach them with glue and screws. These supports prevent the rack from shaking. They help the rack carry heavy mugs safely. Place supports where the rack feels weak.
Finishing Touches
The finishing touches bring your wooden coffee mug rack to life. They protect the wood and give it a smooth, attractive look. These steps also prepare the rack for easy hanging on the wall. Each detail matters for a beautiful and lasting result.
Applying Stain Or Paint
Choose a stain or paint that matches your kitchen style. Stains highlight the natural wood grain and add warmth. Paint offers a solid color and can brighten the rack. Use a brush or cloth to apply evenly. Let it dry completely before moving on.
Sealing The Wood
Seal the wood to protect it from moisture and dirt. Use a clear polyurethane or varnish for a durable finish. Apply thin coats with a brush, allowing each coat to dry well. Sand lightly between coats for smoothness. This step keeps your rack looking fresh longer.
Attaching Mounting Hardware
Choose strong hardware to hold the rack on the wall safely. D-rings or keyhole hangers work well for wooden racks. Attach the hardware on the back, near the top corners. Make sure screws are tight and secure. Check stability before hanging your mugs.
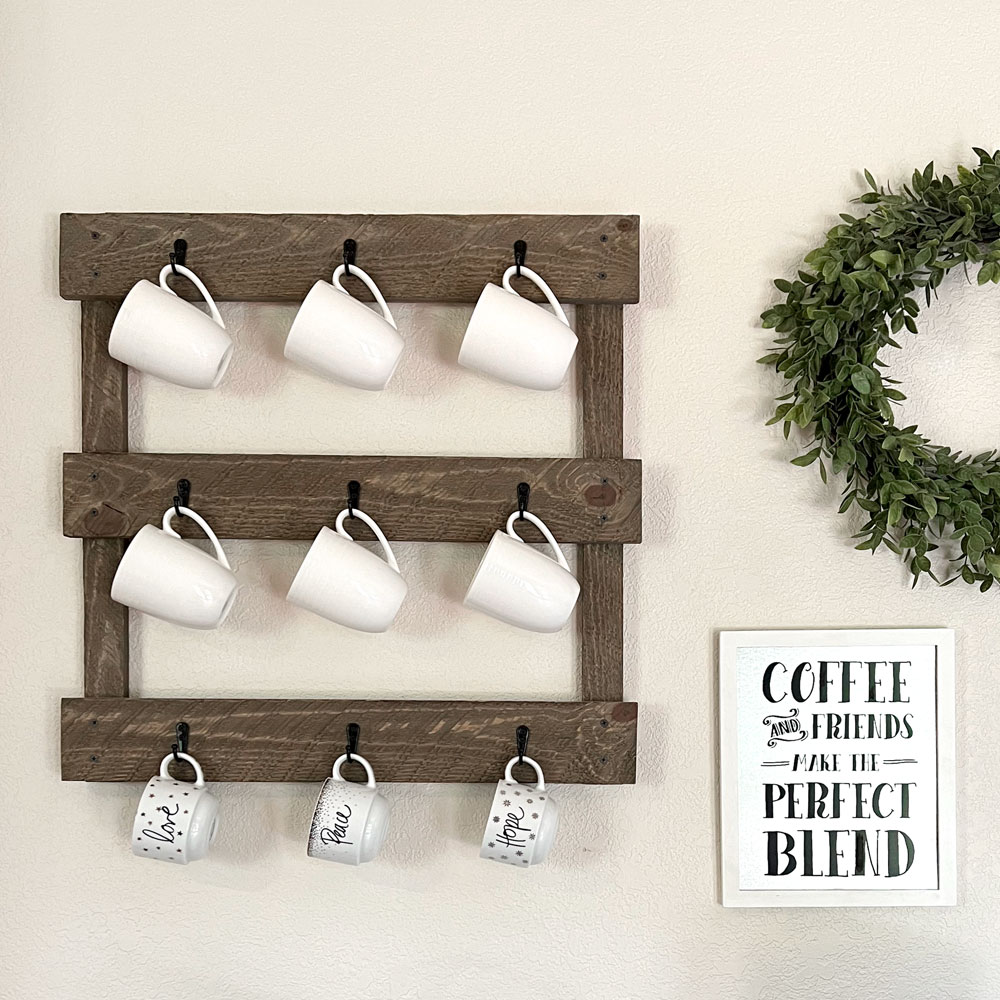
Credit: createplaytravel.com
Mounting And Using The Rack
Mounting and using your wooden coffee mug rack is the final step to enjoy its full benefits. Proper placement and installation ensure the rack stays secure and your mugs are easy to reach. Organizing mugs on the rack keeps your kitchen tidy and stylish.
Choosing The Right Location
Pick a spot near your coffee maker or kettle for easy access. Make sure the wall space is clear and strong enough to hold the rack and mugs. Avoid areas near heat sources or where water may splash. Check the height so everyone can reach the mugs comfortably.
Installing On Walls
Use a stud finder to locate secure spots behind the wall. Mark the drill points carefully to keep the rack level. Choose screws and anchors that fit your wall type for strong support. Drill holes slowly, then fix the rack tightly against the wall. Double-check the rack’s stability before hanging mugs.
Organizing Your Mugs
Arrange mugs by size or style for a neat look. Place frequently used mugs in easy-to-reach spots. Group matching sets together for quick access. Leave space between mugs to avoid chips or scratches. Keep the rack clean by wiping it regularly with a dry cloth.
Tips For Customizing Your Rack
Customizing your wooden coffee mug rack makes it unique and personal. Simple changes can improve its look and function. This section offers easy tips to help you create a rack that fits your style and needs perfectly.
These ideas will guide you to add personality and practical features to your rack. You will also learn how to keep it in great shape for years.
Adding Personal Designs
Paint or stain your rack in colors you like. Use stencils to add shapes or letters. Carve simple patterns or your initials for a custom touch. You can also attach small decorations like wooden flowers or metal accents. These little details make your rack stand out and reflect your taste.
Incorporating Additional Features
Add hooks below the shelf for hanging keys or spoons. Include a small shelf on top for extra mugs or coffee supplies. Attach a chalkboard or corkboard on the side to write notes or pin recipes. These features make your rack more useful and keep your kitchen tidy.
Maintenance Advice
Clean your rack regularly with a soft, dry cloth. Avoid water or harsh cleaners that may damage the wood. Apply wood oil or polish every few months to keep it shiny and strong. Check for loose screws or hooks and tighten them as needed. Proper care helps your rack last longer and look new.
Credit: createplaytravel.com
Frequently Asked Questions
What Materials Do I Need For A Wooden Coffee Mug Rack?
You will need wood planks, screws, a drill, sandpaper, and wood finish or paint. These basic materials help build a strong and smooth rack.
How Long Does It Take To Build A Wooden Mug Rack?
Building a simple wooden mug rack usually takes about 2 to 4 hours. Time depends on your skill level and design complexity.
Can I Customize The Size Of My Mug Rack?
Yes, you can easily adjust the size to fit your space and the number of mugs. Just measure your area before cutting wood.
What Tools Are Essential For Making A Mug Rack?
A drill, saw, screwdriver, measuring tape, and sandpaper are essential tools. These help you cut, assemble, and smooth the rack safely.
How Do I Protect The Wood From Moisture?
Apply a wood sealant, varnish, or paint to protect it from water and stains. This keeps your rack looking good longer.
Conclusion
Building a wooden coffee mug rack adds charm to your kitchen. It keeps mugs neat and easy to find. You only need simple tools and materials. Follow the steps carefully and take your time. This project suits beginners and experienced crafters alike.
Enjoy the satisfaction of making something useful by hand. A handmade rack also makes a thoughtful gift. Try it today and see how it brightens your space. Simple, practical, and fun to create.