
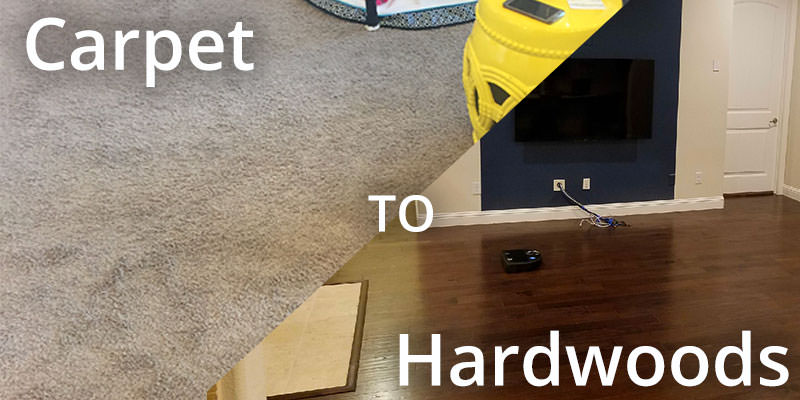
Are you ready to transform your space by replacing your old carpet with beautiful hardwood floors? Removing carpet and installing hardwood might seem like a big job, but with the right steps, you can do it yourself and save money.
Imagine the warmth and elegance hardwood brings to your home—and how proud you’ll feel having done the work yourself. In this guide, you’ll learn exactly how to take out your carpet safely and install hardwood floors that last. Keep reading to discover simple tips and tricks that make the process easier than you think.
Your dream floor is closer than you realize!
Preparing The Room
Preparing the room is the first step to a smooth carpet removal and hardwood installation. Proper preparation helps avoid damage and makes the job easier. It also keeps your space organized and safe.
Clear Furniture And Items
Remove all furniture from the room. This includes chairs, tables, and small items on the floor. Clear the space completely to have full access to the carpet. Moving items out prevents accidents and protects your belongings.
Gather Necessary Tools
Collect all tools before starting. You will need a utility knife, pliers, pry bar, hammer, and a floor scraper. Also, have a broom and vacuum ready for cleanup. Having tools handy speeds up the process.
Wear Protective Gear
Put on gloves to protect your hands from sharp objects. Wear safety goggles to shield your eyes from dust and debris. Use a dust mask to avoid breathing in particles. Proper gear keeps you safe and comfortable.
Credit: hardwoodfloorsfortworth.com
Removing The Carpet
Removing carpet is the first step to install hardwood floors. It takes some effort but is doable with basic tools. Clear the room and prepare to work carefully.
Cut The Carpet Into Sections
Use a utility knife to cut the carpet into small strips. Cut near the walls and then across the room. Smaller pieces are easier to handle and remove.
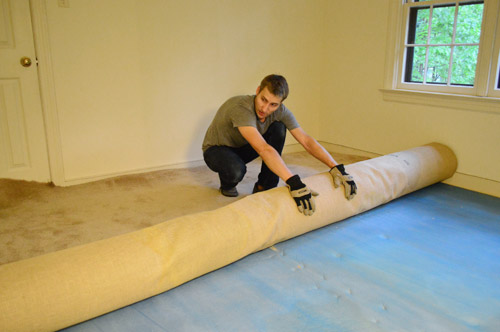
Pull Up The Carpet
Grab a corner of the cut carpet piece and pull it up slowly. The carpet may be glued or stapled, so pull firmly but gently. Remove each section and fold it for disposal.
Remove Carpet Padding
Under the carpet is the padding. Pull it up just like the carpet. Padding may be stapled or glued. Remove all padding to expose the subfloor.
Dispose Of Old Carpet And Padding
Roll the carpet and padding tightly. Tie them with rope or tape. Check local rules for carpet disposal. Take the rolls to a dump or recycling center.
Preparing The Subfloor
Preparing the subfloor is a key step before installing hardwood floors. A smooth, clean subfloor ensures the new hardwood lays flat and lasts long. It also helps avoid squeaks and gaps later. This process involves removing old carpet remnants, cleaning thoroughly, and fixing any problems in the surface.
Remove Staples And Tack Strips
Start by pulling out all staples left from the carpet. Use pliers for this task. Next, remove the tack strips along the edges. These strips hold the carpet in place but can damage hardwood floors. Pry them up carefully with a crowbar or flat tool. Clear every piece to have a safe, even base.
Clean And Inspect The Subfloor
After removing staples and tack strips, sweep all dirt and dust. Use a vacuum to reach tiny debris. Check the subfloor for any nails or screws sticking out. These must be hammered down or removed. Look for signs of mold or water damage. A clean, dry subfloor gives the best start for hardwood installation.
Repair Damages And Level The Surface
Examine the subfloor for cracks or holes. Fill these gaps with wood filler or patching compound. Sand the area smooth after it dries. Check for uneven spots or bumps. Use a leveling compound to even out the surface. A flat subfloor prevents hardwood planks from bending or making noise.
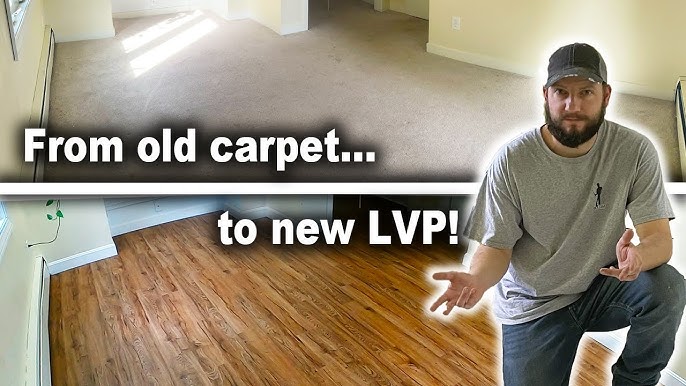
Installing Hardwood Flooring
Installing hardwood flooring transforms your space with warmth and style. This process requires care and patience. Proper steps ensure the floor looks great and lasts long. Follow each step closely for the best results.
Acclimate Hardwood Planks
Bring the hardwood planks into the room where you will install them. Let them sit for 3 to 5 days. This helps the wood adjust to the room’s temperature and humidity. Acclimation prevents the wood from expanding or shrinking later.
Lay The Underlayment
Roll out the underlayment across the floor. It provides a smooth surface and reduces noise. Use an underlayment suited for hardwood floors. Cut it to fit and tape the seams tightly. Make sure it covers the entire floor area.
Plan The Layout
Measure the room and decide the direction of the planks. Usually, planks run parallel to the longest wall. Mark a starting line with a chalk line. This line keeps your rows straight and even as you install.
Install The First Row
Place the first row of planks along the starting line. Leave a small gap between the planks and the wall for expansion. Use spacers to keep this gap uniform. Nail or glue the planks down depending on the flooring type.
Continue Laying Planks
Fit the next planks tightly against the first row. Stagger the seams of the planks for a natural look. Use a tapping block to snug the planks together without damage. Check alignment often to keep rows straight.
Cut Planks To Fit Edges
Measure the space near walls and corners carefully. Use a saw to cut planks to the correct size. Always cut with the finished side up to avoid splinters. Fit the cut planks into place, maintaining the expansion gap.
Finishing Touches
After installing hardwood floors, finishing touches make a big difference. These details create a polished look and protect your new floor. Take your time with these last steps to enjoy a beautiful room.
Install Baseboards And Trim
Baseboards cover the gaps between the floor and walls. They hide rough edges and give a neat finish. Use a nail gun or hammer to attach baseboards carefully. Cut corners and edges precisely for a clean fit. Trim adds style and hides any imperfections.
Clean The New Floor
Remove dust and debris left from installation. Use a soft broom or vacuum with a hard floor setting. Wipe the floor with a damp cloth or mop. Avoid soaking the wood to prevent damage. Clean floors shine and show off the wood’s natural beauty.
Apply Protective Finish If Needed
Some hardwood floors need a protective finish. This finish guards against scratches and spills. Choose a finish made for your floor type. Apply it evenly with a brush or roller. Let the finish dry completely before using the room. This step extends your floor’s life.
Credit: www.younghouselove.com
Credit: www.youtube.com
Frequently Asked Questions
How Do I Remove Carpet Without Damaging The Floor Underneath?
Start by pulling up a corner of the carpet carefully. Use pliers to grip and pull it slowly. Remove the carpet padding and tack strips without scraping the floor.
What Tools Do I Need To Install Hardwood Flooring?
You will need a tape measure, saw, hammer, nails or flooring staples, and spacers. A pry bar and rubber mallet also help. These tools make installation easier and accurate.
How Long Does It Take To Install Hardwood Flooring?
Installation time depends on room size and skill level. Small rooms may take one day; larger rooms can take several days. Preparation and drying time add to the total.
Can Hardwood Flooring Go Over Concrete Subfloor?
Yes, but use a moisture barrier first. Concrete can hold moisture that damages wood. Proper preparation helps hardwood last longer.
How Do I Maintain Hardwood Floors After Installation?
Clean regularly with a soft broom or vacuum. Wipe spills immediately to avoid stains. Use furniture pads to prevent scratches and keep floors looking new.
Conclusion
Removing carpet and installing hardwood takes effort but brings great results. Start by clearing the room and pulling up the carpet carefully. Prepare the floor to ensure it is clean and smooth. Lay the hardwood planks tightly and nail them down securely.
Take your time with each step to avoid mistakes. Enjoy the fresh, clean look that hardwood floors add to your home. This project improves your space and can increase your home’s value. Simple tools and patience make this task doable for most people.
You can create a warm, inviting room with new hardwood floors.