
If you’ve ever wanted to add a unique touch to your indoor garden, mounting a staghorn fern on wood is a fantastic way to do it. These plants don’t just hang around—they become living art on your wall.
But you might be wondering, how exactly do you get started? Don’t worry, you’re in the right place. You’ll discover simple, step-by-step tips to mount your staghorn fern like a pro. By the end, you’ll know exactly how to transform your space with this stunning plant.
Ready to bring your fern to life on wood? Let’s dive in!
Credit: mulhalls.com
Choosing The Right Wood
Choosing the right wood is essential for mounting a staghorn fern. The wood must support the plant’s weight and allow good airflow. It should resist moisture to avoid rotting. Picking the best wood type makes the mounting last longer and keeps the fern healthy.
Best Wood Types For Mounting
Cedar is a popular choice. It resists decay and insects well. Redwood also works great because it stays strong when wet. Cypress is another option, known for its durability. Avoid softwoods like pine, which can rot quickly. Choose wood that is untreated and free from chemicals. This keeps your staghorn fern safe.
Preparing The Wood Surface
Start by sanding the wood to remove rough spots. Smooth wood helps the fern attach better. Clean the surface with a damp cloth to remove dust. Let the wood dry completely before mounting the plant. Drilling small holes can help secure the fern’s roots. Proper preparation ensures the wood supports the fern firmly and lasts longer.
Selecting A Healthy Staghorn Fern
Choosing a healthy staghorn fern is the first step for a successful mounting project. A strong plant will grow well on wood and stay vibrant longer. Healthy ferns have firm leaves and a fresh green color. Avoid plants with yellow or brown spots. These signs may show disease or poor care.
Check the roots and base of the fern. They should be moist but not soggy. Dry or rotting roots can stop your fern from thriving. Picking the right fern saves time and effort later. It helps your staghorn look beautiful on its wooden mount.
Identifying A Thriving Fern
Look for bright green, firm fronds. Soft or drooping leaves mean the fern is weak. Healthy staghorn ferns have two types of fronds. Shield fronds cover the root area and should be flat and intact. Fertile fronds, shaped like antlers, should be thick and upright.
A thriving fern has no signs of pests or damage. Check under the fronds for bugs or holes. Avoid plants with brown edges or dry patches. These are signs of poor health or stress.
Tools Needed For Mounting
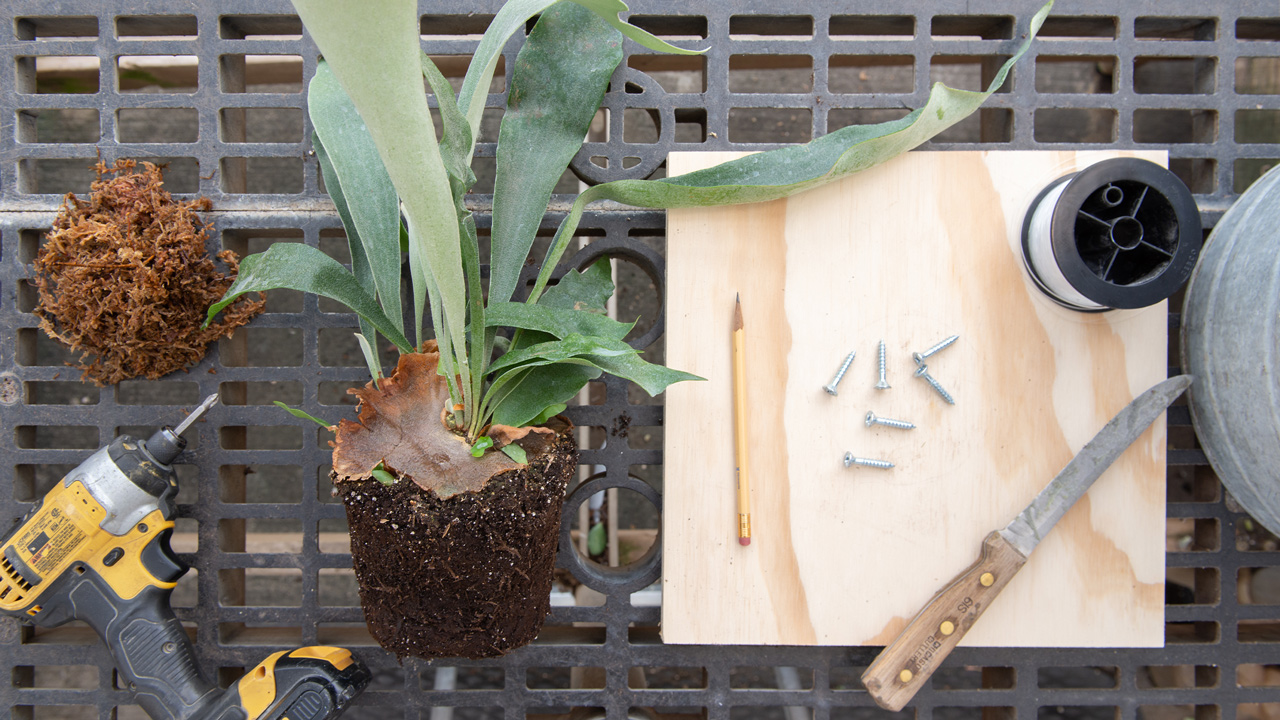
Gather a few simple tools before starting. You will need a piece of wood, such as cedar or oak. These woods resist moisture and decay. Use sphagnum moss to wrap the fern’s roots. It helps keep the plant moist on the wood.
Have fishing line, wire, or nylon ties ready. These will secure the fern to the wood. A staple gun or small nails can help fasten the ties. Use scissors or garden shears to trim excess moss or ties. These tools make mounting easier and neater.
Preparing The Fern For Mounting
Preparing your staghorn fern for mounting is an important step. It helps the fern attach well to the wood and stay healthy. Take time to clean and soak the fern properly. This will make the plant strong and ready for its new home.
Cleaning And Trimming Roots
Start by gently removing the fern from its pot or old mounting. Shake off excess soil from the roots. Use your fingers to brush away any dirt or dead material. Look for brown or mushy roots and trim them with clean scissors. Cutting damaged roots helps the plant grow better. Be careful not to cut too much. Healthy roots should stay intact for strong support.
Soaking The Fern
Next, soak the fern in water for about 15 to 20 minutes. Use lukewarm water to avoid shock. This step hydrates the plant and softens the roots. A well-hydrated fern will cling better to the wood. After soaking, let the fern drain well. Avoid leaving it wet for long, as this can cause rot. Your fern is now ready to be mounted.

Credit: www.reddit.com
Mounting Techniques
Mounting a staghorn fern on wood requires specific techniques to keep the plant healthy and secure. The right method provides good airflow and supports the fern’s growth. Choosing the best materials and steps helps the fern thrive on its new home.
Using Sphagnum Moss As A Base
Sphagnum moss acts as a soft, moisture-retentive base for the fern’s roots. Soak the moss in water until fully wet. Place a thick layer of moss on the wooden board. This layer cushions the roots and holds water to keep them moist. Avoid packing moss too tightly to allow airflow. The moss also helps protect roots from drying out quickly.
Securing The Fern With Wire Or Twine
Use wire or twine to fasten the fern gently on the moss and wood. Wrap the wire or twine around the fern’s base and the wood. Make sure it is firm but not too tight. Tight wrapping can damage the fern’s roots or leaves. Twist the wire ends together or tie knots in the twine to secure the plant. Check the tension regularly and adjust as the fern grows.
Aftercare For Mounted Ferns
After mounting your staghorn fern on wood, proper care is key to keep it healthy. These ferns need specific conditions to thrive. Simple steps help your fern grow strong and beautiful. Understanding watering, light, and feeding needs is important.
Watering And Humidity Tips
Water your staghorn fern regularly but avoid overwatering. The wood mount holds moisture, so check it often. Spray water on the fern’s base and leaves to keep humidity high. Use room temperature water for best results. Aim to keep the air moist, especially in dry rooms. A humidity level around 60% suits these ferns well.
Optimal Light Conditions
Place your mounted fern in bright, indirect light. Direct sunlight can burn the leaves quickly. North or east-facing windows work well. The fern enjoys filtered light similar to its natural forest home. Avoid dark corners or spots with no natural light. Rotate the mount occasionally for even growth.
Fertilizing Your Fern
Feed your staghorn fern once a month during spring and summer. Use a balanced liquid fertilizer diluted to half strength. Apply the fertilizer to the fern’s base or spray lightly on leaves. Avoid fertilizing in winter when growth slows. Proper feeding encourages lush, green fronds and strong roots.
Credit: www.themarthablog.com
Troubleshooting Common Issues
Mounting a staghorn fern on wood looks beautiful but can cause some problems. These issues might seem hard at first. Some common troubles include yellow leaves or pests. Fixing these problems early helps your fern stay healthy and grow strong. This section helps you spot and solve these common troubles.
Dealing With Yellowing Fronds
Yellow leaves often mean the plant needs attention. Too much water can cause yellow fronds. The wood mount might hold extra moisture. Let the fern dry between waterings. Too little light also causes yellowing. Staghorn ferns need bright, indirect light. Move the plant to a better spot if leaves turn yellow. Sometimes, old fronds yellow and die naturally. Remove these gently to keep the plant tidy.
Preventing Pests And Diseases
Pests like scale insects and mealybugs can attack staghorn ferns. Check your plant regularly for small bugs or sticky spots. Treat infestations early with insecticidal soap or neem oil. Good airflow around the fern helps prevent mold and mildew. Avoid overwatering to stop root rot and fungal diseases. Keeping the wood dry and clean reduces pests and disease risk.
Creative Display Ideas
Mounting a staghorn fern on wood creates a natural, stylish display. It turns your plant into a piece of living art. This section explores creative ways to show off your mounted fern. Ideas focus on placement and grouping to boost visual impact.
Indoor And Outdoor Placement
Place your mounted staghorn fern where it gets bright, indirect light. Indoors, bathrooms and kitchens work well. They offer humidity and filtered sunlight. Avoid direct sun that can burn the fronds.
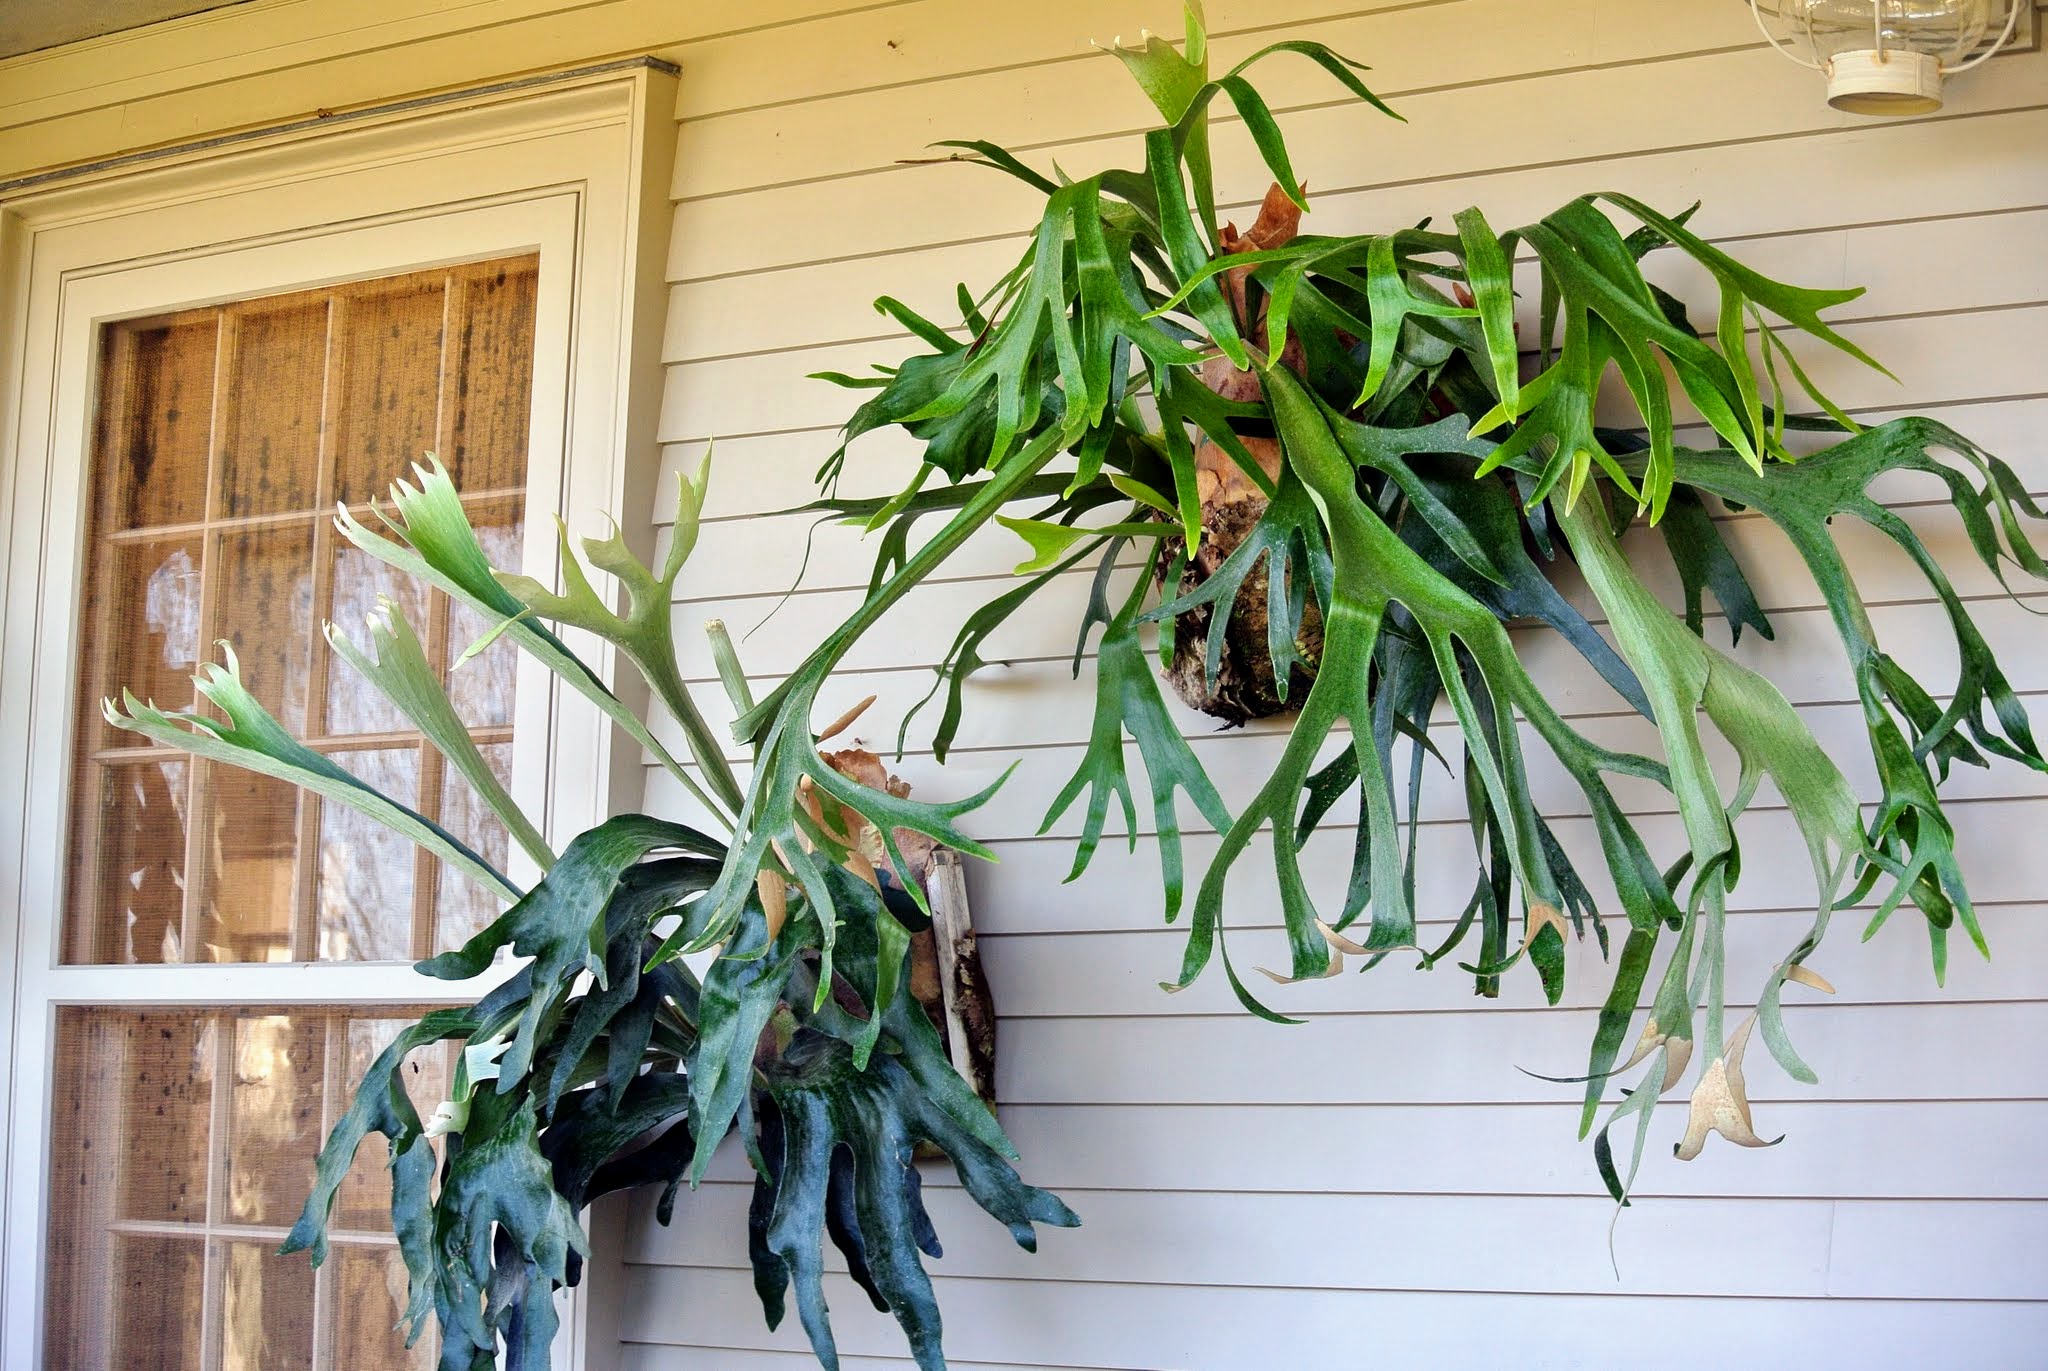
Outdoors, hang the fern in a shaded spot. Under a tree or on a porch roof are ideal. The fern will thrive with morning light and afternoon shade. Protect it from heavy rain and strong wind.
Combining Multiple Mounted Ferns
Group several mounted staghorn ferns on a single wall. Use different wood shapes and sizes for variety. This creates a lush, green focal point in any space.
Try arranging ferns at various heights. This adds depth and interest. Mix in other mounted plants for a natural, jungle feel. Keep the plants spaced to allow air flow and growth.
Frequently Asked Questions
How Do I Prepare Wood For Mounting A Staghorn Fern?
Clean the wood surface well to remove dust and dirt. Use untreated wood like cedar or cork for best results. Make sure the wood is dry before mounting.
What Materials Are Needed To Mount A Staghorn Fern On Wood?
You need wood, sphagnum moss, fishing line or wire, scissors, and a staple gun or nails. These help secure the fern and keep moisture.
How Often Should I Water A Staghorn Fern Mounted On Wood?
Water the fern once a week or when the moss feels dry. Mist it lightly to keep humidity high. Avoid soaking the wood to prevent rot.
Can I Mount A Staghorn Fern Outdoors On Wood?
Yes, but choose a shaded, protected spot. Avoid direct sunlight and strong winds. Outdoor mounting works well in mild climates.
How Do I Attach The Staghorn Fern Securely To The Wood?
Place the fern on damp moss, then wrap fishing line or wire around it tightly. Use a staple gun or nails to hold the line in place. Check regularly to adjust tension.
Conclusion
Mounting a staghorn fern on wood adds beauty to any space. It gives the plant a natural, stylish home. Remember to choose the right wood and secure the fern carefully. Keep the plant’s light and water needs in mind. With patience, your fern will grow healthy and strong.
Enjoy the unique look and fresh feel it brings. This simple project makes your home greener and more inviting. Give it a try and watch your fern thrive!