
Are you dreaming of a unique dance floor that stands out at your next party or event? What if you could create one yourself, using simple materials you might already have?
Making a dance floor out of pallets is easier than you think, and it can add a personal, rustic touch to your space. In this guide, you’ll discover step-by-step how to turn ordinary pallets into a stylish, sturdy dance floor that will impress your guests and keep the party going all night.
Ready to get started? Keep reading, and you’ll have your very own dance floor in no time!
Choosing The Right Pallets
Choosing the right pallets is a key step in making a safe and sturdy dance floor. Pallets come in many types and conditions. Picking the best ones helps create a smooth and strong surface to dance on. This part covers the types of pallets, how to check their condition, and where to find good pallets.
Types Of Pallets To Use
Wood pallets are the most common choice for dance floors. They are strong and easy to work with. Avoid plastic or metal pallets because they can be slippery or hard to join. Look for pallets made of hardwood. They last longer and hold more weight. Softwood pallets may break more easily.
Checking Pallet Condition
Inspect each pallet carefully before using it. Avoid pallets with broken or missing boards. Check for splinters and loose nails. These can cause injury or damage your floor. Make sure the pallet is flat and not warped. Warped pallets make the floor uneven and unsafe. Clean pallets free of dirt, stains, or chemicals.
Where To Source Pallets
Try local warehouses, factories, or stores for free or cheap pallets. Many places discard pallets after use. You can also check online marketplaces or social media groups for pallets. Ask if the pallets are clean and in good condition. Avoid pallets marked with “MB” as they were treated with harmful chemicals.

Credit: ourchildrensearth.wordpress.com
Gathering Tools And Materials
Gathering tools and materials is the first step to build a pallet dance floor. Having the right items makes the process smooth and safe. Prepare everything before starting to save time and avoid interruptions.
Essential Tools Needed
Start with basic tools for cutting and assembling pallets. A saw helps to cut pallets to the right size. A drill is needed to fix screws and bolts securely. Use a hammer to remove any nails from old pallets. A tape measure ensures all pieces fit perfectly. Safety gear like gloves and goggles protect your hands and eyes.
Additional Supplies
Besides tools, gather extra materials for a strong and stable floor. Screws and nails hold pallets together firmly. Sandpaper smooths rough wood surfaces to prevent splinters. Wood sealant or paint adds protection and improves appearance. Rubber mats or foam pads can be placed under pallets for extra comfort. Consider some clamps to hold pallets in place while working.
Preparing The Pallets
Preparing the pallets is the first important step in making a dance floor. Pallets must be clean and safe. This ensures a smooth, strong surface for dancing. Taking time to prepare the pallets saves effort later.
Cleaning And Sanding
Start by cleaning the pallets well. Use a brush to remove dirt and dust. Washing the pallets with water helps remove grime. Let them dry completely before sanding.
Sanding makes the wood smooth and safe. Use medium-grit sandpaper to avoid rough spots. Sand all pallet surfaces, especially the top. Smooth wood prevents splinters and makes the floor look better.
Removing Nails And Splinters
Check pallets carefully for nails or staples. Use a hammer or pliers to pull them out. Nails left in pallets can cause injury or damage.
Look for splinters or sharp edges. Use sandpaper or a file to smooth these spots. Safe pallets make your dance floor comfortable and secure.
Credit: garden.lighting
Designing The Dance Floor Layout
Designing the dance floor layout is a key step in making a pallet dance floor. It helps create a space that fits well and looks great. Good planning makes the setup easy and safe.
Think about how big the dance floor needs to be. Also, imagine how people will move around. These ideas help shape the layout.
Measuring Your Space
Start by measuring the area where the dance floor will go. Use a tape measure to get exact length and width. Write down these numbers. Check for any obstacles like trees or furniture. Clear the space for a smooth surface.
Measure twice to avoid mistakes. Accurate measurements save time and effort later.
Arranging Pallet Placement
Arrange pallets to fit the measured space. Lay them out on the ground first. Check how they connect and fit together. Keep spaces even for stability and safety.
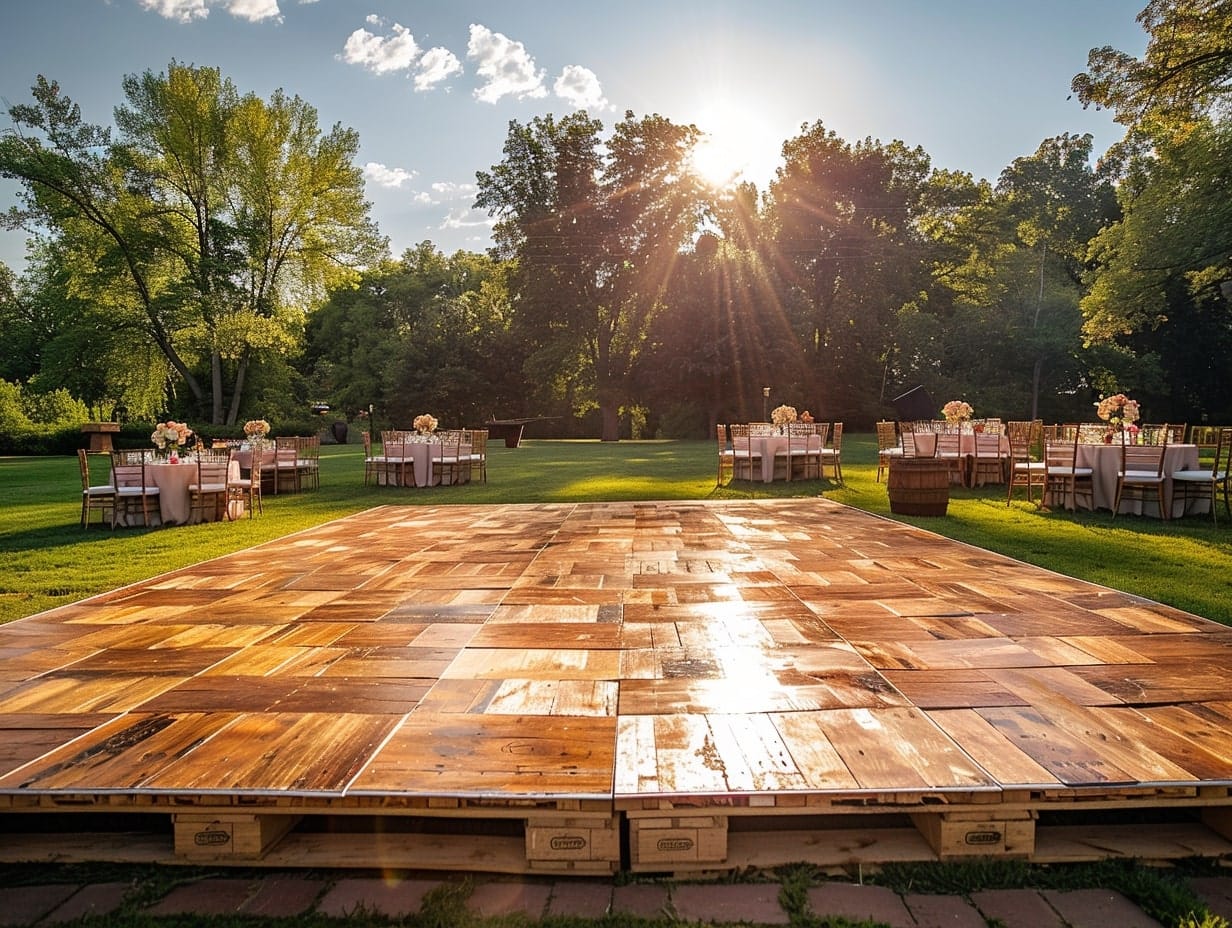
Place pallets so the dance floor looks balanced. You can create squares or rectangles. Use extra pallets for edges or corners. Make sure the surface is flat and secure.
Assembling The Pallet Dance Floor
Assembling the pallet dance floor is a key step in creating a sturdy and safe space to dance. Careful joining of pallets ensures the floor stays together during use. Proper leveling makes the surface even, avoiding trips and falls. Follow these steps to build a reliable dance floor from pallets.
Securing Pallets Together
Place pallets side by side on a flat surface. Use screws or nails to join the pallets at the edges. Attach metal brackets underneath for extra strength. Check that each connection is tight. Avoid gaps between pallets by pushing them close. This keeps the floor steady and prevents movement.
Leveling And Stabilizing
Check the floor with a level tool to find uneven spots. Add shims or small wood blocks under low pallets. Adjust until all pallets are flat and even. Secure the shims to stop shifting. Add rubber pads under corners to reduce slipping. This step makes dancing safer and more comfortable.
Finishing Touches
Adding the finishing touches to your pallet dance floor makes it look complete and ready to use. These final steps protect the wood and enhance its style. They also make the dance floor safer and more inviting.
Applying Sealant Or Paint
Sealant protects the wood from moisture and wear. Choose a clear sealant to keep the natural wood look. Apply it evenly with a brush. Let it dry fully before use.
Painting the pallets adds color and personality. Use outdoor paint for durability. Pick colors that match your event or space. Apply two coats for better coverage. Allow time to dry between coats.
Adding Lighting Or Decorations
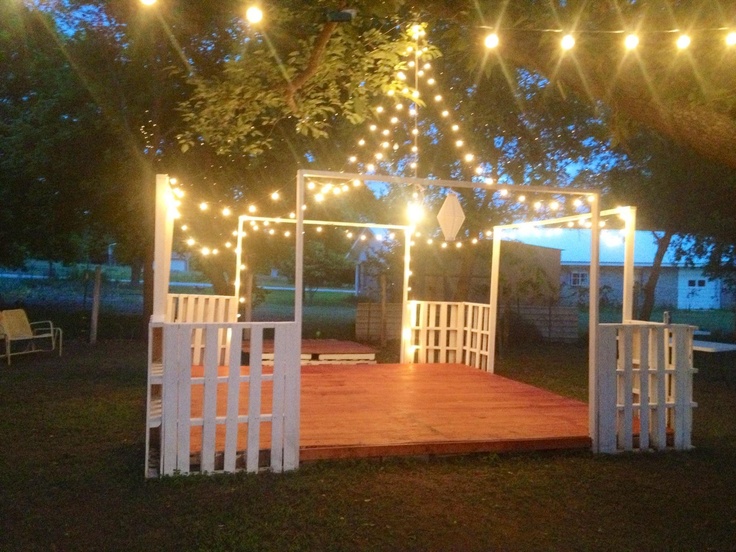
Lighting creates a fun and lively atmosphere. String LED lights around the edges. Use battery-powered or solar lights for easy setup. Soft lights add warmth without glare.
Decorations add charm and style. Place potted plants or flowers nearby. Use fabric or ribbons to soften the look. Keep decorations low to avoid tripping hazards.
Safety Tips For Your Diy Dance Floor
Creating a dance floor from pallets is a fun DIY project. Safety should be the top priority. A safe dance floor prevents accidents and injuries. Follow these tips to keep your dance area secure and stable.
Ensuring Stability
Check each pallet for cracks or weak spots. Only use sturdy pallets in good condition. Lay pallets on a flat, level surface to avoid wobbling. Secure pallets together using screws or brackets. Test the floor by stepping on it before use. Add extra support underneath if needed. Stability keeps dancers safe and confident.
Preventing Injuries
Sand all pallet surfaces to remove splinters. Smooth edges reduce the risk of cuts and scrapes. Use non-slip paint or mats to prevent slipping. Keep the dance floor clean from debris and dust. Avoid gaps between pallets that could trap feet. Clear the surrounding area to stop trips. Proper care protects everyone while dancing.
Credit: uniquepasticheevents.com
Maintenance And Storage
Keeping your pallet dance floor in good shape takes simple care. Proper maintenance and storage extend its life. It keeps the wood strong and safe for dancing. Follow easy steps after each use to clean and store pallets properly. This prevents damage and dirt buildup. It also helps you save money over time by avoiding repairs or replacements.
Cleaning After Use
Remove all dust and debris from the pallets. Use a broom or a dry cloth for light cleaning. For sticky spots, use a damp cloth with mild soap. Avoid soaking the wood to prevent warping. Let the pallets dry completely before storing. This stops mold and bad smells. Check for splinters or nails sticking out. Sand or fix these to keep the floor safe.
Storing Pallets Safely
Store pallets in a dry, covered area. Avoid places with high humidity or rain exposure. Stack pallets flat to keep them stable. Place wood blocks between layers for air flow. This prevents moisture buildup and wood warping. Keep pallets off the ground to avoid insects. Use a tarp or plastic cover if stored outside. This protects from dirt and weather damage.
Frequently Asked Questions
What Materials Do I Need To Make A Pallet Dance Floor?
You need wooden pallets, sandpaper, screws, a drill, and paint or varnish. These materials help build a smooth and sturdy dance floor.
How Do I Prepare Pallets For A Smooth Dance Surface?
Start by sanding the pallets to remove rough spots and splinters. This creates a safe and comfortable floor for dancing.
Can I Use Pallets Outdoors For A Dance Floor?
Yes, pallets can be used outdoors but must be weatherproofed. Apply sealant or paint to protect against moisture and wear.
How Do I Join Pallets To Create A Stable Floor?
Use screws or brackets to tightly connect pallets side by side. This prevents movement and creates a flat, stable surface.
How Long Does It Take To Build A Pallet Dance Floor?
Building time varies, but usually takes a few hours to a day. It depends on your experience and the size of the floor.
Conclusion
Building a dance floor from pallets is simple and fun. It saves money and adds a rustic touch. You only need basic tools and some effort. Pallets create a sturdy surface for dancing. You can customize the size and shape easily.
Try sanding and painting for a nicer look. It’s a great project for parties or events. Enjoy dancing on your unique, handmade floor. Give it a try and see the joy it brings!