
Are you looking to create a stylish bathroom vanity without spending a fortune? Using kitchen cabinets to build your own vanity is a smart and affordable way to upgrade your space.
You’ll get a custom look that fits your bathroom perfectly, and you might already have the perfect cabinet waiting to be transformed. In this guide, you’ll discover simple steps to turn kitchen cabinets into a beautiful, functional bathroom vanity. Ready to save money and add your personal touch?
Keep reading, and let’s get started!
Choosing The Right Kitchen Cabinets
Choosing the right kitchen cabinets is the first step in creating a bathroom vanity. Cabinets need to fit your space and style. They should also hold up well in a bathroom’s moist environment. The right choice makes the project easier and the final look better.
Cabinet Styles That Work Best
Simple cabinet styles work best for bathroom vanities. Flat-panel or shaker cabinets give a clean look. Avoid ornate designs; they can look too busy in a small space. Choose cabinets with doors that open smoothly and drawers that slide easily. This helps keep your bathroom organized.
Material Considerations
Materials must resist moisture and humidity. Solid wood can warp or swell in bathrooms. Choose plywood or MDF with a waterproof finish. Laminated cabinets also work well. Metal or PVC cabinets are good options for wet areas. Pick materials that last and need little maintenance.
Measuring For Your Space
Measure your bathroom space carefully before buying cabinets. Note the width, depth, and height available. Leave room for plumbing and fixtures. Check door clearance and walking space. Accurate measurements prevent costly mistakes and ensure a good fit.
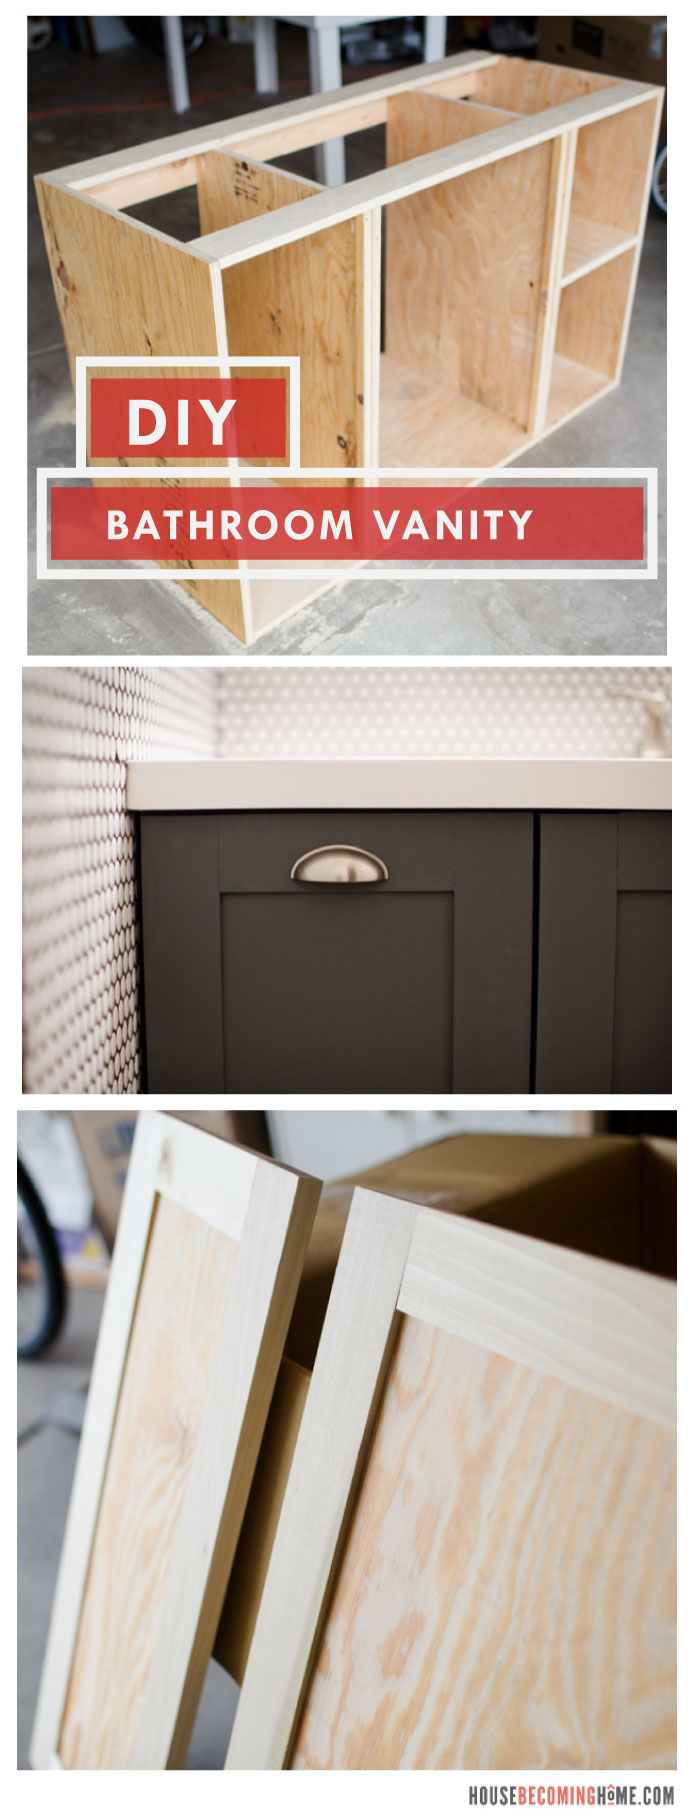
Credit: housebecominghome.com
Gathering Tools And Materials
Starting a bathroom vanity project with kitchen cabinets needs careful preparation. Gathering all the right tools and materials makes the work easier and faster. It helps avoid interruptions during the build. This step ensures you have what you need at hand.
Essential Tools For The Project
Gather basic tools like a drill and screwdriver. A saw is necessary to cut the cabinets to size. Measuring tape helps get exact dimensions. A level keeps the vanity straight. Clamps hold pieces together during assembly. Sandpaper smooths edges and surfaces for a clean finish.
Additional Supplies Needed
Grab screws and wood glue for strong joints. Paint or stain gives the vanity a fresh look. Primer helps paint stick better. Caulk seals gaps and prevents water damage. New hardware such as knobs or handles updates the style. Drop cloths protect floors from dust and spills.
Preparing The Cabinets
Preparing the cabinets is the first step in turning kitchen cabinets into a bathroom vanity. This stage sets the foundation for a smooth and successful project. It involves removing parts that are not needed and making the surface ready for a fresh look.
Removing Unnecessary Parts
Start by taking off any shelves, drawers, or hardware that will not fit the bathroom space. Cabinets often have larger compartments meant for kitchen storage. These parts can make the vanity bulky and hard to use in a bathroom.
Use a screwdriver to carefully remove handles, hinges, and any internal dividers. Keep the screws and hardware in a safe place in case you want to reuse them. Removing these parts helps create a clean base for your bathroom vanity.
Sanding And Refinishing
Next, sand the cabinet surfaces to remove old paint or varnish. Sanding also smooths out rough spots and prepares the wood for a new finish. Use medium-grit sandpaper to start, then switch to fine-grit for a smooth touch.
After sanding, wipe away dust with a damp cloth. Choose a finish that suits bathroom conditions, such as moisture-resistant paint or sealant. Apply the finish evenly and let it dry fully before moving to the next step.

Credit: posadaruralsobrevilla.com
Modifying Cabinets For Bathroom Use
Modifying kitchen cabinets for bathroom use requires careful adjustments. Cabinets need changes to fit bathroom plumbing and height needs. These changes make the cabinet functional and safe for bathroom use.
Adjusting Cabinet Height
Bathroom vanities are usually shorter than kitchen cabinets. Kitchen cabinets often measure 36 inches tall. Bathrooms typically need cabinets around 32 inches. Lowering the cabinet height improves comfort and usability. Use a saw to trim the cabinet base carefully. Sand the cut edges to prevent splinters. Check the cabinet level after cutting. Adjust the legs or add shims as needed. This step ensures the vanity sits flat on the floor.
Cutting For Plumbing Access
Bathroom sinks need space for pipes and drains. Kitchen cabinets do not have this space by default. Mark the back panel of the cabinet where pipes will go. Use a jigsaw to cut holes for plumbing. Make holes big enough for easy pipe installation. Smooth the cut edges with sandpaper. Check the fit by placing the pipes through the holes. Proper cuts prevent damage and allow easy maintenance later.
Installing The Vanity Top
Installing the vanity top is an important step in turning kitchen cabinets into a bathroom vanity. It gives the vanity a finished look and makes it functional. The right top adds style and durability to the bathroom space.
Measure carefully before you begin. The vanity top must fit perfectly on the cabinets. A well-installed top will last longer and look better.
Choosing A Vanity Top
Pick a vanity top that matches your bathroom style. Popular materials include quartz, granite, and laminate. Each offers different looks and durability levels.
Consider the size of your vanity. The top should cover the cabinets without hanging over too much. Also, check the sink type you want. Some tops come with pre-cut holes for sinks.
Think about maintenance. Some materials need more care than others. Choose one that fits your cleaning routine and budget.
Securing The Vanity Top
Place the vanity top carefully on the cabinets. Make sure it sits flat without any gaps. Use a level to check the surface.
Apply a bead of silicone caulk along the cabinet edges. This helps seal the vanity top and prevents water damage. Press the top firmly into place after applying the caulk.
Secure the top with screws or brackets if needed. These hold the top steady during use. Be careful not to crack the top while fastening.
Wipe away any excess caulk before it dries. Let the caulk cure fully before using the vanity. This ensures a strong and water-tight bond.
Adding Bathroom Fixtures
Adding bathroom fixtures to your vanity made from kitchen cabinets brings it to life. This step turns a simple cabinet into a functional bathroom centerpiece. The right fixtures make your space stylish and practical.
Focus on installing the sink, fitting the faucet, and connecting plumbing. Each task needs care and basic tools. Follow clear steps to avoid common mistakes and ensure everything fits well.
Installing The Sink
Choose a sink that fits your cabinet cutout. Place it carefully to check alignment. Use silicone sealant around the edges to prevent water leaks. Secure the sink with clips or brackets under the cabinet. Let the sealant dry before moving to the next step.
Fitting The Faucet
Select a faucet that matches your sink holes. Insert the faucet stems into the holes. Tighten the mounting nuts from below the sink. Attach the faucet handles and spout. Test the faucet for stability and correct operation before connecting water lines.
Connecting Plumbing
Attach supply lines to the faucet’s hot and cold inlets. Use plumber’s tape on threads to prevent leaks. Connect the drain pipe to the sink drain. Secure all connections tightly but avoid over-tightening. Turn on the water supply and check for leaks. Fix any drips before finishing the job.
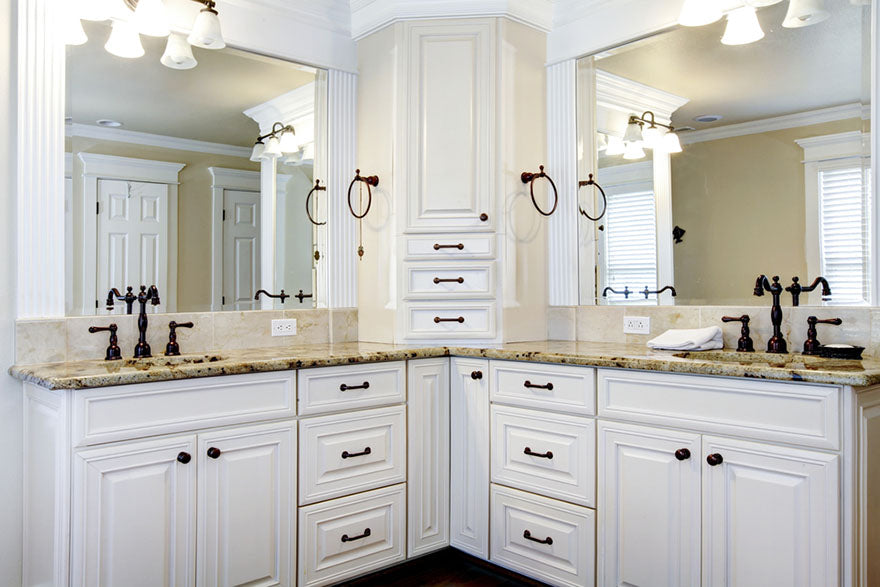
Finishing Touches
Finishing touches make your bathroom vanity look complete and polished. These small details protect the cabinet and add style. Spend time on this step to ensure your vanity lasts long and fits your bathroom’s look.
Sealing And Waterproofing
Protect the wood from water damage by sealing all surfaces. Use a waterproof sealant designed for bathrooms. Apply it evenly on edges, corners, and any exposed wood. Let it dry completely before using the vanity. This step prevents warping and mold growth.
Adding Hardware
Choose handles and knobs that match your bathroom’s style. Measure and mark where each piece goes for even spacing. Attach hardware securely with screws. Hardware improves function and adds a decorative touch. Pick finishes like chrome or brushed nickel for a clean look.
Decorative Enhancements
Small decorations add personality to your vanity. Consider adding a backsplash behind the sink for extra protection. Paint or stain parts of the cabinet for contrast. Use decorative trim or molding for a refined finish. These simple changes make your vanity unique and stylish.
Credit: www.thewcsupply.com
Maintenance Tips
Maintaining a bathroom vanity made from kitchen cabinets keeps it looking fresh and working well. Regular care helps avoid damage and extends its life. Simple steps make maintenance easy and effective.
Cleaning And Care
Use a soft cloth to wipe the vanity every day. Mild soap and water work best for cleaning. Avoid harsh chemicals that can strip the finish. Dry the surface after cleaning to prevent water spots. Clean spills right away to stop stains.
Preventing Water Damage
Seal edges and joints with waterproof caulk to keep water out. Use a splash guard behind the sink area. Check for leaks regularly under the sink and fix them fast. Keep the cabinet doors open sometimes to air it out. Avoid placing wet items directly on wood surfaces.
Frequently Asked Questions
What Kitchen Cabinets Work Best For Bathroom Vanities?
Choose cabinets with durable materials like plywood or MDF. Avoid particleboard as it may warp with moisture. Cabinets with a simple design fit bathroom spaces well.
How Do I Adjust Cabinet Size For Bathroom Sinks?
Measure your sink and counter space carefully. Cut or trim cabinets to fit the sink and plumbing. Leave enough room for water pipes and fixtures.
Can I Use Kitchen Cabinet Doors For Vanity Drawers?
Yes, kitchen cabinet doors can be repurposed as vanity drawer fronts. Sand and refinish them to match your bathroom style. This keeps costs low and looks cohesive.
What Tools Do I Need To Build A Bathroom Vanity?
Basic tools include a drill, saw, screwdriver, measuring tape, and level. You might also need clamps and sandpaper for finishing. These tools help ensure a smooth build.
How Do I Protect Kitchen Cabinets From Bathroom Moisture?
Seal all surfaces with waterproof paint or varnish. Use weatherproof caulk around edges and joints. Proper sealing prevents damage from steam and water.
Conclusion
Transforming kitchen cabinets into a bathroom vanity saves money and adds style. It takes some planning and basic tools but is doable for many. Choose cabinets that fit your space and match your bathroom decor. Measure carefully and make simple changes like cutting or repainting.
This project gives your bathroom a fresh look without buying new furniture. With patience and effort, you can create a unique vanity that suits your needs. Start with small steps, and enjoy your new bathroom vanity soon.