
Are you ready to give your walls a stylish, clean finish with board and batten but unsure how to end it neatly at a corner? Getting the edges right can make all the difference between a professional look and something that feels unfinished.
You’ll discover simple, practical steps to wrap up your board and batten project with confidence. Whether you’re a DIY enthusiast or just starting out, you’ll learn exactly how to create sharp, seamless corners that boost your room’s charm. Keep reading, and you’ll master the technique that brings your walls to life.

Credit: www.youtube.com
Choosing The Right Corner Style
Choosing the right corner style is essential for a neat board and batten finish. Corners can change the look and durability of your siding. The style you pick affects how the boards fit together and how water drains off. This choice also impacts the ease of installation and the final appearance.
Inside Corners Vs Outside Corners
Inside corners happen where two walls meet inward, forming a 90-degree angle. They need careful trimming to avoid gaps. Outside corners are where walls meet outward, creating a corner that sticks out. These require extra protection to prevent damage from weather and bumps. Both types need a clean, tight fit for a smooth look.
Mitered Vs Butt Joints
Mitered joints cut boards at an angle to fit tightly at corners. This style offers a sharp, polished look but needs precise cuts. Butt joints simply but one board against another. This method is easier and faster but may look less refined. Choose based on your skill level and the look you want.
Using Corner Boards
Corner boards cover and protect the edges at outside corners. They hide cuts and joinery for a clean finish. These boards add strength and guard against water damage. Corner boards come in various sizes and styles to match your siding. They help keep the board and batten siding looking crisp and lasting longer.
Preparing Materials And Tools
Preparing the right materials and tools sets the stage for a smooth board and batten installation. This step helps avoid mistakes and saves time. Careful selection and preparation make the corner finish look neat and professional.
Selecting Quality Wood And Batten
Choose wood that resists warping and splitting. Cedar and pine are common choices for batten boards. Make sure the wood is dry and smooth. Check for knots or cracks that may weaken the boards. Quality wood ensures lasting durability and a clean look.
Essential Tools For Clean Cuts
Use a miter saw for precise angle cuts at corners. A tape measure helps keep measurements accurate. A pencil or chalk line marks cutting points clearly. Sandpaper smooths rough edges for a polished finish. Keep all tools sharp and ready for use.
Measuring And Marking Tips
Measure twice before cutting to avoid waste. Mark cut lines clearly with a pencil or marker. Use a square tool for straight, right-angle lines. Account for overlap at corners to ensure tight joins. Accurate marking helps boards fit perfectly at corners.
Cutting And Fitting Techniques
Cutting and fitting board and batten at corners needs skill and care. Proper techniques help create clean, strong joints. These techniques prevent gaps and misalignment. They ensure the battens look neat and last long. Let’s explore key cutting and fitting methods to use.
Making Accurate Miter Cuts
Miter cuts create angled edges that fit tightly together at corners. Use a miter saw or a miter box for precise cuts. Measure the angle carefully, usually 45 degrees for standard corners. Mark the cutting line clearly before cutting. Cut slowly to avoid splintering wood. Check the fit before attaching the boards.
Creating Flush Butt Joints
Flush butt joints join board ends without angles. Cut the boards straight and square. Use a speed square to check the cut. Align the boards so their faces are even. Clamp them firmly to avoid gaps. Nail or screw the boards to secure the joint tightly. Sand the joint lightly for a smooth finish.
Handling Irregular Corner Angles
Some corners are not exactly 90 degrees. Measure the angle with a protractor or angle finder. Adjust the miter saw to match the exact angle. Cut one board at the measured angle. Cut the second board to complement the first. Test the fit and trim if needed. Patience is key to a good finish here.

Credit: hanashappyhome.com
Installing The Board And Batten
Installing board and batten brings charm and texture to walls. This process needs care to ensure the boards and battens fit well. The right installation makes the corner neat and strong. Follow clear steps to get the best look.
Pay attention to securing boards, aligning battens, and choosing the right fasteners. Each part matters for a smooth finish and long-lasting hold.
Securing Boards To The Wall
Start by measuring and cutting the boards to size. Hold each board against the wall firmly. Use a level to keep them straight. Secure boards with screws or nails into wall studs. This ensures boards stay in place over time.
Aligning Battens For A Seamless Look
Place battens evenly over the boards. Check the gaps to keep them consistent. Use a level to keep battens vertical and aligned. Proper alignment hides joints and creates a clean, seamless look. Take time to adjust before fixing battens permanently.
Using Nails Vs Adhesives
Nails provide strong hold and are easy to use. They allow adjustments during installation. Adhesives create a clean surface without nail holes. They work well for smooth walls but need curing time. Sometimes, use nails and adhesives together for extra strength.
Finishing Touches For Durability
Finishing touches are key for a long-lasting board and batten corner. These steps protect the wood from weather and wear. Proper finishing keeps your installation looking great over time. Small efforts here save you from costly repairs later.
Caulking And Sealing Gaps
Fill all gaps between boards with a good exterior caulk. This stops water from seeping in and causing damage. Use a paintable, flexible caulk to handle wood movement. Smooth the caulk with a wet finger for a clean look. Sealing gaps prevents rot and keeps insects out.
Sanding And Smoothing Edges
Sand all edges and corners to remove rough spots and splinters. Smooth edges help paint stick better and last longer. Use fine-grit sandpaper to avoid damage. Take care around corners to keep the shape neat. Well-sanded edges improve the overall appearance.
Painting And Staining Tips
Choose a high-quality exterior paint or stain for protection. Apply a primer if you use paint to improve adhesion. Paint or stain all sides of the boards, including edges. Use at least two coats for strong coverage. This shields the wood from sun and moisture damage.
Common Mistakes To Avoid
Ending board and batten at a corner looks simple but can be tricky. Many make common mistakes that hurt the final look and durability. Avoid these to get clean, sharp corners that last long. Focus on alignment, spacing, and materials for the best result.
Misaligned Corners
Misaligned corners make the whole wall look off. Battens should meet neatly at the corner without gaps or overlaps. Check the angle carefully before attaching. Use a level and square to keep everything straight. A small mistake here affects the entire project’s quality.
Uneven Batten Spacing
Uneven spacing between battens creates a messy appearance. Measure spaces before nailing the battens. Keep the gaps consistent for a balanced look. Uneven gaps confuse the eye and reduce the style’s charm. Take your time to mark and check the distances.
Poor Material Choice
Using the wrong materials causes faster wear and damage. Choose wood or materials designed for outdoor use. Avoid soft woods that warp or rot quickly. Good material resists weather and keeps the corner sharp. Quality materials save money on repairs later.
Alternative Corner Treatments
Alternative corner treatments provide unique ways to finish board and batten corners. These options offer style and protection. They also help hide uneven edges and prevent water damage. Choose the right treatment to fit your home’s style and needs.
Using Metal Corner Trim
Metal corner trim is a strong and clean option. It fits over the corner, covering the edges of the boards and battens. This trim resists moisture and weather damage. It also gives a modern look to the siding. Metal trim is easy to install and lasts a long time.
Decorative Corner Caps
Decorative corner caps add a classic touch to corners. They come in many shapes and designs. These caps cover the joint where boards meet. They create a finished and polished look. Caps can be painted to match the siding color. They protect corners from wear and tear.
Flexible Corner Molding
Flexible corner molding bends to fit different angles. This makes it perfect for rounded or irregular corners. It is made from materials like vinyl or rubber. The molding hides gaps and seals the corner. It provides a smooth and neat finish. Flexible molding is simple to cut and attach.
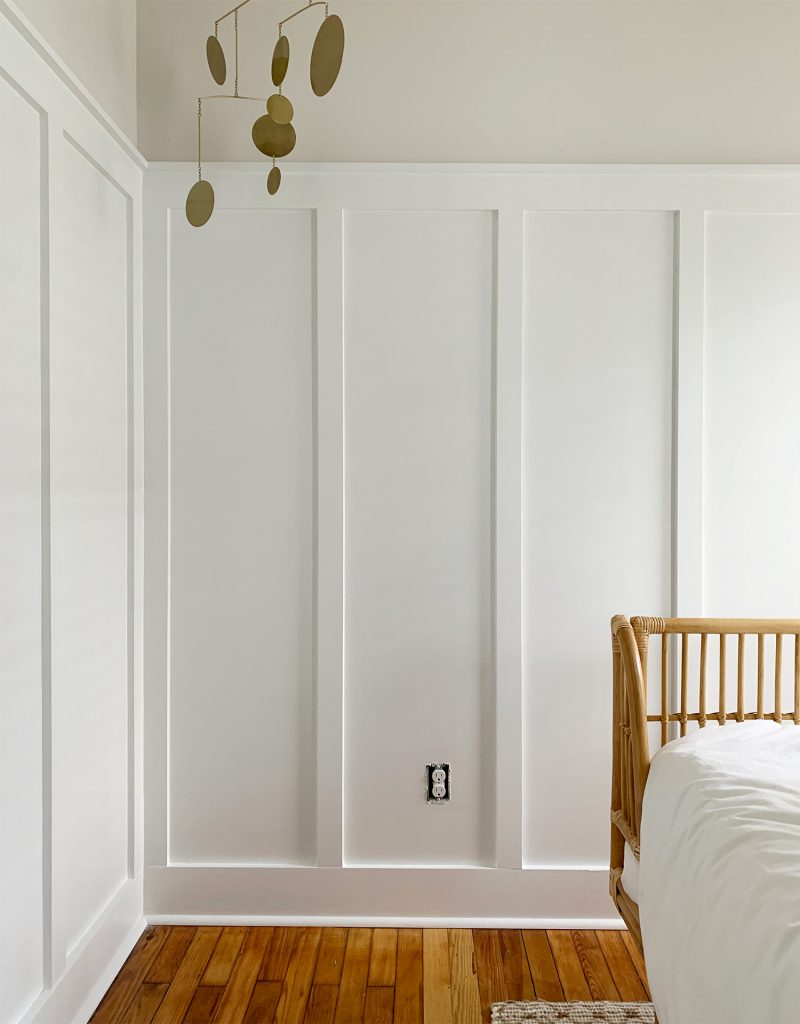
Credit: www.younghouselove.com
Frequently Asked Questions
How Do You Finish Board And Batten At An Outside Corner?
Use a corner board or trim piece to cover the joint. This hides gaps and makes the corner look neat. Secure it tightly to keep moisture out.
What Tools Are Needed To End Board And Batten Corners?
You will need a saw, measuring tape, nails or screws, and a level. A hammer or drill helps fasten pieces securely. Caulk can seal gaps for weatherproofing.
Can Board And Batten Corners Be Mitered For A Cleaner Look?
Yes, mitering the battens creates a sharp, clean corner. Cut boards at a 45-degree angle to fit snugly. This method takes more skill but looks polished.
How Do You Prevent Water Damage At Board And Batten Corners?
Seal all joints with exterior caulk to block water entry. Use weather-resistant paint or stain for added protection. Make sure corner boards fit tightly and slope slightly.
What Is The Best Wood Type For Board And Batten Corners?
Cedar and pine are popular for their durability and resistance to rot. They hold paint well and are easy to cut. Choose wood rated for outdoor use for best results.
Conclusion
Ending board and batten at a corner needs care and precision. Use the right tools to cut boards cleanly. Align the battens so they meet neatly at the corner. Seal gaps to keep moisture out. A good finish makes your wall look sharp and strong.
Take your time and check each step. This way, your project will last and look great. Simple steps, great results.