
Looking for a smart way to add extra seating and storage to your home? Building a storage bench with a hinged top is a simple project that anyone can tackle.
You’ll get a sturdy bench to sit on and hidden space to keep your things organized. Imagine how much clutter you can clear away with this handy piece. You’ll discover step-by-step instructions that make the process easy to follow. By the end, you’ll have a custom storage bench that fits your style and needs perfectly.
Ready to get started? Let’s dive in!
Materials And Tools
Before building a storage bench with a hinged top, gather the right materials and tools. Having everything ready helps the project go smoothly. Choose good quality items that suit your design and space. The right wood, hardware, and tools make a big difference in the final product.
Wood Selection
Select wood that is strong and easy to work with. Pine is a popular choice for beginners. It is affordable and has a smooth finish. For a more durable bench, consider hardwoods like oak or maple. These woods last longer and resist wear. Make sure the wood is dry and free from cracks. Using quality wood ensures your bench will hold weight well.
Hardware And Hinges
Choose sturdy hardware to keep the bench secure. Soft-close hinges prevent the lid from slamming shut. They add safety and comfort. Pick hinges that support the bench’s size and weight. Use screws that fit the wood thickness. Corner braces and handles can add stability and style. The right hardware helps the bench work well every day.
Required Tools
Prepare basic tools to make the build easier. A saw cuts the wood to size. A drill makes holes for screws and hardware. Sandpaper smooths the surfaces and edges. A screwdriver or drill bit tightens screws. A measuring tape keeps your cuts accurate. Clamps hold pieces together while you work. These tools help you build a neat, strong bench.
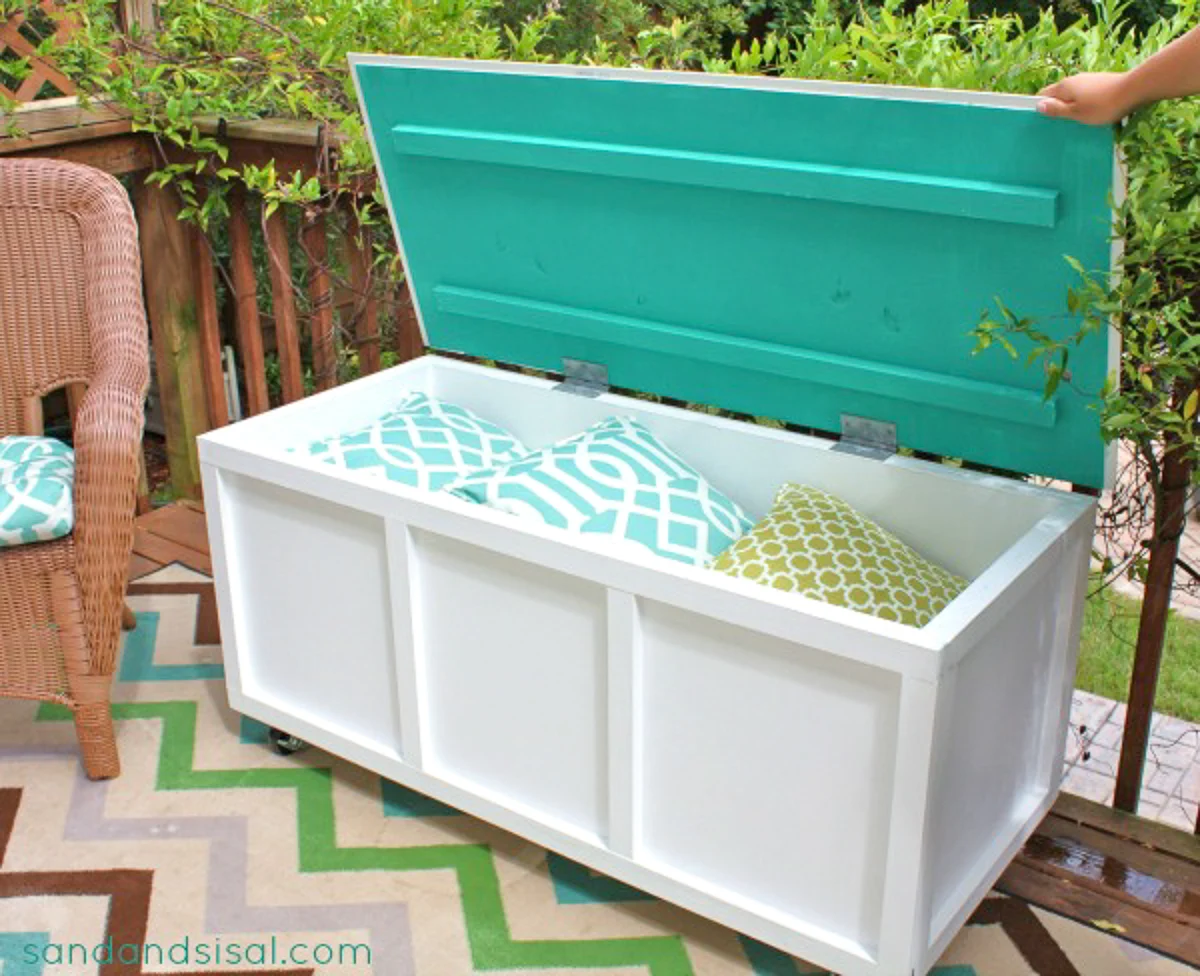
Credit: www.thehandymansdaughter.com
Planning Your Storage Bench
Planning your storage bench is the first step to a successful project. It sets the foundation for a bench that fits your space and needs. Careful planning saves time and materials later.
Think about where you want to place the bench. Consider the size of the area and what you want to store inside. This helps in choosing the right measurements and style.
Measuring And Dimensions
Start by measuring the space where the bench will go. Note the length, width, and height available. Leave some room around the bench for comfort and access.
Decide how much storage space you need inside. This guides the bench’s internal dimensions. Keep the bench height comfortable for sitting, usually around 18 inches.
Check doorways and hallways too. Make sure you can bring the bench inside without problems. Plan dimensions that suit your storage needs and room size.
Design And Style Choices
Choose a design that matches your room’s decor. A simple, clean style works well in most spaces. Think about the materials and colors you want to use.
Decide on the bench top. A hinged top offers easy access to storage. It also keeps your items hidden and dust-free.
Consider the type of hinges. Strong, smooth hinges last longer and work better. Add cushions or paint for extra comfort and style.
Cutting And Preparing Wood
Cutting and preparing wood is the first important step in building a storage bench with a hinged top. Precise cuts and smooth edges ensure the bench fits well and looks neat. Taking time here saves effort later.
Prepare your workspace and tools before starting. Make sure your wood pieces are ready to be measured and cut carefully. Safety is key, so wear protective gear and work slowly.
Marking And Measuring Cuts
Use a tape measure to get exact dimensions for each wood piece. Mark lines clearly with a pencil or chalk. Double-check all measurements before cutting.
Mark cuts on the wood surface where you will saw. Straight, clear lines help guide the saw accurately. Measure twice, cut once to avoid mistakes.
Sanding And Finishing Edges
After cutting, smooth all edges with sandpaper. This removes splinters and rough spots that could cause injury. Start with coarse sandpaper and finish with fine grit for a smooth touch.
Pay special attention to corners and cut ends. Clean edges improve the bench’s look and make it easier to handle. A good sanding job also helps paint or stain stick better.
Assembling The Bench Frame
Assembling the bench frame is the first step in building your storage bench. This part creates the strong base and sides that hold the entire bench together. A solid frame ensures your bench will last and support weight properly. Follow these steps carefully to build a sturdy frame that fits perfectly.
Building The Base And Sides
Start by cutting the wood pieces for the base and sides. Use sturdy boards for strong support. Arrange the base pieces on a flat surface. Attach the side boards to the base using wood screws or nails. Make sure the corners are square by checking with a carpenter’s square. Tighten the screws to hold everything firmly. The sides should stand straight and strong.
Attaching The Bottom Panel
Next, cut the bottom panel to fit inside the base frame. Place the panel on the inside bottom of the frame. Secure it with screws or nails spaced evenly. This panel will support the weight inside the bench. Check that the panel fits snugly and lies flat. A well-attached bottom panel adds stability to the whole bench.
Constructing The Hinged Top
Constructing the hinged top is a key step in building your storage bench. It allows easy access to the inside while keeping items safe. The top needs to fit perfectly and open smoothly.
Start by preparing the lid. Measure carefully to match the bench size. The lid should cover the entire opening without gaps. Next, attach the hinges to make the lid functional.
Cutting The Lid
Use a piece of wood that matches the bench’s width and length. Mark the exact dimensions on the wood with a pencil. Double-check the measurements before cutting. Use a saw to cut along the lines. Sand the edges to make them smooth. This helps avoid splinters and improves the lid’s look.
Installing Hinges
Choose hinges that fit the size and weight of the lid. Place the hinges evenly on one long side of the lid. Mark the screw holes with a pencil. Drill small pilot holes to prevent wood from splitting. Attach the hinges to the lid with screws. Then, fix the other side of the hinges to the bench frame. Test the lid by opening and closing it several times. Adjust the hinges if needed for smooth movement.
Adding Storage Features
Adding storage features to your bench makes it more useful and organized. It helps keep items neat and easy to find. Thoughtful storage design improves both function and appearance. Simple additions can create a practical space for many things.
Internal Dividers
Internal dividers split the storage area into sections. They keep items separated and prevent clutter. You can use wood or sturdy boards for dividers. Measure the space carefully before cutting the pieces. Attach dividers firmly to the bench base and sides. This creates compartments for tools, toys, or shoes. Dividers help you use the storage space better.
Optional Cushion Or Seat
Add a cushion or seat on top for comfort. It makes the bench a cozy place to sit. Use foam padding covered with fabric or vinyl. Secure the cushion to the lid or bench frame. Choose a fabric that is durable and easy to clean. A cushion adds style and extra function to your bench.
Finishing Touches
Finishing touches bring your storage bench to life. They protect the wood and enhance its beauty. A well-finished bench looks great and lasts longer. This part of the project needs care and patience. Let’s explore two key steps: painting and staining, then sealing and protecting wood.
Painting And Staining
Painting gives your bench color and personality. Choose a color that fits your room’s style. Use a brush or roller for smooth coverage. Let each coat dry fully before adding the next. Two or three coats often work best.
Staining shows off the wood grain. It adds warmth and depth to the bench. Test the stain on a small wood piece first. Apply with a cloth or brush, wiping off extra. Stain dries fast, so work quickly and evenly.
Sealing And Protecting Wood
Sealing guards the wood from moisture and dirt. It also makes cleaning easier. Use a clear polyurethane or varnish for a strong finish. Apply with a fine brush in thin layers. Sand lightly between coats for smoothness.
Protection keeps your bench looking good for years. It stops scratches and wear from daily use. Choose a sealant fit for indoor furniture. Follow the instructions for best results and drying times.
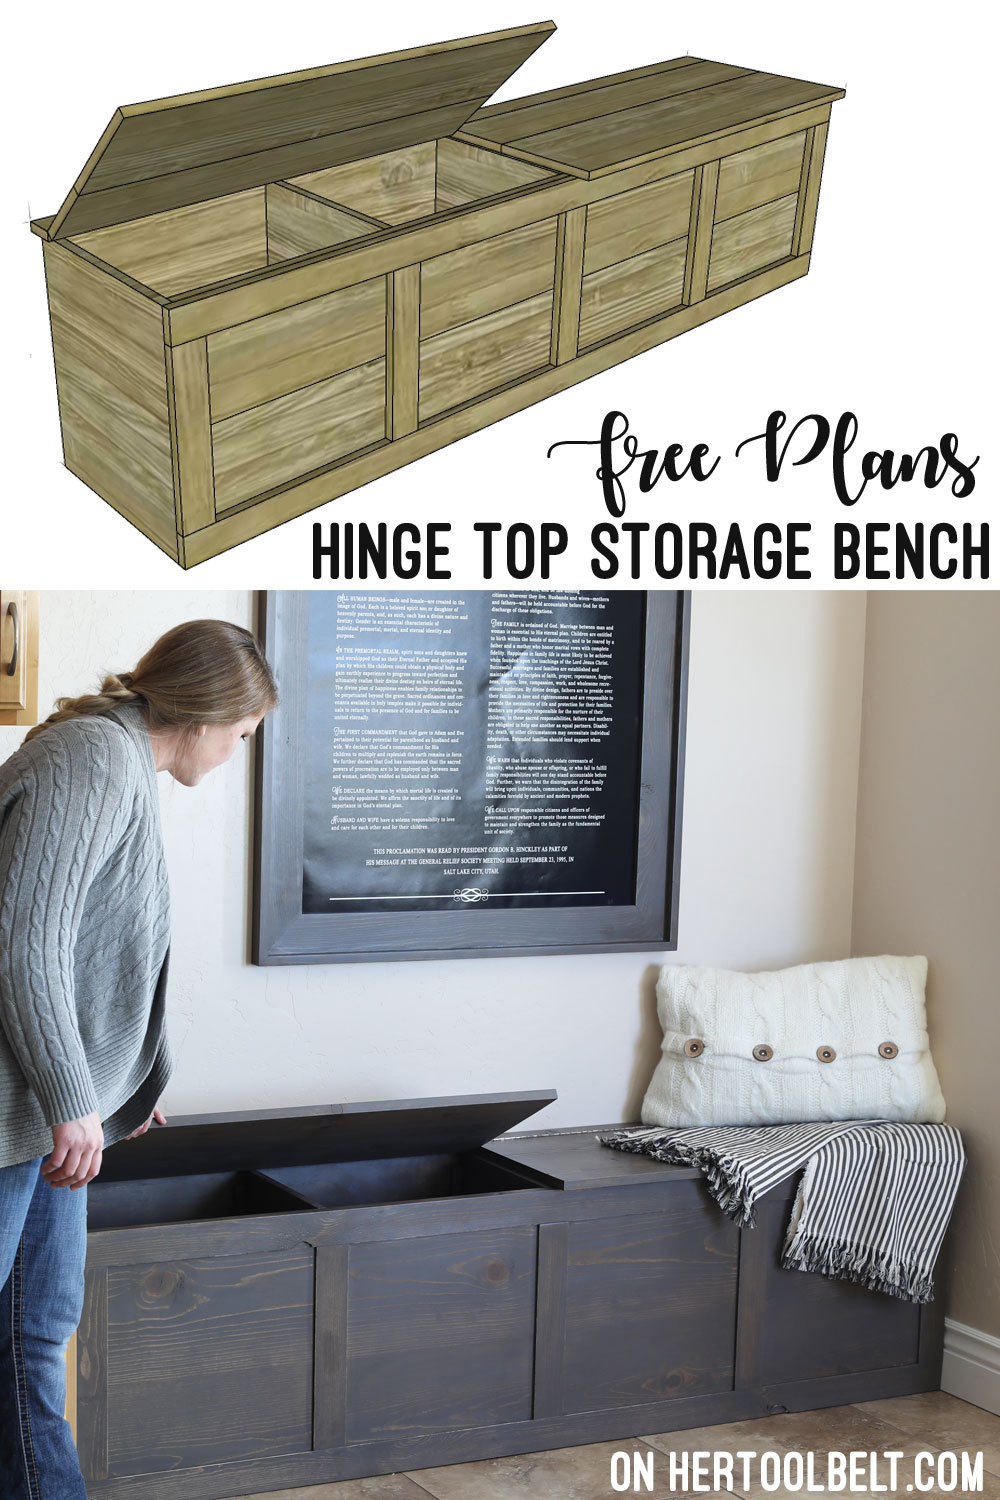
Credit: www.hertoolbelt.com
Safety Tips And Maintenance
Building a storage bench with a hinged top is rewarding and practical. Safety and maintenance ensure your project lasts long and works well. Proper care protects you and keeps the bench in good shape.
Safe Handling Of Tools
Always wear safety glasses and gloves before starting. Keep tools sharp and clean to work better and safer. Use tools only for their intended purpose. Store tools in a safe place after use. Never rush; work slowly and carefully. Make sure your work area is clean and well-lit.
Maintaining Your Bench
Check hinges regularly for loose screws and tighten them. Clean the bench with a soft cloth and mild soap. Avoid harsh chemicals that can damage the wood. Apply a fresh coat of paint or sealant every year. Keep the bench dry to prevent wood from warping. Fix any cracks or splits early to avoid bigger problems.

Credit: www.youtube.com
Frequently Asked Questions
What Materials Do I Need To Build A Storage Bench?
You need wood panels, hinges, screws, wood glue, and paint or stain. Choose durable wood like pine or oak for strength and appearance.
How Do I Install A Hinged Top On The Bench?
Attach hinges to the back edge of the bench top and the frame. Make sure the hinges are aligned for smooth opening and closing.
Can I Customize The Size Of My Storage Bench?
Yes, you can adjust dimensions to fit your space and storage needs. Measure your area first and plan accordingly.
What Tools Are Necessary For Building A Storage Bench?
Basic tools include a saw, drill, screwdriver, measuring tape, and clamps. These tools help cut, assemble, and secure the bench parts.
How Do I Finish The Bench For Durability?
Apply paint, stain, or sealant to protect the wood from damage. Let each coat dry well for a lasting finish.
Conclusion
Building a storage bench with a hinged top is a useful project. You gain extra seating and hidden storage in one piece. The steps are simple and easy to follow. Choose the right materials and tools to start. Take your time to measure and assemble carefully.
A well-made bench lasts for years. Enjoy a tidy space and a new furniture piece. Try this project to add function and style at home.