
Are you looking to save space and add a unique touch to your room? Building bunk beds attached to the wall is a smart way to do just that.
Not only do they free up floor space, but they also create a sturdy, safe sleeping area your kids will love. Imagine having more room for play, study, or storage—all while giving your space a stylish upgrade. In this guide, you’ll find simple, step-by-step instructions that make the process easy, even if you’re new to DIY.
Keep reading to discover how you can transform your room with your own hands and create bunk beds that are both practical and eye-catching.
Choosing The Right Materials
Choosing the right materials is key to building strong bunk beds attached to the wall. The materials must support weight and stay safe over time. Quality materials make the project easier and the bed more durable. Focus on wood, tools, hardware, and safety gear. Each part plays a role in the final result.
Selecting Wood Types
Choose wood that is strong and easy to work with. Pine is affordable and common for bunk beds. Oak and maple are harder and last longer. Avoid soft woods like fir or spruce for support parts. Check for wood without cracks or knots. Smooth wood will prevent splinters and improve safety.
Required Tools And Hardware
Gather basic tools like a drill, screwdriver, saw, and level. Use screws designed for wood to ensure strong joints. Heavy-duty wall anchors or lag bolts hold the bed firmly to the wall. Include brackets and corner braces for extra support. These tools and hardware keep the bed stable and secure.
Safety Equipment Essentials
Wear safety glasses to protect your eyes from dust and wood chips. Use gloves to avoid splinters and cuts. A dust mask keeps harmful particles out of your lungs. Hearing protection helps when using power tools. Safety gear is vital to prevent injuries during the build.
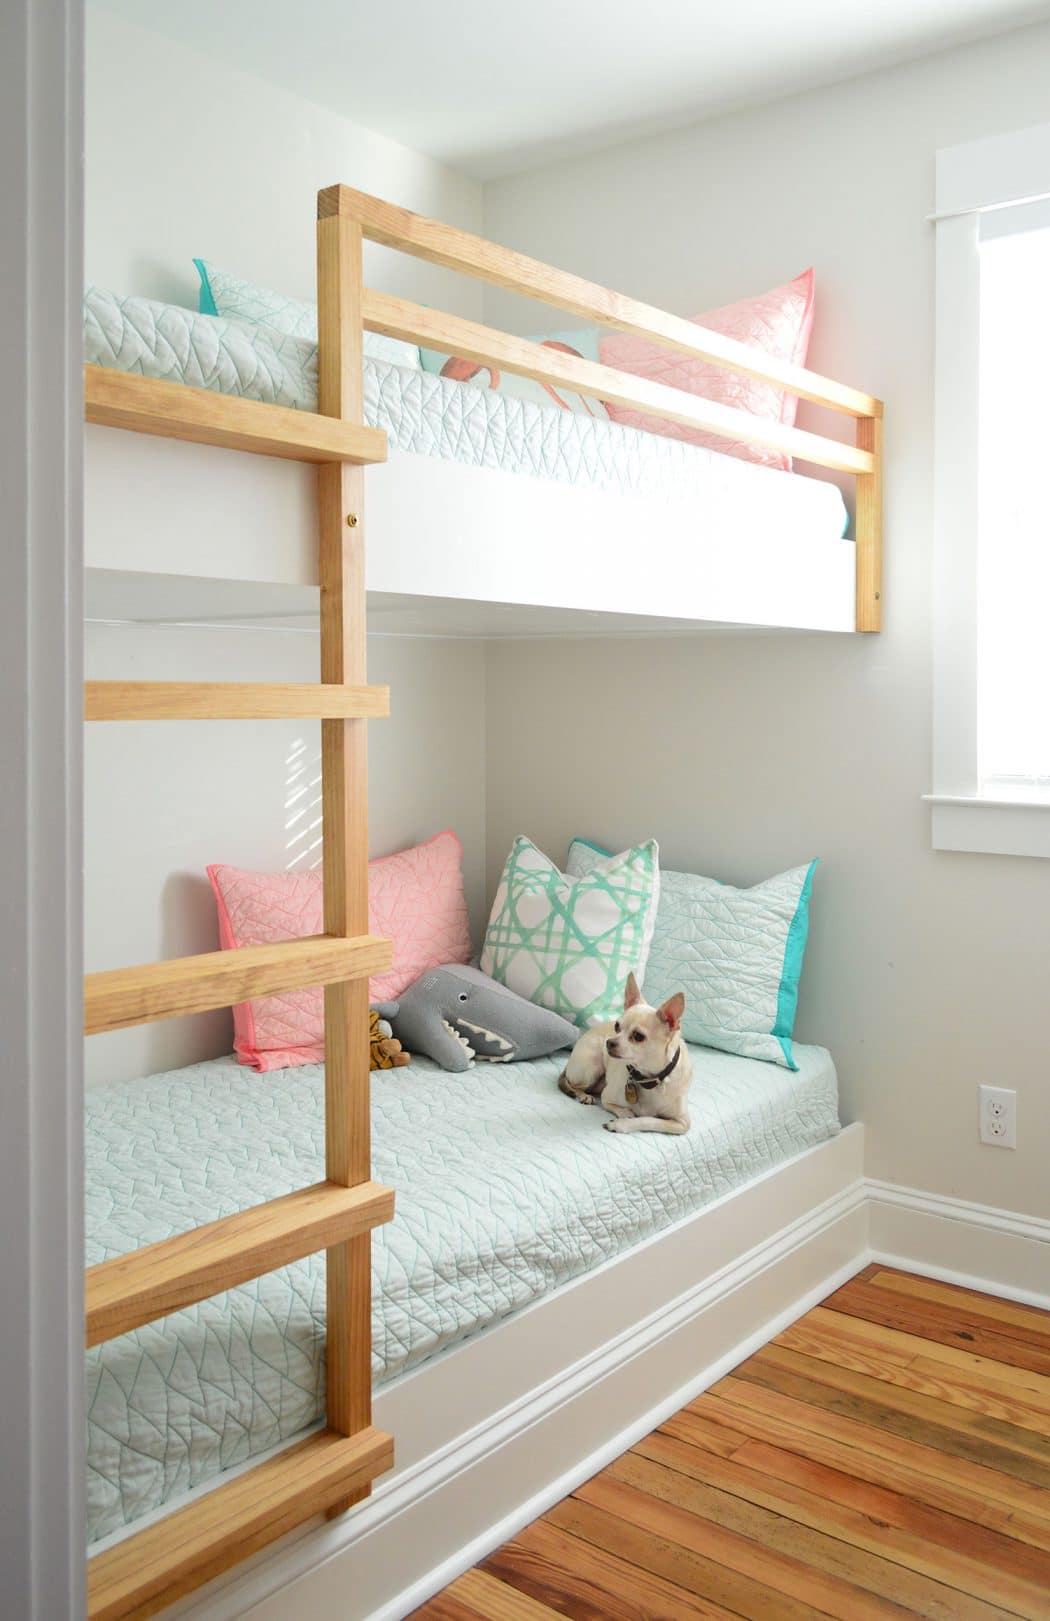
Credit: www.younghouselove.com
Planning Your Bunk Bed Design
Planning your bunk bed design is the first step to a safe and useful bed. It helps to save space and fit your needs perfectly. Good planning makes building easier and the final bed more comfortable. Think about the room and who will use the bed. This way, you create a design that works well and looks great.
Measuring Wall Space
Start by measuring the wall where you want the bunk bed. Use a tape measure to get exact width and height. Note any doors, windows, or outlets near the spot. This helps avoid problems during installation. Make sure the wall is strong enough to hold the bed. Mark the area clearly to guide your building process.
Deciding Bed Dimensions
Choose the right size for each bunk. Consider who will sleep on the beds and their comfort. Standard twin beds work well for most kids. Think about headroom between the top and bottom bunks. Leave enough space for sitting up and moving easily. Adjust the length if the room is small, but keep enough space for sleeping.
Incorporating Storage Options
Adding storage saves room and keeps things tidy. Think about shelves, drawers, or cubbies under the bed. Use the space at the foot or sides of the bed for storage. Built-in options look neat and use space well. Plan storage that fits what the user needs, like books, toys, or clothes. Make sure storage does not block access or make the bed unsafe.
Preparing The Wall And Workspace
Preparing the wall and workspace is a crucial step for building sturdy bunk beds attached to the wall. This stage ensures the beds will be safe and secure. It also helps avoid damage to the wall or floor during installation. Proper preparation makes the entire process smoother and faster.
Locating Wall Studs
Use a stud finder to locate the wall studs behind the drywall. Studs are the strong wooden beams that support the wall. Mark the stud locations with a pencil. These marks show where to attach the bunk bed frame. Attaching to studs provides the best support and safety.
Clearing And Protecting The Area
Remove all furniture and items near the wall. This creates enough space to work safely. Cover the floor with a drop cloth or old sheet. Protect the floor from dust, paint, and scratches. Keeping the area clean reduces accidents and helps focus on the task.
Marking Attachment Points
Measure and mark the exact points on the wall for the bed brackets. Use a level to keep the marks straight and even. Double-check measurements to avoid mistakes. Clear and accurate marks guide the drilling and fastening steps. This step ensures the bed hangs securely and evenly on the wall.
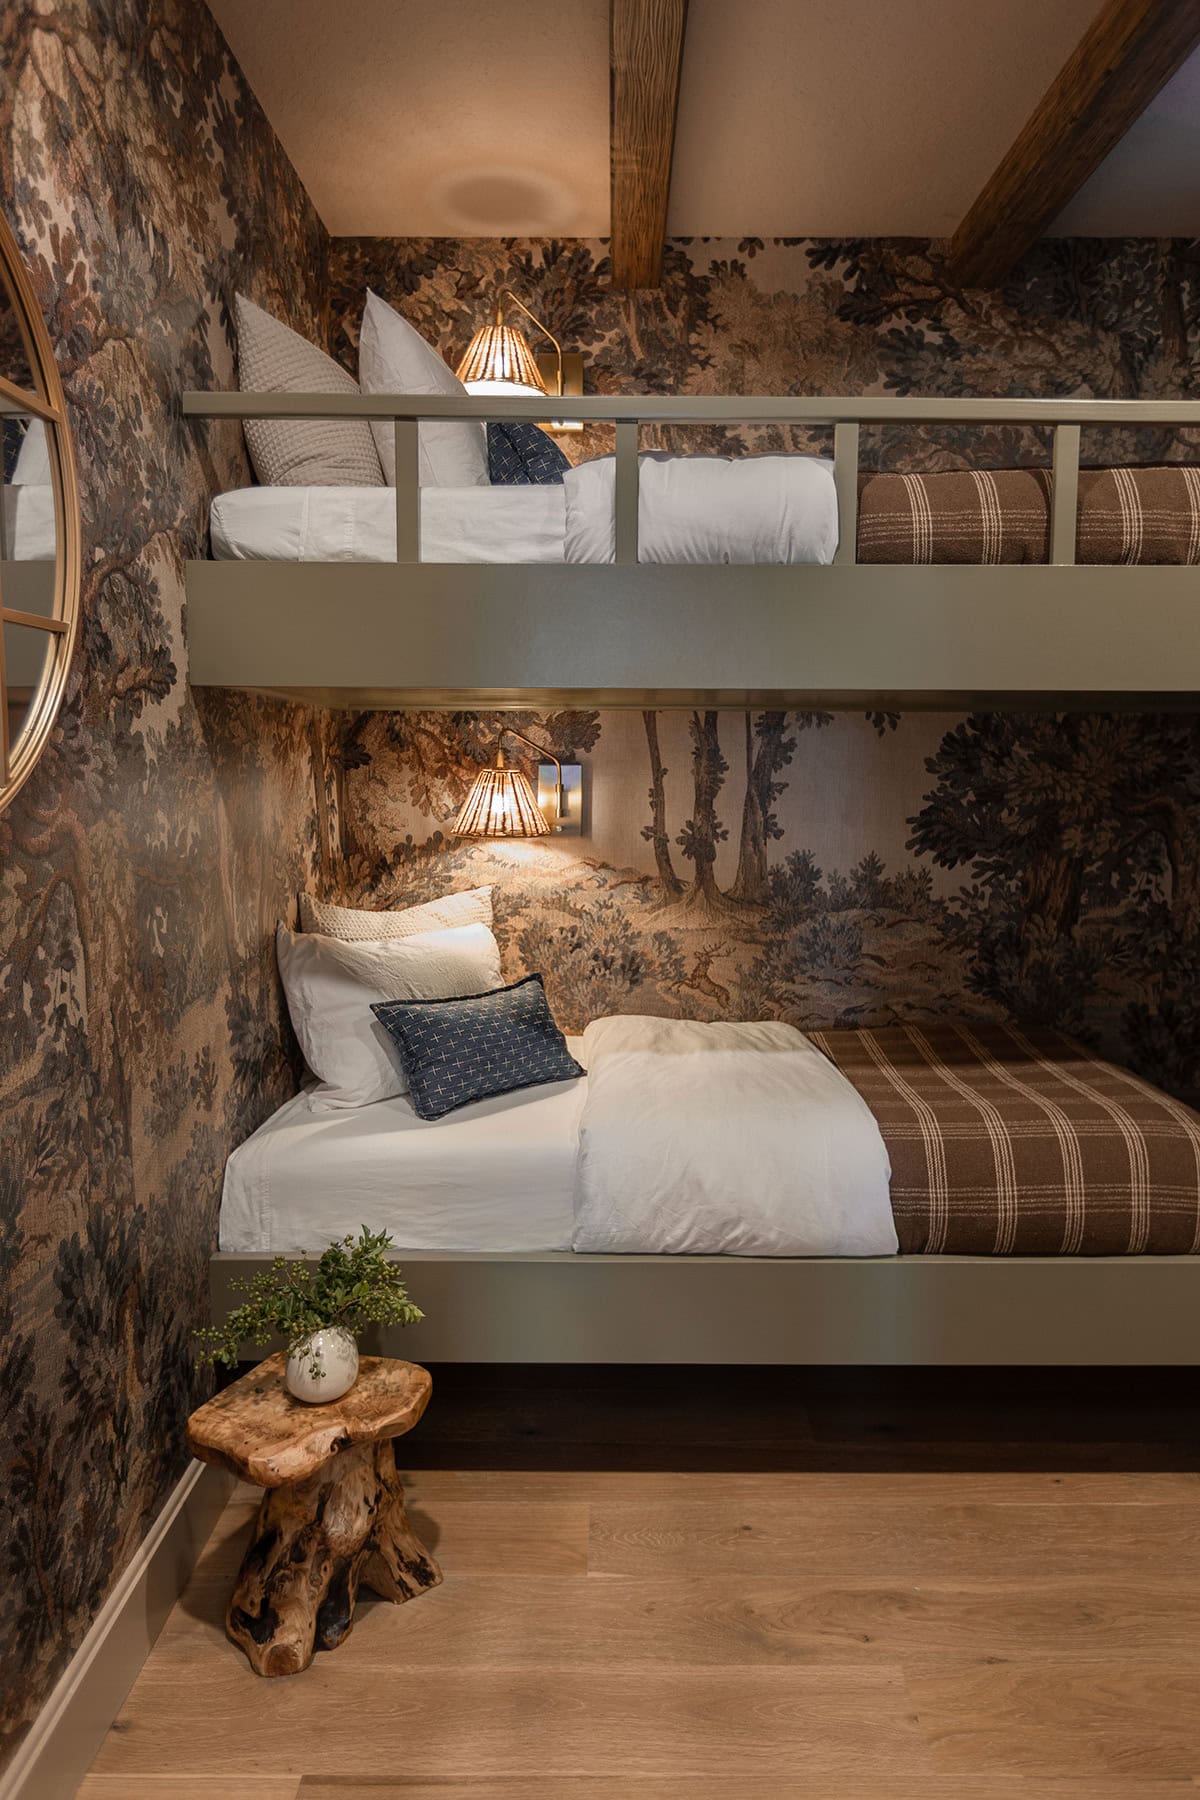
Credit: www.jennasuedesign.com
Building The Bed Frame
Building the bed frame is a key step in creating sturdy, wall-attached bunk beds. The frame supports the mattress and ensures safety. Strong materials and precise measurements are essential. Start by preparing all the wooden parts and tools for assembly.
Focus on accuracy to keep the bed stable. Each part must fit perfectly. The frame must hold weight without bending or shaking. Follow the steps carefully for a solid structure.
Cutting And Assembling Side Rails
Cut the side rails from solid wood boards. Measure twice, cut once. The rails should match the mattress size. Sand the edges smooth to avoid splinters.
Attach the rails using wood screws and brackets. Drill pilot holes first to prevent wood from splitting. Check that the rails are level and straight before tightening screws. The side rails form the backbone of the bed frame.
Constructing Bed Slats
Cut wooden slats to fit between the side rails. Space the slats evenly to support the mattress well. Use a tape measure for consistent gaps.
Secure the slats with screws or nails. Make sure they lie flat and do not wobble. Proper slat placement helps air flow and adds strength to the frame.
Creating Guardrails And Ladder
Build guardrails to prevent falls from the top bunk. Use sturdy wood pieces and attach them securely to the side rails. The guardrails should be tall enough to keep sleepers safe.
Construct a ladder that fits the bed height. Cut steps wide enough for safe footing. Attach the ladder firmly to the bed frame or wall. Test its stability before use.
Attaching The Bunk Bed To The Wall
Attaching a bunk bed to the wall is a key step for safety and durability. It stops the bed from moving or tipping over. This makes the sleeping space secure for children or guests. Follow clear steps to attach the bed frame firmly and safely. Use the right tools and materials for strong support. Check the bed’s stability after installation to ensure safety.
Using Anchors And Brackets
Start by choosing heavy-duty wall anchors and brackets. These support the weight of the bunk bed and its occupants. Mark the wall where the bed frame will touch. Drill holes for the anchors at the marked spots. Insert the anchors securely to hold screws tightly. Attach brackets to the bed frame and wall using screws. Make sure brackets fit flush against the wall and frame.
Securing The Frame Safely
Align the bunk bed frame with the attached brackets on the wall. Insert screws through the bracket holes into the frame. Tighten screws firmly but avoid over-tightening to prevent damage. Check that the frame sits evenly and does not wobble. Use additional brackets if the bed is long or heavy. This adds extra support and spreads the weight evenly.
Double-checking Stability
Push the bed frame gently from different angles. The bed should stay firmly in place without shifting. Check all screws and anchors to ensure they are tight. Use a level to confirm the bed is perfectly horizontal. Repeat tightening any loose screws or anchors. A stable bunk bed means safer sleep for everyone.
Finishing Touches
Finishing touches make your wall-attached bunk beds safe and beautiful. These final steps protect the wood, add comfort, and ensure safety. They also help your bunk beds last longer and look great in the room. Follow these simple steps to complete your project perfectly.
Sanding And Painting
Start by sanding all wood surfaces smooth. Use medium then fine sandpaper for the best finish. Sanding removes rough spots and splinters that can hurt skin. Clean off dust before painting.
Choose paint or stain that matches your room’s style. Use non-toxic paint for children’s safety. Apply two coats for full coverage. Let each coat dry completely. Painting protects the wood from moisture and damage.
Adding Mattresses And Bedding
Pick mattresses that fit your bunk bed frames exactly. Measure carefully to avoid gaps. Use firm mattresses for better support and safety. Add bedding that is soft and easy to wash. Choose colors and patterns your kids will love. Keep bedding simple to reduce clutter.
Installing Safety Accessories
Attach guardrails to the top bunk to prevent falls. Make sure rails are secure and tall enough. Add a sturdy ladder with wide steps for easy climbing. Check all screws and bolts for tightness. Use wall anchors to secure beds firmly to the wall. Safety accessories protect your children during sleep and play.
Maintenance And Safety Tips
Keeping your wall-attached bunk beds safe and strong needs regular care. This care helps stop problems early. It also keeps the beds steady and safe for use. Follow simple steps to check and fix your bunk beds. This keeps them good for years.
Regular Inspection Checklist
Check the bed frame for cracks or splits in the wood. Look at the wall brackets for any signs of bending or rust. Make sure the ladder steps are firm and not loose. Inspect the mattress supports to see if they hold tight. Look under the bed for any signs of wear or damage. Check that the bed is still firmly attached to the wall. Do this inspection every month or after rough use.
Tightening Hardware
Use a screwdriver or wrench to tighten all screws and bolts. Focus on wall brackets, bed frame joints, and ladder screws. Loose hardware can cause the bed to wobble or fall. Tightening these parts keeps the bed strong and steady. Do this check every few weeks for safety.
Preventing Common Issues
Avoid placing heavy items on the upper bunk to stop strain. Teach kids to climb the ladder carefully and not jump on the bed. Use guardrails on the top bunk to prevent falls. Keep the area around the bed clear to avoid accidents. Replace any worn parts immediately to keep the bed safe. Clean the bed frame to stop dust build-up that can hide damage.
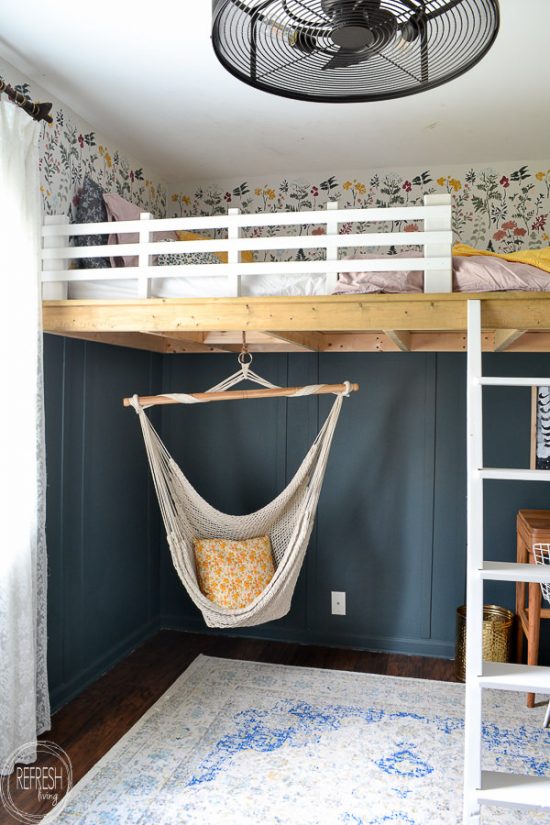
Credit: refreshliving.us
Frequently Asked Questions
How Do I Safely Attach Bunk Beds To A Wall?
Use strong brackets and anchors designed for your wall type. Securely screw the bed frame to studs for stability. Double-check all connections before use.
What Materials Are Best For Building Wall-attached Bunk Beds?
Solid wood or metal frames work best for strength and durability. Use quality screws, brackets, and anchors to ensure safety. Avoid particleboard or weak materials.
How Much Space Should I Leave Between The Bunk Bed And Wall?
Keep a small gap of about 1 to 2 inches to prevent wall damage. This also allows for air circulation and easy cleaning. Ensure the bed frame is still firmly attached.
Can I Build Bunk Beds On My Own Without Professional Help?
Yes, with basic tools and clear instructions, you can build them yourself. Take your time and follow safety steps closely. Ask a friend for help when needed.
What Tools Are Needed To Build Bunk Beds Attached To A Wall?
You will need a drill, screwdriver, measuring tape, level, and stud finder. Safety gear like gloves and goggles is also important. These tools help ensure a secure build.
Conclusion
Building bunk beds attached to the wall saves space and adds safety. Follow clear steps and use strong materials for best results. Check measurements carefully before drilling or fixing parts. Secure the beds firmly to avoid any accidents. Take your time and stay patient throughout the process.
This project can make any room look neat and organized. Enjoy the extra space and comfort that wall-mounted bunk beds provide.