
Are you ready to add a touch of charm and elegance to your home? Learning how to make a wooden arch door frame is easier than you might think.
This simple yet stunning feature can transform any doorway, giving your space a warm, inviting feel. You’ll discover step-by-step instructions that anyone can follow, even if you’re new to woodworking. By the end, you’ll have the confidence and know-how to create a beautiful arch door frame that will impress your family and friends.
Keep reading—you’re about to unlock a skill that brings both style and value to your home.
Choosing The Right Wood
Choosing the right wood is key to making a strong wooden arch door frame. The wood affects the look, strength, and life of the door. This guide explains how to pick the best wood for your project.
Types Of Wood For Door Frames
Hardwoods like oak, maple, and cherry are popular for door frames. They are strong and have a nice finish. Softwoods like pine and cedar are easier to cut and shape. Cedar resists rot and insects, making it good for outside doors. Choose wood that fits your style and use.
Wood Quality And Durability
Look for wood that is straight and free of cracks or knots. Knots can weaken the frame. Check the moisture content; dry wood is less likely to warp. Durable wood lasts longer and needs less repair. Think about weather exposure if the door is outside.
Where To Buy Wood
Buy wood from local lumber yards or home improvement stores. These places offer many wood types and grades. You can also find quality wood online. Always check the wood before buying. Good wood makes building easier and the final door better.

Credit: www.om-home-garden.com
Tools And Materials Needed
Making a wooden arch door frame requires specific tools and materials. Having the right items ready makes the project easier and safer. This section lists all you need before starting.
Essential Tools
- Measuring tape for accurate dimensions
- Pencil for marking cut lines
- Circular saw or jigsaw for cutting wood
- Clamps to hold pieces steady
- Chisel for fine shaping
- Hammer for nailing parts together
- Power drill with bits for screws
- Wood file or sandpaper to smooth edges
- Square tool for right angles
Additional Supplies
- Wood boards (choose hardwood for durability)
- Wood glue for strong joints
- Wood screws or nails
- Wood stain or paint for finishing
- Sealant to protect from moisture
- Template or pattern for the arch shape
Safety Equipment
- Safety goggles to protect eyes
- Ear protection from loud tools
- Dust mask to avoid inhaling sawdust
- Work gloves to protect hands
- Proper footwear for a stable stance
Measuring And Planning
Measuring and planning are the first steps to build a wooden arch door frame. This stage helps avoid mistakes and saves wood. Careful measurement ensures the arch fits the doorway perfectly. Planning the design guides each cut and joint. Proper preparation leads to a smooth building process and a strong frame.
Taking Accurate Measurements
Start by measuring the height and width of the doorway. Use a tape measure and write down the exact numbers. Measure at several points to check for any unevenness. Note the thickness of the wall where the arch will sit. Record all measurements clearly before moving on.
Sketching The Arch Design
Draw a simple sketch of the arch on paper. Mark the width and height based on your measurements. Decide on the shape of the arch: round, pointed, or flat. Use a compass or a flexible curve to create smooth lines. This sketch will guide your wood cutting later.
Calculating Wood Dimensions
Calculate the size of each wooden piece needed for the frame. Add extra length for joints and overlaps. Consider the thickness of the wood to keep the arch sturdy. Write down the length and width of each part. Double-check these numbers before buying or cutting wood.
Credit: www.archwaysandceilings.com
Cutting The Wood Pieces
Cutting the wood pieces is a key step in making a wooden arch door frame. The accuracy of your cuts affects the fit and look of the door frame. Careful measuring and cutting help create a strong, beautiful arch.
Each piece must match the design and size of your frame. You will cut straight parts and curved sections for the arch. Taking your time and using the right tools makes this easier and safer.
Marking Cut Lines
Start by measuring each wood piece carefully. Use a pencil to draw clear cut lines on the wood. Mark both straight and curved lines accurately. Use a ruler for straight lines and a template for curves. Double-check all marks before cutting.
Cutting Straight And Curved Sections
For straight cuts, use a handsaw or power saw. Follow the marked lines slowly and steadily. For curved cuts, a jigsaw works best. Move the jigsaw smoothly along the curve. Keep your hand steady to avoid rough edges. Always wear safety goggles during cutting.
Sanding Edges
After cutting, smooth all edges with sandpaper. Sand straight edges with a sanding block. For curved edges, use flexible sandpaper or a sanding sponge. Remove any splinters or rough spots. Smooth edges help the pieces fit better and look neat.
Assembling The Frame
Assembling the frame is a key step in building a wooden arch door frame. This part shapes the door’s structure and strength. Careful joining and securing ensure the frame holds well and looks neat. Follow each step to create a sturdy and smooth frame.
Joining Techniques
Start by fitting the wooden pieces together at the corners. Use simple joints like butt joints or miter joints for clean edges. Cut the wood precisely to match the arch curve. Check the fit before securing the pieces. Proper joints keep the frame steady and aligned.
Using Wood Glue And Screws
Apply wood glue along the joining edges for extra hold. Spread glue evenly to avoid gaps or weak spots. Insert screws to strengthen the bond. Drill pilot holes first to prevent wood splitting. Use screws long enough to grip both pieces firmly.
Clamping And Drying
Clamp the frame tightly after gluing and screwing. Clamps hold the wood in place while glue dries. Leave clamps on for at least one hour or as glue instructions say. Check the frame for any movement during drying. Remove clamps gently to keep the frame intact.

Credit: www.youtube.com
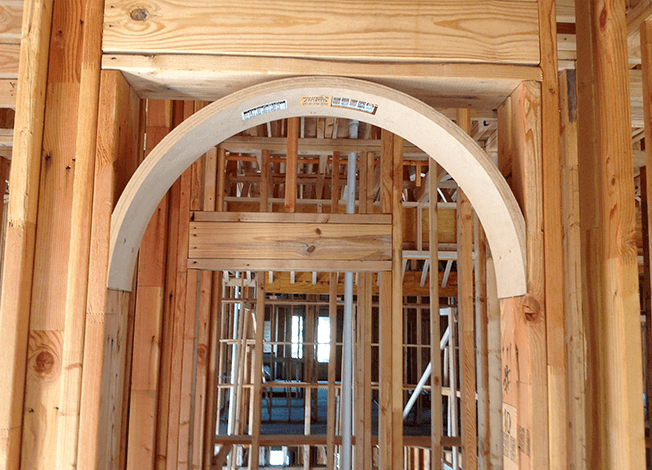
Creating The Arch Shape
Creating the arch shape for a wooden door frame requires careful planning and precise work. The arch gives the door a unique look and adds character to any room. The process involves shaping wood to form a smooth curve that fits the door opening perfectly.
Wood can be shaped in several ways. Choosing the right method depends on the tools and materials available. The goal is to achieve a strong, even arch that holds its form over time.
Bending Wood For The Arch
Bending wood is one of the most common ways to create an arch. Thin strips of wood are steamed or soaked in water to make them flexible. Once soft, the wood bends easily without cracking.
Use a form or mold to guide the wood into the arch shape. Clamp the wood in place until it dries and hardens. This process can take several hours or days, depending on the wood type.
Using Templates And Jigs
Templates and jigs help maintain consistent curves and angles. Create a template by cutting the arch shape from a piece of plywood or hardboard. This template acts as a guide for cutting or shaping the wood.
A jig holds the wood steady during cutting or bending. It ensures every arch piece matches perfectly. Using these tools saves time and reduces errors.
Securing The Arch
Once shaped, secure the arch frame to prevent movement. Use wood glue along the joints for extra strength. Nails or screws add mechanical support.
Check the arch for evenness before final fastening. Sand any rough edges to smooth the curve. Proper securing ensures the arch stays strong for years.
Finishing Touches
Finishing touches give your wooden arch door frame a clean, polished look. These steps make sure the frame looks great and lasts long. Focus on filling gaps, sanding smooth, and applying the right finish. Each step improves the overall quality and appearance.
Filling Gaps And Imperfections
Check the frame for any gaps or cracks. Use wood filler or putty to fill these spaces. Press the filler into gaps with a putty knife. Let it dry fully before moving on. This step hides flaws and strengthens the frame.
Sanding For Smoothness
Sand the entire frame with medium-grit sandpaper. Focus on the filled areas to even them out. Switch to fine-grit sandpaper for a smooth finish. Sand lightly along the wood grain. Clean off dust with a soft cloth before finishing.
Applying Stain Or Paint
Choose a stain or paint that matches your style. Apply thin, even coats using a brush or cloth. Let each coat dry completely before adding another. Stain highlights wood grain. Paint offers a solid color and protection. Finish with a clear sealant for durability.
Installing The Door Frame
Installing the wooden arch door frame is a key step in your project. It sets the foundation for the door’s strength and appearance. Careful work here ensures the frame fits well and lasts long.
Preparing The Door Opening
First, clean the door opening. Remove any old nails, debris, or loose material. Check the opening’s size. It should match the frame dimensions. Use a level to check if the opening is square and even. Fix any uneven parts with a wood filler or shims. This makes sure the frame sits flush and straight.
Positioning The Frame
Place the wooden arch frame gently into the opening. Hold it steady and check the fit. The frame should be centered and aligned with the wall edges. Use a level on the sides and top of the frame. Adjust the frame until it is perfectly vertical and straight. Small movements can make a big difference in the final look.
Securing And Leveling
Secure the frame with nails or screws. Start with the top corners to hold it in place. Check the level again before fully fixing the frame. Add shims between the frame and wall if needed. These keep the frame stable and prevent warping. Drive in the rest of the screws gradually, checking alignment often. Tighten everything firmly, but avoid over-tightening to prevent damage.
Maintenance Tips
Keeping your wooden arch door frame in good shape helps it last longer. Simple care steps prevent damage and keep it looking fresh. Regular attention saves time and money on big repairs.
Regular Cleaning
Dust and dirt can build up on the wood. Use a soft cloth or brush to remove loose dirt. Clean the frame gently with mild soap and water. Avoid harsh chemicals that may harm the wood. Dry the frame well to stop moisture damage.
Protecting Against Weather
Wood can crack or warp from sun and rain. Apply a weatherproof sealant every year. Sealants block water and shield from UV rays. Check the frame for peeling or worn spots. Cover the door frame during heavy storms or snow.
Repairing Damage
Small cracks or chips can grow if left alone. Fill cracks with wood filler and sand smooth once dry. Replace rotten or damaged wood parts quickly. Tighten loose screws or nails to keep the frame stable. A strong frame keeps your door safe and secure.
Frequently Asked Questions
What Tools Do I Need To Make A Wooden Arch Door Frame?
You need a jigsaw, measuring tape, pencil, clamps, wood glue, and sandpaper. These basic tools help you cut, shape, and assemble the wood easily.
How Do I Measure For A Wooden Arch Door Frame?
Measure the width, height, and curve radius of your door opening. Accurate measurements ensure the arch fits perfectly and looks balanced.
Which Wood Type Is Best For An Arch Door Frame?
Pine and oak are good choices because they are strong and easy to shape. Choose wood that matches your door and room style.
How Do I Shape The Arch Curve On Wood?
Draw the arch shape using a compass or a flexible curve ruler. Then cut carefully with a jigsaw and sand smooth for a clean finish.
Can I Install An Arch Door Frame Myself?
Yes, with basic carpentry skills, you can install it by following step-by-step instructions. Take your time to ensure the frame is level and secure.
Conclusion
Building a wooden arch door frame can add charm to any space. Follow each step carefully for the best results. Take your time cutting and shaping the wood. Use the right tools to make the process easier. A well-made arch door frame lasts for years.
Enjoy the satisfaction of creating something with your hands. This project improves your skills and home’s look. Try it out and see the difference it makes. Simple steps lead to great results. Keep practicing and you’ll get better every time.