
If you’re working with shiplap on your home’s exterior, you’ve probably wondered how to finish it neatly at an outside corner. Getting this right isn’t just about looks—it’s about protecting your walls and making sure everything fits together perfectly.
In this guide, you’ll learn simple, practical steps to end your shiplap cleanly and securely on an outside corner. Whether you’re a DIY enthusiast or just starting out, these tips will help you achieve a polished, professional finish that you’ll be proud of.
Keep reading to discover how to make your shiplap corners look sharp and last longer.
Credit: angelamariemade.com
Choosing The Right Materials
Choosing the right materials is crucial for ending shiplap on an outside corner. The materials affect the look and durability of your project. Using proper materials protects your home from weather damage. It also ensures a clean, professional finish.
Types Of Shiplap For Exterior Use
Exterior shiplap must resist moisture and sun damage. Common choices include cedar and pine. Cedar is naturally rot-resistant and lasts longer outside. Pine is affordable and easy to paint or stain. PVC shiplap is another option. It is waterproof and low maintenance. Choose shiplap that fits your budget and style.
Selecting Corner Trim Options
Corner trims hide the edges of shiplap for a neat finish. Wood trim matches natural shiplap well. PVC or composite trims resist water better. Some trims are flat, while others have a rounded edge. Pick a trim that suits your home’s style. Make sure it fits tightly to avoid gaps.
Tools Needed For Installation
Prepare tools before starting the project. You will need a miter saw to cut precise angles. A nail gun speeds up fastening the boards and trim. Use a level to keep shiplap straight. Measuring tape helps ensure accurate cuts. Caulk and paint finish the job and seal gaps.
Preparing The Outside Corner
Preparing the outside corner is a key step when ending shiplap on an exterior wall. It ensures the boards fit well and look neat. Proper preparation also protects the corner from weather damage. Taking time to measure, mark, and prepare the surface will make your project easier and last longer.
Measuring And Marking
Start by measuring the corner carefully. Use a tape measure to find the exact length of the boards needed. Mark the cutting lines clearly with a pencil. Check the measurements twice to avoid mistakes. Accurate marking helps the shiplap fit snugly around the corner.
Surface Preparation Tips
Clean the corner area to remove dirt and dust. Use a brush or cloth to wipe the surface. Check for any loose or damaged siding and fix it. Smooth the surface by sanding rough spots. A clean, even surface makes the shiplap stick better and look nicer.
Weatherproofing Essentials
Apply a weatherproof sealant on the corner before installing shiplap. Use a high-quality exterior primer to protect the wood. Seal all gaps and joints with exterior caulk. This prevents water from getting behind the boards. Proper weatherproofing keeps your corner safe from rain and wind.
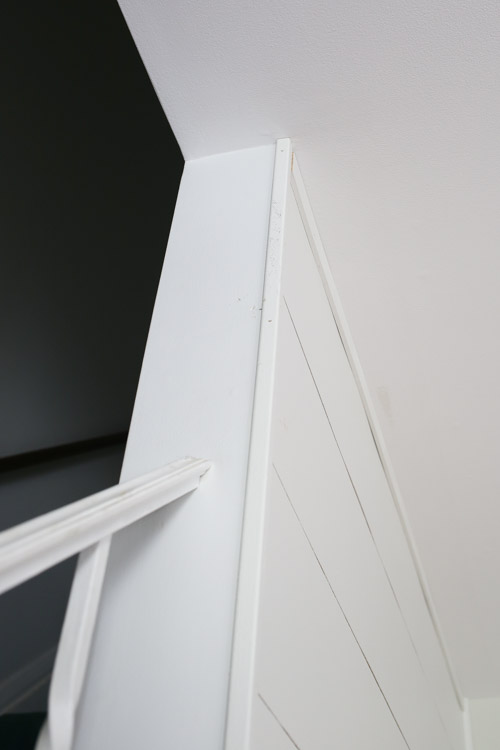
Techniques For Ending Shiplap
Ending shiplap on an outside corner needs careful planning. The joint must look neat and last long. Different techniques help achieve a smooth finish. Each method has its own style and strength. Choose the one that fits your project and skill level.
These techniques make your shiplap corner strong and visually appealing. They prevent gaps and protect against weather damage. Below are three common ways to end shiplap on outside corners.
Butt Joint Method
The butt joint is the simplest way to end shiplap. The boards meet at a 90-degree angle. One board butts directly against the other. Use nails or screws to hold them tight. Apply wood filler to cover any gaps. Paint or stain to match the rest of the wall. This method works best for straight corners with little movement.
Overlap Joint Approach
The overlap joint adds more protection from water. One shiplap board overlaps the other at the corner. This overlap creates a natural barrier against rain. It also hides the end grain of the boards. Nail the overlapping board securely to the frame. Seal the joint with caulk to prevent leaks. This approach offers a stronger, more weatherproof corner.
Using Corner Boards
Corner boards cover the ends of shiplap on outside corners. They create a clean, finished look. Choose corner boards wider than the shiplap thickness. Attach them over the meeting edges of the shiplap boards. Nail or screw firmly in place. Paint or stain corner boards to match your siding. This technique adds extra protection and hides any uneven cuts. It suits many architectural styles and is easy to maintain.
Fastening And Securing
Fastening and securing shiplap on an outside corner is crucial. It keeps the boards tight and prevents gaps or warping. Proper fastening also improves the look and strength of the corner. Use nails and adhesives to hold the boards firmly in place. Follow best practices to ensure a clean, stable finish.
Nailing Best Practices
Use galvanized or stainless steel nails to prevent rust. Nail at a slight angle to grip the wood better. Space nails every 12 to 16 inches along each board. Drive nails just below the surface to hide them later. Avoid overdriving nails, which can damage the wood.
Applying Construction Adhesives
Apply a thin bead of construction adhesive on the back of each board. Use adhesive designed for exterior use and wood surfaces. Press the board firmly against the corner after applying adhesive. This adds extra hold and reduces movement over time. Allow adhesive to dry fully before painting or staining.
Ensuring Stability And Durability
Check that all boards are flush and aligned before nailing. Use a level to keep the corner straight and even. Fill nail holes with wood filler for a smooth finish. Seal all edges with caulk to keep out moisture. Regularly inspect the corner for any loose boards or damage.
Finishing Touches
Finishing touches make your shiplap corner look clean and polished. They hide imperfections and protect the wood. These final steps help your project last longer and look great.
Caulking Gaps And Seams
Fill any gaps or seams with paintable caulk. It stops water and dirt from getting inside. Use a small bead and smooth it with your finger. Wipe away extra caulk before it dries.
Sanding And Smoothing Edges
Sand rough edges and corners lightly. This removes splinters and uneven spots. Use fine-grit sandpaper for a smooth finish. Sand in the direction of the wood grain for best results.
Painting And Sealing
Apply primer to prepare the wood surface. Once dry, paint with a quality exterior paint. Choose paint that resists weather and fading. Seal the paint with a clear protective coat. This keeps your shiplap safe from moisture and sun damage.
Common Mistakes To Avoid
Ending shiplap on an outside corner can be tricky. Many beginners make avoidable mistakes. These errors can affect the look and durability of your project. Knowing what to avoid helps you get a clean, lasting finish.
Misaligned Boards
Boards that don’t line up ruin the corner’s appearance. Check each board’s position before nailing it. Keep the edges flush and level. Measure carefully to keep the pattern consistent. Misalignment makes the corner look sloppy and unprofessional.
Ignoring Expansion Gaps
Wood expands and contracts with weather changes. Without small gaps, boards can warp or crack. Leave a tiny space between boards at the corner. This gap prevents damage and keeps the shiplap stable. Forgetting this step can cause costly repairs later.
Poor Weatherproofing
Outside corners face rain and wind directly. Sealing and painting are essential to stop water damage. Use quality caulk in corners and joints. Apply weatherproof paint or stain to protect the wood. Skipping weatherproofing leads to rot and shortens the shiplap’s life.
Maintenance Tips For Longevity
Maintaining shiplap on an outside corner helps keep it looking fresh and strong. Simple care steps extend its life and protect it from weather damage. A little effort goes a long way in preserving your shiplap’s beauty and function.
Regular Inspections
Check your shiplap corners often for signs of wear or damage. Look for cracks, gaps, or loose boards. Early detection helps avoid bigger problems later. Use a ladder to reach higher spots safely. Note any areas where water might collect or seep in.
Cleaning And Upkeep
Remove dirt and debris regularly to prevent buildup. Use a soft brush or cloth with mild soap and water. Avoid harsh chemicals that can harm the wood or paint. Rinse well and let the shiplap dry completely. Clean corners carefully to avoid trapped moisture.
Repairing Damaged Sections
Fix damaged boards quickly to stop further decay. Replace rotted or broken pieces with matching wood. Sand rough edges before painting or sealing. Use exterior-grade paint or sealant to protect repairs. Tighten nails or screws that have loosened over time.

Credit: www.reddit.com

Credit: themorrismansionblog.com
Frequently Asked Questions
How Do You Finish Shiplap On An Outside Corner?
Use a corner trim or miter the boards at a 45-degree angle. This hides the edges and creates a clean look.
What Tools Are Needed To End Shiplap On Corners?
You will need a saw, measuring tape, nails, and a hammer or nail gun. A level helps keep boards straight.
Can Shiplap Boards Be Cut To Fit Outside Corners?
Yes, cutting boards to fit corners is common. Make precise cuts for a tight, neat finish.
Should Outside Corners Be Caulked After Installing Shiplap?
Caulking outside corners helps seal gaps and protect against moisture. Use paintable exterior caulk for best results.
What Is The Best Wood Type For Outdoor Shiplap Corners?
Cedar and redwood resist rot and weather well. Choose treated wood for longer durability outdoors.
Conclusion
Ending shiplap on an outside corner needs care and attention. Use proper tools and measure twice before cutting. Align boards neatly for a clean, polished look. Seal gaps to keep moisture and dirt out. Taking these steps helps your project last longer.
A well-finished corner improves your home’s curb appeal. Follow these tips, and your shiplap will look great. Simple actions make a big difference in the final result. You can do this with patience and practice.