
You need a vise, but don’t have a workbench to mount it on. That can feel like a big roadblock when you’re ready to get to work.
What if you could set up a secure, stable vise anywhere without a traditional bench? Imagine how much easier your projects would become if you had a simple, reliable way to hold your materials steady. You’ll discover easy, practical methods to mount a vise without a bench—so you can get your work done faster and with less hassle.
Keep reading, and you’ll be surprised how simple it is to turn almost any space into your own workshop.
Choosing The Right Vise
Choosing the right vise is key for mounting it without a bench. The right vise fits your workspace and the tasks you do. It should be strong, stable, and easy to mount on different surfaces. The wrong vise can make your work harder and less safe. Think about the type, size, and weight before buying.
Types Suitable For Benchless Mounting
Clamp-on vises work great without a bench. They attach directly to tables or shelves. Portable vises are also good. They often come with bases that bolt to floors or walls. Some vises have suction bases for smooth surfaces. Choose a vise made of strong materials like steel or cast iron. Avoid heavy vises that need big benches.
Size And Weight Considerations
Small to medium-sized vises fit better on limited spaces. Heavy vises need solid support to stay stable. Lighter vises are easier to move and mount on various surfaces. Match the vise size to your project needs. Large vises hold bigger workpieces but require sturdy mounting spots. Keep in mind the balance between size and weight for safe use.
Credit: www.youtube.com
Alternative Mounting Surfaces
Mounting a vise without a traditional workbench can be simple. Alternative surfaces provide strong support and flexibility. These options help you set up your vise quickly and safely. Choose the best surface based on your space and tools.
Using Worktables And Desks
Worktables and desks offer sturdy surfaces for mounting a vise. Choose a spot with solid wood or thick metal. Avoid thin or hollow surfaces that might not hold the vise firmly.
Clamp the vise to the edge for easy access. Make sure the surface can handle the force applied during work. Secure the vise tightly to prevent movement.
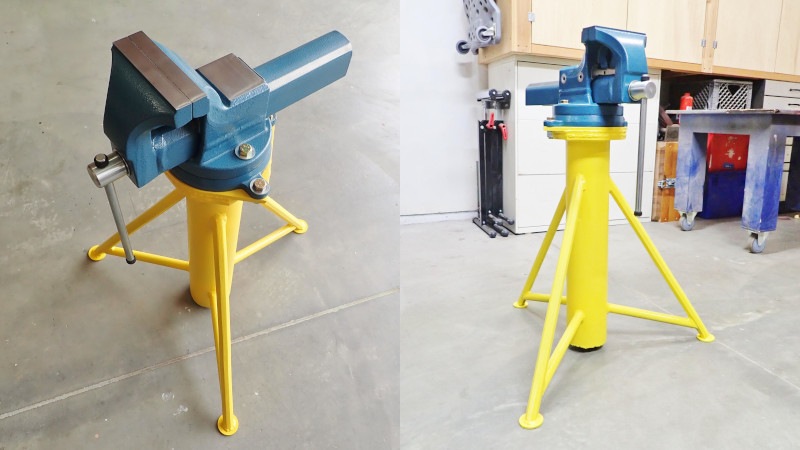
Mounting On Portable Stands
Portable stands provide mobility and convenience. Many stands come with mounting plates or holes for easy installation. Pick a stand that supports the vise’s weight and usage.
Set up the stand on a flat surface. Attach the vise using bolts or clamps. This setup lets you move the vise to different areas as needed.
Attaching To Wall Studs
Walls with studs can support a vise if mounted correctly. Locate the studs behind drywall using a stud finder. Mark the exact spots for strong anchoring.
Use heavy-duty bolts or lag screws to attach the vise base to the studs. Ensure the vise is at a comfortable working height. This method saves floor space and keeps the vise stable.
Clamping Methods Without A Bench
Mounting a vise usually requires a sturdy bench. But not everyone has a workbench ready. There are ways to clamp a vise without a bench. These methods keep your vise stable and secure during work. Each method suits different needs and setups.
Choosing the right clamping method depends on your workspace and the type of work you do. Here are some popular options that do not require a bench.
C-clamps And Quick-grip Clamps
C-clamps and quick-grip clamps hold a vise tightly on a flat surface. They are easy to use and remove. You can clamp the vise to a table, a plank, or even a sturdy box. C-clamps provide strong pressure but take more time to tighten. Quick-grip clamps work faster and are simpler to adjust. Both options keep the vise steady for light to medium tasks.
Magnetic Base Vises
Magnetic base vises attach to metal surfaces without any drilling or clamping. They use strong magnets to hold the vise firmly. This method works best on steel or iron surfaces. The magnetic base allows easy repositioning of the vise. It is perfect for small metalworking jobs. Keep in mind, it won’t work on wood or plastic surfaces.
Suction Cup Mounts
Suction cup mounts stick to smooth, non-porous surfaces like glass or polished metal. They hold the vise in place with strong suction. This method is portable and quick to set up. Suction cups work well for light tasks and small vises. They are not suitable for heavy work or rough surfaces. Always check the suction strength before starting.
Credit: hackaday.com
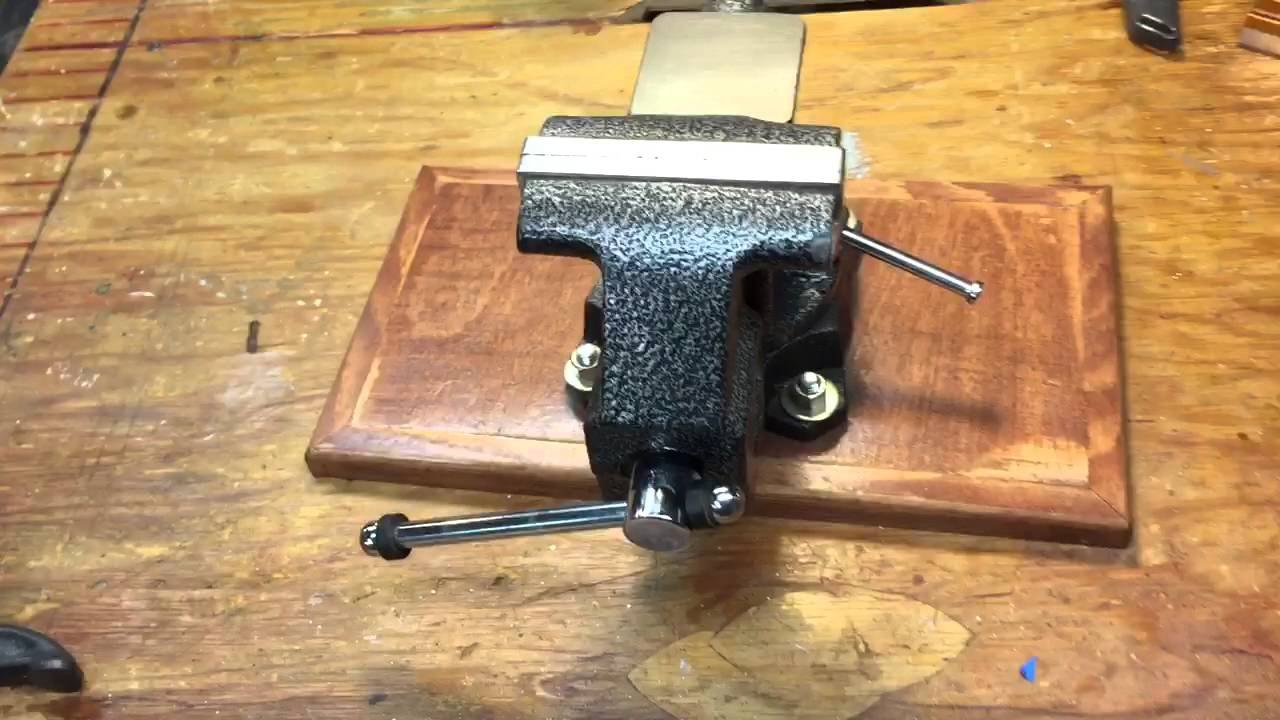
Building A Diy Vise Mount
Building a DIY vise mount is a smart way to use a vise without a traditional workbench. This method creates a sturdy base for your vise anywhere you need it. It saves space and gives more flexibility in your workspace.
The process is simple and uses easy-to-find materials. You can make a strong mount that holds your vise steady. Follow these clear steps to assemble a reliable mount.
Materials Needed
- Wood board (at least 2 inches thick)
- Metal brackets or angle irons
- Bolts and nuts (size matching your vise holes)
- Washers
- Drill with drill bits
- Screwdriver or wrench
- Sandpaper
- Clamps (optional, for holding pieces while assembling)
Step-by-step Assembly
- Choose a solid wood board as the base of the mount.
- Sand the wood surface to remove rough edges.
- Mark the holes on the board to match your vise’s base.
- Drill holes through the wood for bolts.
- Attach metal brackets under the wood for extra support.
- Place the vise on the board and align the holes.
- Insert bolts with washers through the vise and board.
- Tighten nuts securely using a wrench or screwdriver.
- Check that the vise is firmly attached and does not wobble.
Safety Tips
- Wear safety glasses while drilling and assembling.
- Use clamps to hold wood steady during drilling.
- Check that all bolts are tight before use.
- Keep your work area clean to avoid accidents.
- Do not overload the vise beyond its capacity.
Securing The Vise For Stability
Securing the vise for stability is essential when mounting it without a bench. A stable vise ensures safe and accurate work. It prevents movement during use, which can cause accidents or damage. Proper securing methods keep the vise firmly in place on any surface.
Using Bolts And Screws
Bolts and screws provide a strong hold for the vise. Choose bolts that fit the mounting holes of the vise base. Drill holes in the mounting surface matching the vise holes. Use washers and nuts to tighten the bolts securely. Tightening bolts prevents any wobble or shifting during use.
Reinforcing With Brackets
Brackets add extra support to the vise mounting. Attach L-shaped or flat metal brackets to the vise and surface. Secure brackets with screws or bolts for added strength. Brackets reduce movement and increase the vise’s grip on the surface. They are useful on uneven or soft surfaces.
Adding Non-slip Pads
Non-slip pads improve grip and reduce slipping. Place rubber or silicone pads under the vise base. Pads cushion the vise and protect the surface from scratches. They also absorb vibrations during work. Non-slip pads are easy to add and increase overall stability.
Portable Vise Options
Portable vise options offer great flexibility for work without a bench. These tools are designed for easy use and transport. They help hold materials steady in many places. Portable vises suit quick jobs and limited spaces. They come in different styles to fit your needs. Choose the right type to get the best hold and convenience.
Handheld Vises
Handheld vises are small and easy to carry. They fit comfortably in your hand. These vises clamp directly onto objects or surfaces. You control the grip with your fingers or a small lever. They work well for light tasks like jewelry making or small repairs. Handheld vises are simple but very useful. They do not need extra mounting tools. Use them anywhere, anytime, for quick holding.
Foldable And Compact Designs
Foldable vises save space and fit in small bags. They fold flat for easy storage and transport. Compact designs still provide a strong grip. These vises often have adjustable clamps to fit various surfaces. They work well on tables, pipes, or uneven spots. Foldable vises are perfect for mobile workers or hobbyists. Carrying them is hassle-free and saves room in your toolkit.
Maintenance And Care Tips
Proper maintenance and care keep your vise working well without a bench. Simple steps extend its life and performance. Regular attention prevents damage and costly repairs. Follow these easy tips to maintain your vise securely mounted and ready for use.
Regular Cleaning
Remove dirt and debris after each use. Wipe the vise with a dry cloth. Use a brush to clear dust from tight spots. Avoid water, which can cause rust. Keep the mounting area clean too. Clean parts work smoothly and last longer.
Lubrication Techniques
Apply light oil to moving parts regularly. Focus on the screw and sliding surfaces. Use a cloth to spread oil evenly. Avoid excess oil to prevent dust buildup. Lubrication reduces friction and wear. It keeps the vise opening and closing smoothly.
Checking Mount Stability
Check the vise mount for looseness often. Tighten bolts or screws as needed. Ensure the mounting surface is firm and steady. A loose mount can cause accidents. Secure mounting improves safety and accuracy in your work.

Credit: www.instructables.com
Frequently Asked Questions
How Do I Mount A Vise Without A Workbench?
Use a sturdy wooden board or metal plate as a base. Secure the vise with bolts and clamps to keep it stable.
What Tools Are Needed To Mount A Vise Without A Bench?
You will need bolts, nuts, washers, a drill, and clamps. These tools help secure the vise safely in place.
Can I Mount A Vise On A Table Instead Of A Bench?
Yes, a strong table can work as a base. Make sure it can hold the vise firmly during use.
How To Ensure Stability When Mounting A Vise Without A Bench?
Use heavy materials like thick wood or metal. Tighten bolts and use clamps to prevent movement.
Is It Safe To Use A Vise Without A Bench?
Yes, if mounted securely on a solid surface. Always check the stability before applying pressure.
Conclusion
Mounting a vise without a bench is simple with the right steps. You can use clamps, brackets, or sturdy surfaces to hold it tight. This method works well for small spaces or quick projects. Always check the vise’s stability before use to stay safe.
Try different mounting spots to find what fits best. With a little effort, your vise will be ready anytime you need it. No bench needed. Just steady support and a bit of patience.