
If you want your woodworking projects to look smooth and professional, knowing how to tell the direction of wood grain for sanding is a game changer. Sanding against the grain can leave scratches and rough spots, ruining your hard work.
But once you learn to identify the grain direction, your sanding will be easier, faster, and deliver better results. This simple skill can save you time and help you create finishes that truly shine. Keep reading, and you’ll discover easy tips to spot the grain every time—making your next project your best one yet.
Wood Grain Basics
Understanding wood grain is important before sanding wood. It helps you avoid scratches and get a smooth finish. Wood grain shows the direction of wood fibers. Sanding with the grain protects the wood surface. This section explains the basics of wood grain for better sanding results.
What Is Wood Grain
Wood grain is the pattern created by wood fibers. These fibers run along the tree trunk. They give wood its natural texture and strength. Grain direction usually follows the length of the wood piece. Knowing this direction helps you sand evenly. Sanding against the grain can leave marks and rough spots.
Types Of Wood Grain Patterns
Wood grain patterns vary by tree species and cut type. Straight grain has fibers running in one direction. It is the easiest to sand smoothly. Wavy grain shows gentle curves in the fiber lines. It creates a unique look but is harder to sand. Interlocked grain has fibers twisting around each other. This pattern needs extra care to avoid sanding damage.
Credit: kmtools.com
Identifying Grain Direction
Identifying the direction of wood grain is key for smooth sanding. Sanding along the grain avoids scratches and rough spots. It also helps the wood look better and last longer. Knowing how to find the grain direction is the first step in any woodworking project. Here are some ways to spot the grain clearly.
Visual Clues On Wood Surface
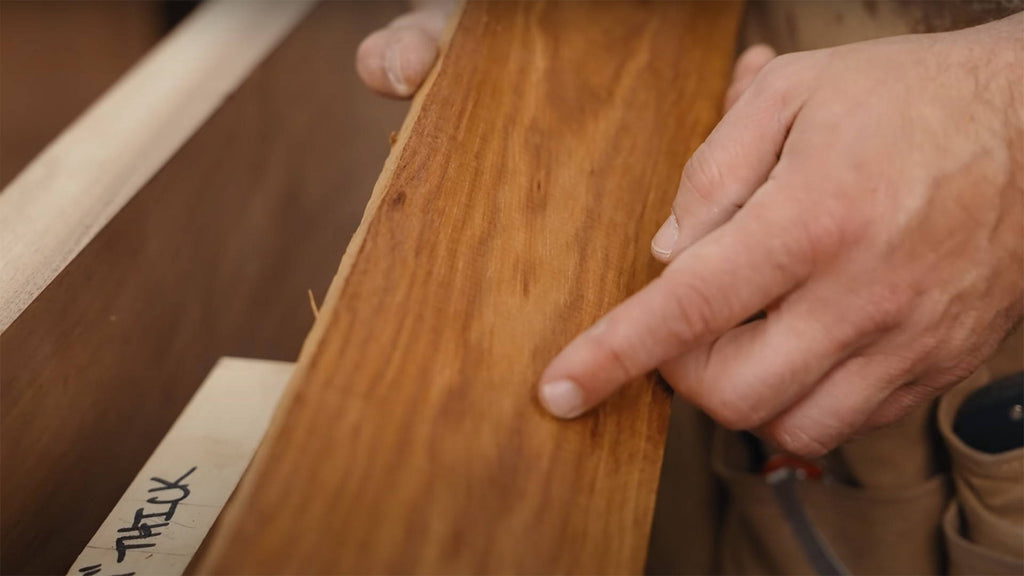
Look closely at the wood surface. Grain lines run in a specific direction. These lines often appear as thin, dark streaks or bands. On flat surfaces, grain usually flows in straight or slightly curved lines. Curved or wavy grain shows in areas like knots. Follow the longest, smooth lines for the main grain direction. Avoid sanding against these lines to prevent rough patches.
Using Touch To Feel The Grain
Run your hand gently over the wood. Grain feels smoother when you move with it. Moving against the grain creates a rough or bumpy feel. This happens because wood fibers stand up when sanded the wrong way. Feeling the wood helps confirm the grain direction. This method works well for wood with less visible grain lines.
How Light Affects Grain Visibility
Shine a light at a low angle across the wood. Light highlights the grain by casting small shadows. These shadows make grain lines easier to see. Different lights reveal different grain details. Natural daylight or a bright lamp works best. Adjust the light angle slowly to find clear grain patterns. This technique helps especially with flat or smooth surfaces.
Tools To Help Determine Grain
Knowing the wood grain direction is key for smooth sanding. Tools can make this easier. These tools help see fine grain details. They guide your sanding for better results. Here are some helpful tools to find grain direction.
Magnifying Glass And Grain Details
A magnifying glass helps you see wood grain closely. It shows tiny lines and patterns clearly. With this, you can spot the grain direction easily. Use it in good light for best view. It reveals the natural flow of wood fibers. This tool is simple but very useful.
Using A Grain Viewer Or Microscope
A grain viewer or small microscope gives a stronger zoom. It shows wood grain in fine detail. This tool reveals the grain’s texture and line direction. It is helpful for very smooth or polished wood. You can see how fibers run under the surface. It helps plan sanding to avoid rough spots.
Marking Grain Direction For Reference
After you find the grain direction, mark it lightly. Use a pencil or chalk to draw an arrow. This keeps your sanding aligned with the grain. Marking helps avoid mistakes during long projects. It also guides other workers or helpers. Clear marks save time and improve sanding quality.
Sanding Techniques By Grain
Sanding wood properly depends on knowing its grain direction. Understanding how to sand with, against, or across the grain affects the smoothness and finish quality. Using the right technique brings out the natural beauty of wood and prevents damage. Below are important sanding methods based on the wood grain direction.
Sanding With The Grain
Sanding with the grain means moving the sandpaper along the wood fibers. This method creates a smooth surface without scratches. It helps remove rough spots and evens out the texture. Sanding in this way reduces the chance of visible marks. It is the best technique for most woodworking projects.
Risks Of Sanding Against The Grain
Sanding against the grain means moving the sandpaper across the wood fibers. This can cause scratches and rough patches. These marks are hard to remove and will show after finishing. Sanding against the grain may also lift wood fibers, making the surface uneven. It is usually best to avoid this technique.
Cross-grain Sanding Tips
Cross-grain sanding means sanding at a slight angle to the grain. Use this method carefully to blend uneven spots. Light pressure and fine grit sandpaper help reduce scratches. Always finish by sanding with the grain to smooth the surface. Cross-grain sanding works best for small corrections, not the entire surface.
Common Grain Challenges
Wood grain can be tricky when sanding. It does not always run in one clear direction. This can cause uneven surfaces or scratches if not handled well. Common challenges occur with irregular grain, knots, and end grain. Understanding these issues helps achieve a smooth finish.
Dealing With Irregular Grain
Irregular grain changes direction often. Sanding against the grain here can leave marks. Use gentle strokes and follow the main grain path as much as possible. Light sanding in multiple directions may help smooth out rough patches without damage.
Handling Knotty Areas
Knots are hard spots in wood. They resist sanding and can dull sandpaper quickly. Sand lightly around knots to avoid tearing the wood fibers. Use finer grit sandpaper to smooth these areas after removing rough edges. Patience is key for a clean result.
Sanding End Grain Properly
End grain absorbs more finish and shows sanding marks easily. Sand with the grain’s end direction using light pressure. Use fine grit paper to avoid deep scratches. Take extra care to keep the surface even and ready for finishing coats.

Credit: www.youtube.com
Expert Tips For Smooth Finishes
Getting a smooth finish on wood depends a lot on how you sand it. Knowing the direction of the wood grain helps you avoid scratches and rough spots. These expert tips will guide you through sanding with the grain for a cleaner, nicer surface.
Follow these simple steps to make your sanding job easier and your wood look better.
Choosing The Right Grit Sequence
Start sanding with coarse grit paper to remove rough areas. Use grits like 60 or 80 for this step. Then, move to medium grits such as 120 or 150. Finish with fine grits like 220 or higher for a smooth surface. Changing grits gradually avoids deep scratches.
Avoiding Grain Tear-out
Sanding against the grain can pull wood fibers and cause tear-out. Always sand in the direction the wood fibers run. Use light pressure to prevent tearing the wood. For tricky spots, try sanding with a very fine grit or by hand.
Final Sanding And Polishing Tricks
After the last sanding, wipe the wood with a damp cloth. This raises the grain slightly. Let it dry, then sand lightly again with fine grit. Use a soft cloth or buffing pad to polish the surface. This helps close the wood pores and gives a smooth shine.
:max_bytes(150000):strip_icc()/3435-69d347d10fad4a8fa59af079d45a33bc.jpg)
Credit: www.woodmagazine.com
Frequently Asked Questions
How Can I Identify Wood Grain Direction Easily?
Look closely at the wood surface to see the natural lines. These lines show the grain direction. They usually run along the length of the wood piece.
Why Is Sanding With The Wood Grain Important?
Sanding with the grain prevents scratches and rough spots. It helps the surface stay smooth and looks better after finishing.
What Tools Help Spot Wood Grain Direction?
A bright light or flashlight can highlight the grain. You can also use your hand to feel the texture and find the grain.
Can Sanding Against The Grain Damage Wood?
Yes, sanding against the grain can cause rough patches and visible marks. It weakens the wood’s appearance and finish quality.
How Do Different Woods Affect Grain Direction Visibility?
Softwoods often have clearer, straighter grain lines. Hardwoods might show more complex or wavy grain patterns, making direction harder to see.
Conclusion
Understanding wood grain direction helps you sand smoothly and evenly. Always follow the grain to avoid scratches and rough spots. Check the wood’s surface carefully before starting your work. Sanding against the grain can damage the wood and ruin your project.
Take your time to observe the lines and feel the texture. This simple step makes a big difference in the final look. Remember, good sanding shows in the finished wood’s shine and smoothness. Keep these tips in mind for better woodworking results every time.