
Are you looking to add a unique, handcrafted touch to your woodworking projects? Knowing how to make circular saw marks on wood can give your pieces a distinct, textured look that stands out.
Whether you want to create rustic charm or highlight the natural grain, these marks add character and depth. You’ll discover simple techniques to achieve the perfect saw marks every time. Keep reading to transform your woodwork and impress everyone with your skillful finish.
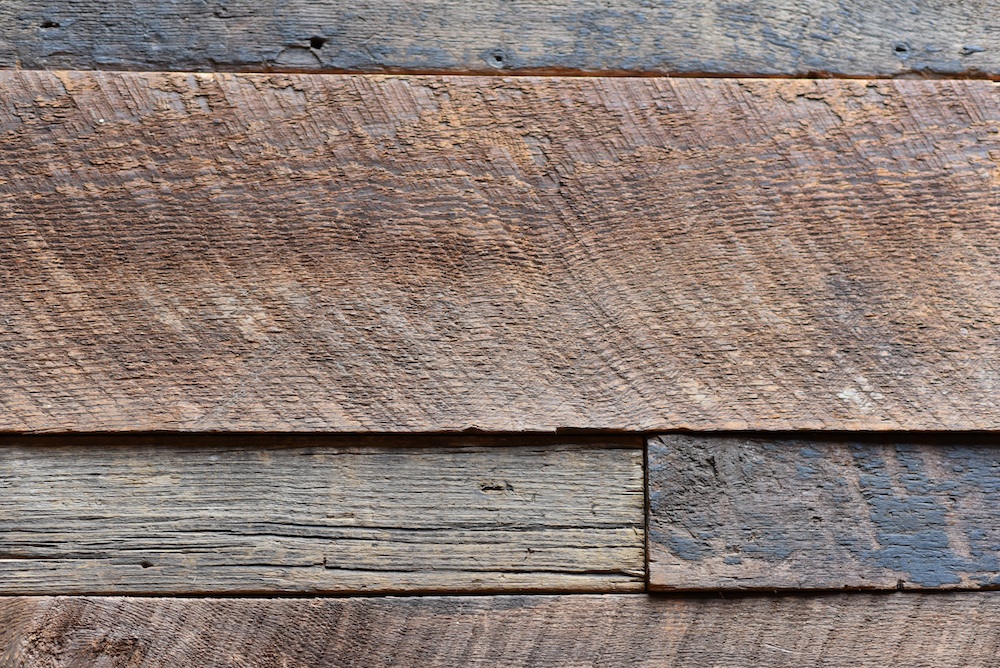
Credit: arboristsite.com
Choosing The Right Circular Saw
Choosing the right circular saw is key to making clear and precise marks on wood. The saw you pick affects the quality of your work and your safety. Understanding the types of saws, blade options, and safety features helps you make the best choice. This guide covers what to look for in a circular saw for marking wood.
Types Of Circular Saws
Circular saws come in different types. The most common is the sidewinder, which has a motor beside the blade. It is lightweight and easy to handle. Another type is the worm drive saw. It offers more power and torque but is heavier. Corded saws provide constant power, while cordless saws offer more freedom of movement. Choose a saw that fits your project size and comfort level.
Blade Selection For Marking
Blade choice matters for making clear marks on wood. Use blades with fewer teeth for rough cuts and clear marks. More teeth give smoother cuts but can hide saw marks. A carbide-tipped blade lasts longer and stays sharp. Select a blade size that matches your saw for best results.
Safety Features To Consider
Safety is important when using a circular saw. Look for saws with blade guards that cover the blade well. Electric brakes stop the blade quickly after release. A comfortable grip reduces hand fatigue and improves control. Choose a saw with a safety switch to avoid accidental starts. Always wear safety glasses and gloves during use.

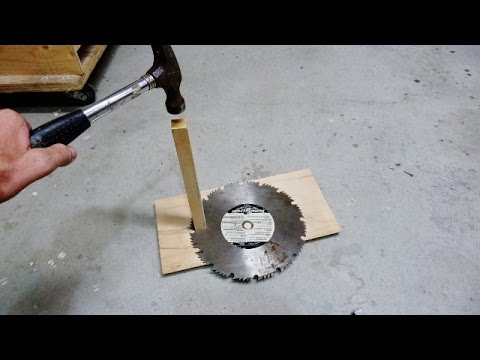
Credit: www.reddit.com
Preparing Wood For Circular Saw Marks
Preparing wood before making circular saw marks is essential. Proper preparation helps create clean, accurate cuts. It also protects the wood from damage during cutting. This section explains how to prepare wood for the best results.
Selecting The Wood Type
Choose wood that suits your project needs. Softwoods like pine are easier to cut but may dent easily. Hardwoods such as oak are tougher but offer a smooth finish. Select wood with minimal knots and cracks. These imperfections can cause uneven saw marks.
Surface Preparation Techniques
Start by cleaning the wood surface. Remove dust, dirt, and debris with a brush or cloth. Sand the wood lightly to smooth rough spots. Use fine-grit sandpaper for a gentle finish. Avoid sanding too much, which can change wood thickness. Ensure the wood is dry before marking.
Marking Guidelines And Measurements
Measure carefully using a ruler or tape measure. Mark cut lines with a pencil or chalk. Use a straight edge or square to draw clear, straight lines. Double-check measurements to avoid mistakes. Mark both sides of the wood if needed for accuracy.
Techniques For Creating Circular Saw Marks
Creating clear circular saw marks on wood adds style and texture. These marks can give your projects a unique, handcrafted look. Understanding the right techniques makes the process easier and safer. Focus on controlling the saw and the wood for the best results.
Adjusting Saw Depth And Speed
Set the saw blade to the right depth. Too deep cuts can damage the wood. Too shallow cuts may not leave visible marks. Control the speed of the saw for clean lines. Slower speeds help create sharper marks. Faster speeds might cause rough edges. Find a balance to suit your wood type.
Guiding The Saw For Consistent Marks
Hold the saw steady and move it smoothly. Use both hands for better control. Keep the saw straight along the wood grain. Avoid wobbling to keep marks even. Practice on scrap wood first. This helps build confidence and skill. Consistency is key for a professional look.
Using Templates And Jigs
Templates and jigs guide the saw for precise marks. They help repeat patterns easily. Use a sturdy template that fits your wood size. Clamp it firmly to avoid slipping. Follow the edges of the template with the saw. This method saves time and improves accuracy.
Credit: www.youtube.com
Enhancing Circular Saw Marks
Enhancing circular saw marks can add character and charm to wood projects. These marks tell a story of craftsmanship and add depth to the wood’s surface. Enhancing them helps create a unique, rustic look that stands out.
Careful techniques can bring out the beauty in these marks. Enhancing does not mean hiding; it means highlighting the texture and patterns made by the saw. This section explores ways to make those marks more visible and attractive.
Distressing And Weathering Effects
Distressing adds an aged, worn look to wood with saw marks. Use light sanding to soften sharp edges without removing marks. Gently hit the wood with a hammer or chain for dents and small cracks. These effects give the wood a natural, old appearance.
Weathering can deepen the saw marks’ shadows. Exposure to sunlight or water changes wood color and texture. You can also use tools to create small scratches around the marks. This adds more character and a lived-in feel.
Staining And Finishing Tips
Stain can highlight saw marks by seeping into grooves. Choose a darker stain to make marks stand out. Apply stain with a brush or rag, then wipe the surface gently. This leaves stain mostly in the marks, creating contrast.
Use a clear finish to protect the wood and marks. Matte or satin finishes keep a natural look. Glossy finishes may reduce the saw marks’ visibility. Apply thin coats of finish to avoid filling the grooves.
Combining Marks With Other Textures
Mix saw marks with other textures for a richer surface. Add wire brushing to raise the wood grain around marks. This creates a rough, tactile feel that complements saw cuts.
Use hand carving or chiseling to add patterns near saw marks. These details enhance the wood’s visual interest. The mix of textures makes the project more appealing and unique.
Common Mistakes And How To Avoid Them
Making circular saw marks on wood can be tricky. Mistakes happen easily, but many can be avoided with simple tips. Knowing common errors helps you work safer and get better results. Here are some usual problems and how to fix them.
Uneven Marking Issues
Uneven marks come from moving the saw too fast or slow. This causes rough, inconsistent lines on the wood surface. Not holding the saw steady also leads to wobbly marks. Use a guide or fence to keep the saw straight. Maintain a steady speed to get smooth, even marks.
Blade Tear-out Problems
Tear-out happens when wood fibers splinter around the cut. Dull blades cause more tear-out. Choose a sharp blade with many teeth for clean cuts. Cutting on the wood’s good side reduces splintering. Support the wood well to avoid bending or vibration that causes tear-out.
Safety Hazards And Prevention
Ignoring safety rules risks serious injury. Always wear safety glasses and hearing protection. Keep hands away from the blade path. Use clamps to hold wood firmly. Check the blade guard is working properly. Disconnect power before changing blades or cleaning the saw.
Creative Projects Using Circular Saw Marks
Circular saw marks add a unique touch to wood projects. They create texture and depth that stand out. These marks give wood a rustic and creative look.
Using circular saw marks can turn simple wood pieces into art. They bring character and style to everyday items. You can use them in many creative ways.
Decorative Wood Panels
Wood panels with circular saw marks make walls eye-catching. The marks add a raw, natural feel to any room. You can use these panels in living rooms or bedrooms. They create a warm and inviting atmosphere. Different patterns of saw marks create unique textures.
Custom Furniture Accents
Adding circular saw marks to furniture gives it personality. Chairs, tables, and shelves look special with these marks. They break the smooth surface and add interest. Saw marks can highlight certain parts of the furniture. This makes each piece one of a kind.
Artistic Woodworking Designs
Artists use circular saw marks to create bold designs. The marks can form patterns or abstract shapes. They add a creative edge to sculptures and wall art. Saw marks also show the hand-crafted nature of the work. This adds value and charm to each piece.
Frequently Asked Questions
What Tools Do I Need To Make Circular Saw Marks On Wood?
You need a circular saw, wood piece, safety gear, and a pencil for marking. A straight edge helps guide the saw for cleaner marks.
How Do I Create Straight Circular Saw Marks On Wood?
Mark a straight line on the wood using a pencil and ruler. Guide the saw along the line slowly to keep the cut straight.
Can I Control The Depth Of Circular Saw Marks?
Yes, adjust the saw blade depth before cutting to control mark depth. Set it shallow for light marks or deeper for strong cuts.
What Safety Tips Should I Follow When Using A Circular Saw?
Wear safety glasses and gloves to protect yourself. Keep fingers away from the blade and use clamps to hold the wood steady.
How Do I Fix Rough Circular Saw Marks On Wood?
Sand the marked area with fine-grit sandpaper to smooth it. For deeper marks, use wood filler before sanding for a clean finish.
Conclusion
Making circular saw marks on wood is easier than it seems. Start with the right tools and safety gear. Take your time and follow the steps carefully. Practice on scrap wood to build confidence. Clean, straight marks add character and style to your project.
With patience, you can achieve a neat, professional look. Keep your saw steady and your cuts smooth. Soon, you’ll enjoy the unique texture these marks bring. Try it out and watch your woodworking skills grow. Simple techniques can make a big difference in your work.