
Looking to add comfort and style to your outdoor space? Installing a ceiling fan on your pergola can be the perfect solution.
It keeps the air moving, cools you down on hot days, and even adds a touch of charm to your backyard. But how do you do it safely and correctly? You’re about to discover simple, step-by-step tips that make the installation process easy—even if you’ve never done electrical work before.
Keep reading to learn exactly how to install an outdoor ceiling fan on your pergola and transform your outdoor area into a cool, inviting retreat.
Choosing The Right Outdoor Ceiling Fan
Choosing the right outdoor ceiling fan for your pergola is key. It affects comfort and style. The fan must suit your space and handle outdoor conditions well. This section helps you pick the best fan for your pergola.
Fan Size And Style
Pick a fan size that fits your pergola. Small pergolas need fans with blades 36-42 inches wide. Larger spaces require fans 52 inches or bigger. The style should match your outdoor decor. Simple designs work well for modern spaces. Rustic or vintage fans suit classic pergolas. Choose a fan that adds to your outdoor look.
Weather Resistance Features
Outdoor fans must resist rain, wind, and dust. Look for fans rated for damp or wet locations. Wet-rated fans handle direct rain and humidity. Damp-rated fans work in covered areas only. Check for corrosion-resistant materials like stainless steel or plastic blades. A fan with sealed motor parts lasts longer. This ensures your fan works well in all seasons.
Power Source Options
Fans can run on electricity or batteries. Most outdoor fans connect to your home’s electrical system. This gives steady power for longer use. Solar-powered fans are eco-friendly and easy to install. Some fans use rechargeable batteries for flexibility. Choose a power source that fits your pergola setup. Make sure the fan’s wiring matches your pergola’s power access.
Tools And Materials Needed
Installing an outdoor ceiling fan on a pergola needs specific tools and materials. These items help make the job safe and smooth. Having the right gear avoids delays and mistakes. Prepare everything before starting to work.
Essential Tools
- Drill with drill bits for wood and metal
- Screwdrivers, both Phillips and flathead
- Wire strippers and cutters
- Voltage tester to check electrical wires
- Measuring tape to ensure correct placement
- Level to keep the fan straight
- Step ladder for reaching high areas
- Adjustable wrench for tightening bolts
- Stud finder to locate pergola beams
Required Materials
- Outdoor-rated ceiling fan with mounting kit
- Electrical box rated for outdoor use
- Weatherproof electrical wire
- Wire nuts for secure connections
- Mounting brackets compatible with your fan
- Exterior-rated screws and anchors
- Silicone caulk to seal openings
Safety Gear
- Safety glasses to protect your eyes
- Work gloves for hand protection
- Dust mask to avoid inhaling debris
- Non-slip shoes for stable footing
- Hard hat if working under beams
Preparing The Pergola
Preparing the pergola is the first step in installing an outdoor ceiling fan. This step ensures the fan stays safe and works well. It also helps avoid damage to the pergola structure. Proper preparation makes the installation easier and more secure.
Assessing Structural Support
Check if your pergola can hold the ceiling fan. The fan needs a strong support beam. Look for beams made of solid wood or metal. Make sure the beam is thick and sturdy enough. Weak beams can cause the fan to wobble or fall. If unsure, get advice from a professional.
Marking The Installation Spot
Pick the exact spot to install the fan. The center of the pergola roof is best. Use a pencil to mark where the fan will hang. Double-check the spot for clearance from beams and other objects. Make sure the fan blades will have enough space to spin freely.
Installing A Support Brace
A support brace adds extra strength to hold the fan. Install it between two beams if needed. Use sturdy wood or metal for the brace. Secure the brace tightly with screws or bolts. This brace will carry the fan’s weight and reduce shaking.

Credit: www.youtube.com
Electrical Setup
Setting up the electrical system for your outdoor ceiling fan is key for safe and smooth operation. It involves running power to the fan, installing a junction box, and making sure all wiring is correct and grounded. Each step must meet local codes to avoid hazards.
Running Power To The Fan Location
First, choose a power source close to your pergola. This could be an outdoor outlet or the main circuit panel. Use outdoor-rated cable to run power along the pergola frame. Secure the wiring with clamps to keep it neat and safe. Turn off power at the breaker before working on electrical lines.
Installing An Outdoor-rated Junction Box
Attach a weatherproof junction box where the fan will hang. This box protects connections from rain and dust. Mount the box firmly to a pergola beam. Ensure it is rated for outdoor use and can support the fan’s weight. This box is the anchor point for the fan’s wiring and mounting bracket.
Ensuring Proper Wiring And Grounding
Connect the fan wires to the power supply inside the junction box. Match colors: black to black (hot), white to white (neutral), and green or bare copper to ground. Use wire nuts rated for outdoor use. Check all connections are tight and secure. Proper grounding prevents shocks and electrical fires.
Mounting The Ceiling Fan
Mounting the ceiling fan on your pergola is a key step for a safe and stable setup. This process involves putting together fan parts, fixing the mounting bracket, and hanging the fan securely. Each task requires care and attention to ensure the fan works well outdoors.
Assembling The Fan Components
Start by unpacking all fan parts. Check the blade arms, motor, and light kit if included. Attach the blade arms to the motor using the screws provided. Tighten each screw firmly but avoid over-tightening. Connect any wiring needed for the light or fan motor according to the instructions. Make sure all parts fit together without forcing.
Attaching The Mounting Bracket
Locate the center beam of the pergola where the fan will hang. Use a stud finder if needed. Align the mounting bracket on this spot. Mark the screw holes with a pencil. Drill pilot holes to avoid wood splitting. Secure the bracket with heavy-duty screws. Confirm the bracket is stable and does not move.
Hanging And Securing The Fan
Lift the fan motor and hook it onto the mounting bracket. This step may need two people for safety. Connect the fan’s wiring to the power source, matching wire colors carefully. Push the wires into the ceiling box. Attach the canopy to cover the bracket and wiring. Finally, tighten all screws and make sure the fan hangs level and secure.
Wiring The Fan
Wiring the fan is a key step when installing an outdoor ceiling fan on a pergola. It ensures the fan runs smoothly and safely. Proper wiring connects the fan to your home’s power supply. This section explains how to connect wires, test connections, and use controls.
Connecting Fan Wires
First, turn off the power at the breaker box. Use a voltage tester to confirm no electricity flows. Match the fan wires with the pergola wires by color. Usually, black is for power, white is neutral, and green or copper is ground. Twist the matching wires together and secure them with wire nuts. Make sure all connections are tight and covered.
Testing Electrical Connections
Turn the power back on after wiring. Use the fan’s switch or remote to test if it runs. Check the fan blades spin in the right direction. Listen for any unusual sounds. If the fan does not work, turn off the power and check all connections again. Safety first—never test wiring with bare hands.
Using A Remote Or Wall Control
Remote controls add convenience to your outdoor fan. Follow the instructions to pair the remote with the fan. Wall controls may require extra wiring to the fan’s receiver. Secure the control box inside the fan canopy. Test all fan speeds and light functions if available. Remote and wall controls improve comfort and ease of use.
Final Checks And Maintenance Tips
Final checks and maintenance keep your outdoor ceiling fan working well. They help avoid problems and make the fan last longer. A well-maintained fan keeps your pergola cool and comfortable.
Balancing The Fan Blades
Check the fan blades for balance. Unbalanced blades cause noise and wobbling. Use a blade balancing kit or add small weights. Tighten all screws on the blades and motor. Balanced blades improve performance and reduce wear.
Weatherproofing Electrical Components
Protect electrical parts from rain and moisture. Use waterproof covers on connections and switches. Seal gaps with silicone caulk to keep water out. Weatherproofing stops rust and electrical shorts. It keeps your fan safe and working.
Regular Cleaning And Upkeep
Clean your fan often to remove dust and dirt. Use a soft cloth and mild soap. Avoid harsh chemicals that can damage finishes. Check for loose parts and tighten them. Regular upkeep keeps the fan quiet and smooth.
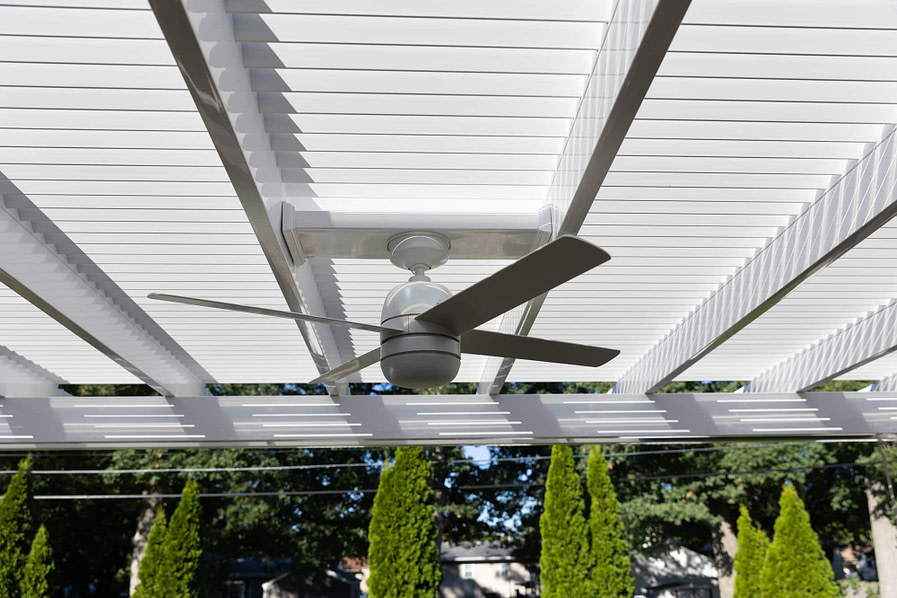
Credit: heartlandpergolas.com

Credit: www.hunterfan.com
Frequently Asked Questions
What Tools Are Needed To Install A Ceiling Fan On A Pergola?
You need a drill, screwdriver, wire stripper, voltage tester, and mounting bracket. Safety gear like gloves and goggles is also important.
Can Any Ceiling Fan Be Used Outdoors On A Pergola?
No, only fans rated for outdoor use should be installed on a pergola. Look for damp or wet-rated fans for best results.
How Do You Ensure The Fan Is Safely Mounted On A Pergola?
Attach the fan to a solid beam or joist using a strong mounting bracket. Make sure all screws are tight and the fan is secure.
What Type Of Wiring Is Required For An Outdoor Ceiling Fan?
Use outdoor-rated electrical wire with waterproof connectors for safety. The wiring must be protected from weather and moisture.
How Do You Protect The Ceiling Fan From Weather Damage?
Choose a fan with weather-resistant materials and finish. Regularly clean and check for rust or damage to keep it working well.
Conclusion
Installing an outdoor ceiling fan on your pergola brings comfort and style. It helps keep bugs away and cools the air on hot days. Follow the steps carefully for a safe setup. Use the right tools and check electrical connections.
Enjoy your outdoor space longer with gentle airflow above. A well-installed fan makes your pergola more inviting. Keep it clean and maintained for the best performance. Simple changes can make your outdoor time more pleasant.