
Are you ready to transform your flat pergola into a stylish, weather-proof retreat? Putting a roof on your flat pergola can instantly boost your outdoor space, giving you shelter from sun and rain while adding charm to your backyard.
But how do you do it right without spending a fortune or hiring expensive contractors? In this guide, you’ll discover simple, step-by-step tips to put a roof on your flat pergola yourself. Whether you want to enjoy cozy evenings or protect your furniture, this article will show you how to make your pergola work for you—comfortably and beautifully.
Keep reading, and you’ll be one step closer to the perfect outdoor haven.
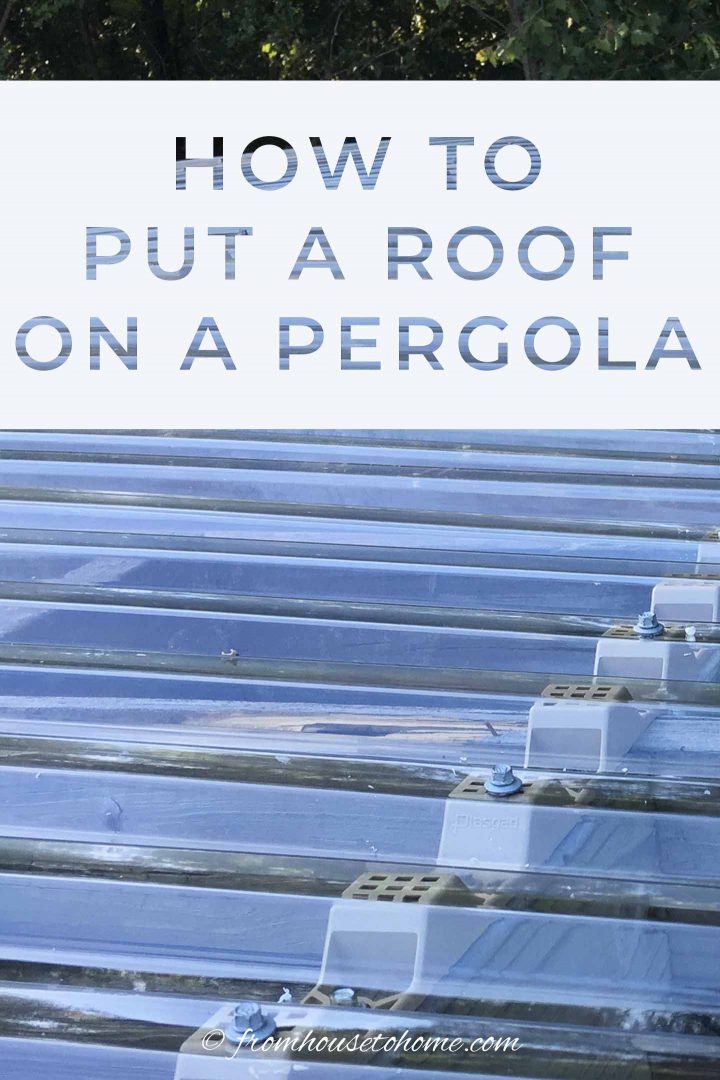
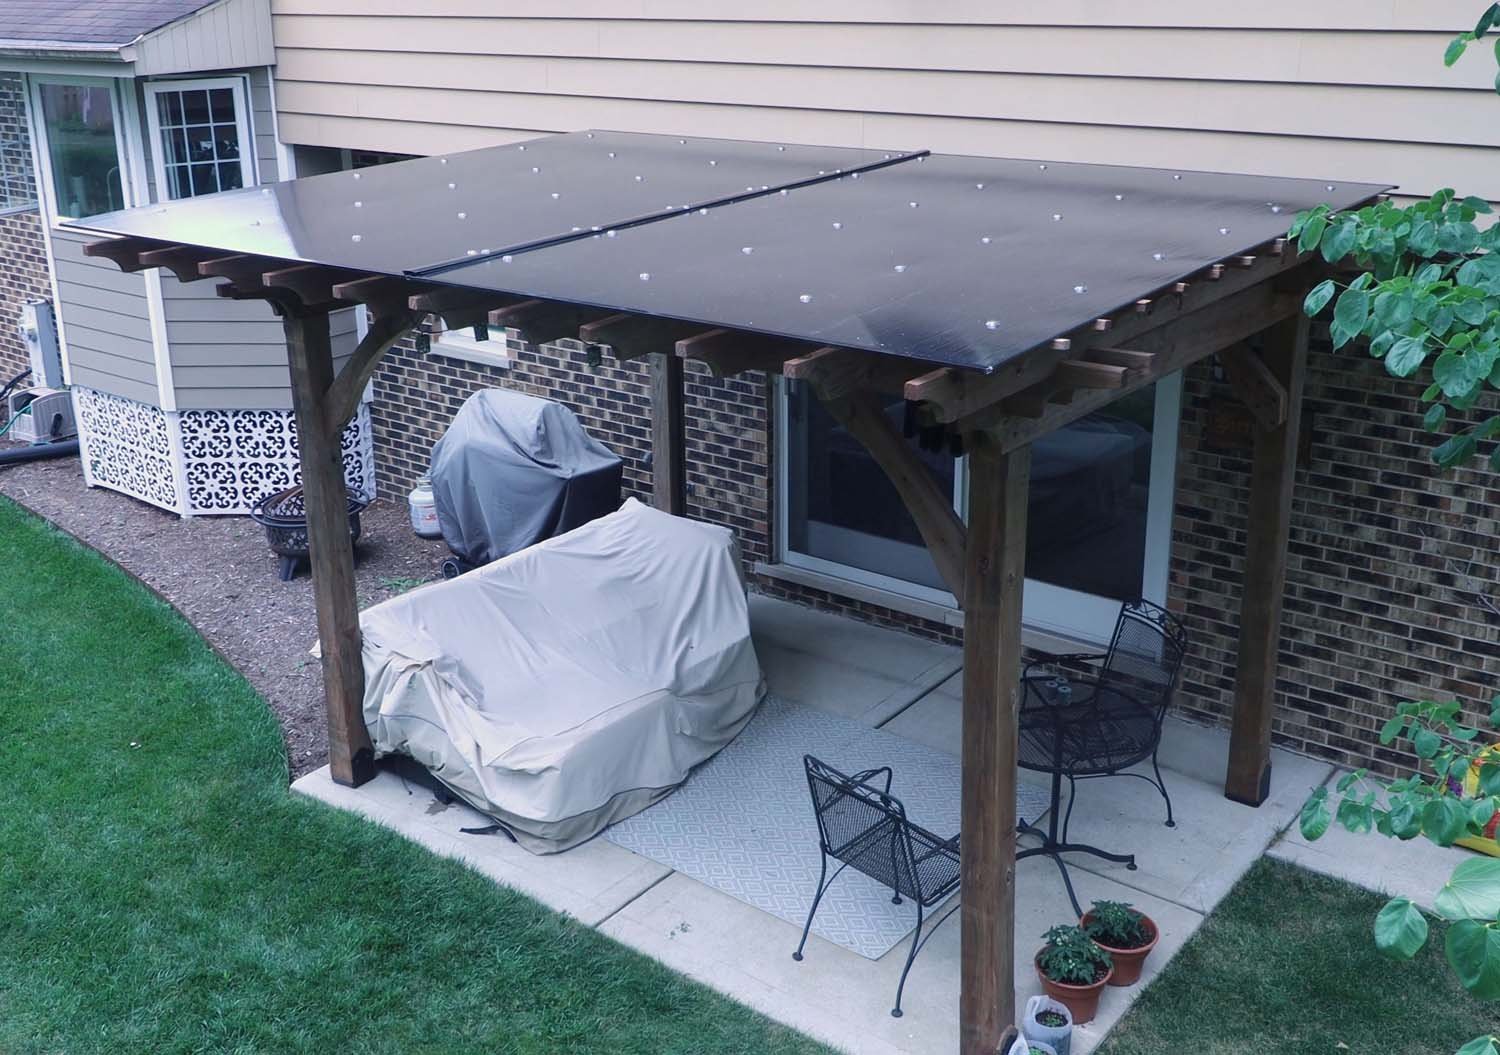
Credit: www.fromhousetohome.com
Choosing The Right Roof Material
Choosing the right roof material for your flat pergola shapes its look and function. The roof protects from sun and rain. It also sets the mood for your outdoor space. Picking the best option means balancing style, durability, and cost. This helps create a pergola that lasts and feels right.
Comparing Popular Roof Options
Polycarbonate sheets let light through and block UV rays. They feel bright and open but stay strong in storms. Metal roofs offer great protection and last long. They keep water out and give a modern look. Wood slats add natural charm but need care to avoid rot. Fabric covers provide shade and are easy to change. They need frequent replacement though.
Factors Influencing Material Choice
Think about the climate. Heavy rain or snow needs strong, waterproof roofs. Sunlight calls for UV protection. Consider the pergola’s purpose. A dining area needs full shade and shelter. A lounge spot might want some light and breeze. Also, check local building rules. Some areas limit roof types or materials.
Budget Considerations
Set a clear budget before buying. Polycarbonate costs more but saves on repairs. Metal roofs have higher upfront prices but last longer. Wood is cheaper at first but needs upkeep. Fabric is low-cost but replaced often. Balance price with how long the roof should last.

Credit: www.fromhousetohome.com
Measuring And Preparing The Pergola
Measuring and preparing your flat pergola is the first step toward adding a roof. This stage ensures your roof fits well and stays secure. Proper preparation saves time and prevents mistakes during installation.
Take your time with measurements and check the structure carefully. Gather all tools and materials before starting the project. Being ready helps the work go smoothly and safely.
Taking Accurate Measurements
Measure the length and width of the pergola frame precisely. Use a tape measure and record the numbers twice for accuracy. Note the height from the ground to the top beams.
Check for any uneven parts or warping in the frame. These details affect how the roof will fit and attach. Mark the measurements clearly on paper for reference.
Checking Structural Integrity
Examine all pergola posts and beams for cracks or damage. Make sure all joints and connections are tight and strong. Look for signs of rot or insect damage on wooden parts.
Test the frame’s stability by gently pushing it. It should not wobble or shift. Fix any weak spots before adding the roof to avoid future problems.
Gathering Necessary Tools And Supplies
Collect tools such as a drill, screws, saw, level, and ladder. Choose roofing materials that suit your pergola’s size and style. Have safety gear like gloves and goggles ready.
Prepare extra fasteners and sealants for a secure fit. Organize everything close to your work area. This saves time and keeps the workspace safe.
Installing The Roof Frame
Installing the roof frame is a key step to add shelter and style to a flat pergola. This process creates a strong base for the roof covering. It also ensures the pergola can hold weight safely. Follow each step carefully to build a reliable roof frame.
Building Support Beams
Start by cutting the support beams to fit the pergola size. Use sturdy wood or metal for strength. Place beams evenly across the pergola’s top. These beams will carry the roof’s weight. Secure each beam with screws or brackets. Double-check the spacing to keep balance.
Securing The Frame To The Pergola
Attach the support beams firmly to the pergola posts. Use heavy-duty brackets or bolts for a tight fit. Make sure each connection is strong to avoid wobbling. Tighten all fasteners with a drill or wrench. This step keeps the frame safe during bad weather.
Ensuring Level And Stability
Use a carpenter’s level to check beam alignment. Adjust the beams until they are perfectly horizontal. Stability prevents water pooling on the roof. Add extra braces if needed for more support. A level, stable frame lasts longer and looks better.
Attaching The Roofing Material
Attaching the roofing material is a key step in finishing your flat pergola. It protects the structure from rain and sun. Proper attachment ensures durability and prevents leaks. Follow clear steps to secure your roofing material safely and neatly.
Laying Down Waterproof Underlayment
Start by placing a waterproof underlayment over the pergola frame. This layer stops water from seeping through. Roll out the underlayment evenly. Cut it to fit the entire roof surface. Secure it with staples or roofing nails. Make sure it lies flat without wrinkles.
Fixing Panels Or Sheets
Choose roofing panels or sheets that suit your pergola. Common options include polycarbonate, metal, or PVC. Align the first panel at one edge of the pergola. Use screws with rubber washers to fix the panels. Space screws evenly for strong hold. Overlap panels slightly to avoid gaps.
Sealing Edges And Joints
Seal all edges and joints to keep water out. Apply waterproof sealant along panel overlaps. Use flashing tape on corners and edges. Press the tape firmly to stick well. Check for any small gaps and seal them too. Proper sealing extends the life of your roof.
Adding Finishing Touches
Adding finishing touches to your flat pergola roof improves its look and function. These small steps protect your structure and keep it lasting longer. They also help manage water flow and prevent damage. Proper care makes your pergola a great outdoor space for years.
Installing Gutters And Drainage
Gutters guide rainwater away from your pergola. This stops water from pooling on or near the structure. Choose gutters made for flat roofs or low slopes. Attach them along the edges of the pergola roof. Connect downspouts to direct water away from the base. Proper drainage helps avoid wood rot and soil erosion.
Painting Or Treating The Roof
Paint or treat the roof for extra protection. Use weatherproof paint or sealant made for outdoor wood. This blocks moisture and sun damage. Choose light colors to reflect heat and keep the area cooler. Apply the coating evenly and cover all surfaces. This step keeps your pergola looking fresh and strong.
Maintaining Your Pergola Roof
Check your pergola roof regularly for damage. Remove leaves, dirt, and debris that collect on top. Clear gutters and downspouts to keep water flowing smoothly. Repair any cracks, loose boards, or peeling paint quickly. Regular care stops small problems from becoming big issues. Your pergola will stay safe and beautiful.
Credit: www.apexpergola.com
Frequently Asked Questions
What Materials Work Best For Flat Pergola Roofing?
Clear polycarbonate sheets and waterproof fabric are popular choices. They offer protection while allowing light through. Wood panels can also work but need sealing.
How Do I Attach A Roof To A Flat Pergola?
Use screws and brackets to secure roofing panels to the frame. Ensure the structure is strong enough to hold the added weight. Seal edges to prevent leaks.
Can I Install A Flat Pergola Roof By Myself?
Yes, with basic tools and some carpentry skills, it is possible. Follow safety guidelines and measure twice before cutting. Ask a friend to help for safety.
How Do I Waterproof A Flat Pergola Roof?
Apply a waterproof sealant or use waterproof roofing material. Check for gaps or holes and seal them tightly. Regular maintenance helps keep the roof dry.
What Is The Best Roof Angle For A Flat Pergola?
A slight slope of 1 to 5 degrees helps water run off. This prevents pooling and damage over time. Even a small angle makes a big difference.
Conclusion
Adding a roof to your flat pergola brings shade and style. Choose materials that suit your weather and budget. Measure carefully to ensure a perfect fit. Use the right tools and follow safety steps closely. Take your time to work steadily and avoid mistakes.
Enjoy your new outdoor space for relaxing or entertaining. A well-built roof can last many years with simple care. Ready to enhance your pergola? Start your project with confidence today.