
If you want your resin projects to look smooth, clear, and free of bubbles, using a pressure pot is a game-changer. But if you’ve never used one before, it might seem a little confusing.
Don’t worry—you’re about to learn simple, practical steps that will help you master this tool quickly. By the end of this article, you’ll know exactly how to use a pressure pot to get professional-quality resin results every time. Ready to take your resin work to the next level?
Let’s dive in!
Choosing The Right Pressure Pot
Choosing the right pressure pot is important for good resin results. The right pot helps remove bubbles and keeps your resin smooth. Picking a good pressure pot saves time and makes your work easier. Below are key points to consider when selecting a pressure pot for resin.
Types Of Pressure Pots
There are different types of pressure pots. Some are made for small projects, others for large ones. Some pressure pots work with air compressors. Others use manual pumps. Choose a type that fits your workspace and tools.
Size And Capacity Considerations
Size matters when buying a pressure pot. A small pot holds fewer resin pieces. A large pot can fit many or big pieces. Think about the size of your projects. Pick a pot that matches your usual project size.
Material And Build Quality
Look for strong materials like steel or aluminum. Good build quality means the pot lasts longer. Check if the pot has a tight seal to hold pressure. A sturdy pot keeps you safe and your resin perfect.

Credit: www.artmolds.com
Essential Tools And Supplies
Using a pressure pot for resin projects requires the right tools and supplies. These items help you get clear, bubble-free results. Having everything ready makes the process smooth and safe. Below are the key essentials you need before starting your resin casting.
Resin Types Compatible With Pressure Pots
Not all resins work well in pressure pots. Most artists use epoxy or polyester resin. Epoxy resin cures slowly and shows bubbles clearly. Polyester resin cures faster but has strong fumes. Choose resin with low viscosity for better bubble release. Check the resin label for pressure pot compatibility. Avoid resins that expand or foam during curing.
Molds And Casting Materials
Silicone molds are best for resin casting. They are flexible and easy to remove. Avoid hard plastic molds that may crack under pressure. Ensure molds fit well inside the pressure pot chamber. Use mold release spray to protect the mold and help remove the cast. Other materials include mixing cups, stir sticks, and measuring tools for accurate resin mixing.
Safety Gear And Accessories
Wear gloves to protect your skin from resin. Use a respirator mask in a well-ventilated area to avoid fumes. Safety glasses protect your eyes from splashes. Have paper towels or wipes ready for spills. Keep a fire extinguisher nearby for emergencies. These safety steps prevent accidents and keep your workspace clean.
Preparing Your Resin Mixture
Preparing your resin mixture is a key step before using a pressure pot for resin. It ensures a smooth, clear finish and strong results. Careful measuring, mixing, and adding color or effects sets the stage for success. Taking time here saves effort later.
Measuring And Mixing Techniques
Use a digital scale for exact resin and hardener amounts. Follow the product instructions carefully. Pour both parts into a clean container. Stir slowly with a flat stick to reduce bubbles. Mix for at least three minutes, scraping the sides often. Avoid whipping air into the resin.
Avoiding Air Bubbles In Resin
Mix gently to keep bubbles low. Let the resin rest for five minutes to allow bubbles to rise. Use a heat gun or torch lightly over the surface to pop bubbles before pouring. Pour resin slowly into molds or surfaces to avoid trapping new air.
Adding Pigments And Additives
Choose pigments or additives made for resin. Add small amounts to the mixed resin. Stir gently until the color or effect spreads evenly. Avoid adding too much to keep the resin fluid. Test on a small batch first to check color and texture.
Setting Up The Pressure Pot
Setting up the pressure pot correctly is important for good resin casting results. The pot helps remove air bubbles from resin pieces. It uses air pressure to push bubbles out while the resin cures. This guide explains how to prepare your pressure pot step-by-step.
Assembling The Pot And Seals
Start by checking the pot parts. Look for the lid, seals, and pressure gauge. Make sure all parts are clean and dry. Fit the rubber seals into the lid groove. The seals stop air leaks during pressure. Attach the lid tightly to the pot base. Turn the clamps or screws until secure. Avoid over-tightening to protect the seals.
Placing Resin Casts Inside
Place your resin molds or casts on the pot tray. Arrange them with space between each piece. This helps air flow evenly inside the pot. Avoid stacking molds to prevent uneven pressure. Use a tray or rack if your pot has one. Close the lid carefully without moving the casts.
Adjusting Pressure And Timing
Connect the air compressor to the pot valve. Turn on the compressor and increase pressure slowly. Most resin casts need about 40 to 60 psi. Watch the pressure gauge to keep it steady. Set a timer for your resin curing time. Usually, 30 to 60 minutes is enough. After the time ends, slowly release pressure. Open the lid only when pressure is zero.
Operating The Pressure Pot Safely
Operating a pressure pot safely is key to getting great results with resin. It also keeps you and your workspace safe. Knowing how to set pressure, watch the curing, and handle problems helps you avoid accidents and mistakes. Follow simple steps to use your pressure pot confidently and correctly.
Pressure Levels For Different Resins
Different resins need different pressure levels. Most clear epoxy resins work well at 40 to 60 PSI. Silicone molds may need less pressure, around 20 to 30 PSI. Always check the resin instructions. Too much pressure can damage your project or the pot. Too little pressure may cause bubbles. Adjust pressure carefully for the best finish.
Monitoring The Curing Process
Keep an eye on your resin while it cures in the pressure pot. Watch the pressure gauge often. It should stay steady during the whole process. Check the temperature near the pot. Resin cures best in a warm, stable environment. Avoid opening the pot until curing finishes. Sudden pressure changes can ruin your work.
Handling Common Issues
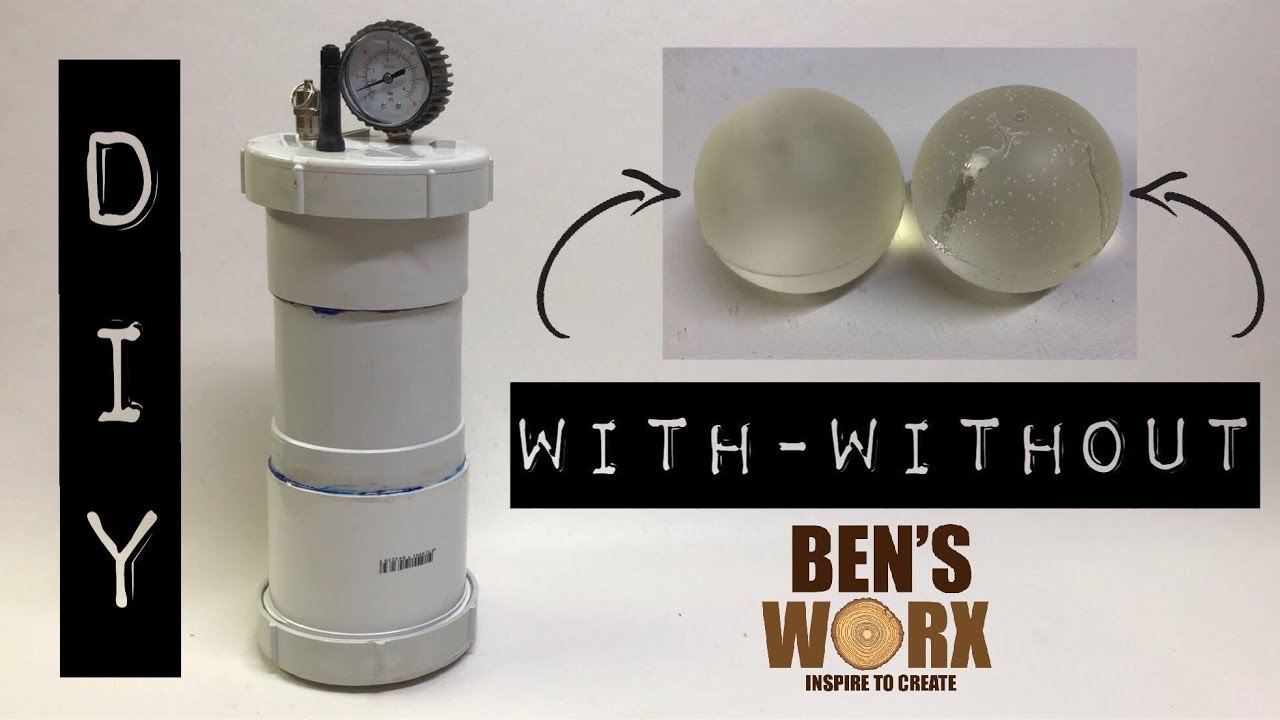
Sometimes pressure pots develop small problems. If pressure drops, check for leaks in the seal or hose. Clean the pot regularly to avoid build-up. If resin bubbles appear, increase pressure slightly or extend cure time. Never force open the pot if pressure is high. Release pressure slowly using the valve. Careful handling prevents accidents and keeps your project perfect.
Credit: www.youtube.com
Post-casting Tips
After casting resin in a pressure pot, careful steps improve your results. Post-casting tips help protect your work and tools. This section covers releasing pressure, removing casts, cleaning, and fixing common problems.
Releasing Pressure And Removing Casts
Turn off the pressure pot and slowly release air pressure. Do this in small steps to avoid damage. Wait until the pot reaches normal pressure before opening the lid. Gently remove the resin cast to prevent cracks or breaks. Handle the cast with clean, dry hands to keep it clear of dirt.
Cleaning And Maintenance
Clean the pressure pot right after use to stop resin buildup. Use warm water and mild soap on all surfaces. Avoid harsh chemicals that can damage the pot. Dry the pot completely to stop rust or mold. Check seals and valves for wear, replacing parts if needed. Regular cleaning keeps the pot working well for many uses.
Troubleshooting Imperfections
Look for bubbles, rough edges, or sticky spots on your cast. Bubbles mean the pressure was too low or released too fast. Rough edges may need light sanding with fine grit paper. Sticky areas suggest under-cured resin; give it more time to harden. Check resin mix ratios carefully next time to avoid mistakes. Small fixes can improve your final pieces greatly.
Advanced Techniques
Advanced techniques with a pressure pot open new creative doors for resin artists. These methods help improve the quality and look of your projects. They also allow more complex designs.
Using these techniques takes practice but brings great results. You can create smooth finishes and vibrant colors that stand out.
Layering And Multi-color Casting
Layering resin in a pressure pot helps avoid bubbles between layers. Pour one color and let it cure slightly before adding the next. This technique creates depth and unique effects.
Multi-color casting blends different resin colors in one piece. The pressure pot reduces air bubbles that form during mixing. You get clean, sharp color transitions and bright patterns.
Using Pressure Pots With Large Projects
Large resin projects need more care to cure evenly. A bigger pressure pot or multiple small pots work well here. Keep resin pieces balanced and avoid overfilling the pot.
Check the pressure gauge often to maintain steady pressure. This step ensures bubbles stay compressed and the resin sets smoothly across the whole project.
Combining Pressure Pot With Other Tools
Pressure pots work well with heat guns and vacuum chambers. Use a vacuum chamber to remove most bubbles before pouring resin. Then place the mold in the pressure pot for a bubble-free finish.
Heat guns help pop surface bubbles after pouring. Use them carefully to avoid overheating. The pressure pot then compresses any remaining tiny bubbles for a flawless look.

Credit: www.youtube.com
Frequently Asked Questions
What Is A Pressure Pot Used For In Resin Art?
A pressure pot removes air bubbles from resin art pieces. It applies pressure to push bubbles out. This results in smooth, clear resin surfaces.
How Do I Set Up A Pressure Pot For Resin?
Place your resin mold inside the pot and seal the lid tightly. Connect the pot to an air compressor. Set the pressure to 40-60 PSI before starting.
How Long Should Resin Cure In A Pressure Pot?
Cure resin in the pressure pot for 15 to 30 minutes. This depends on the resin type and room temperature. Check the resin’s instructions for exact timing.
Can A Pressure Pot Fix Cloudy Resin?
Yes, a pressure pot helps clear cloudy resin by removing trapped air. It compresses bubbles, making the resin look transparent. Use it during the curing process for best results.
Is It Safe To Use A Pressure Pot With Resin?
Using a pressure pot is safe if you follow instructions carefully. Always wear protective gear and work in a ventilated space. Never exceed the recommended pressure to avoid accidents.
Conclusion
Using a pressure pot helps remove bubbles from resin easily. It keeps your resin pieces clear and smooth. Always follow safety steps to avoid problems. Clean your pot after each use to keep it working well. With practice, you will get better results every time.
Try different settings to find what works best. Enjoy making beautiful resin art with less hassle. Keep experimenting and have fun with your projects.