
Are you ready to give your garden shed a strong, reliable foundation that lasts for years? Building a wooden base is one of the smartest steps you can take to protect your shed from moisture, uneven ground, and damage.
But if you’ve never done it before, the idea might feel a bit overwhelming. Don’t worry—you’re in the right place. This guide will walk you through each simple step, so you can build a sturdy wooden base that fits your shed perfectly.
Stick with me, and you’ll have the confidence and know-how to get the job done right. Let’s get started!
Choosing The Right Location
Choosing the right location for your garden shed base is very important. A good spot ensures your shed stays strong and lasts long. It also makes the shed easy to use and keeps your garden tidy. Think about how the place affects the shed before you start building.
Assessing Ground Conditions
Check the soil where you want to build. Soft or wet soil can make the base sink or shift. Hard, firm soil is best for a stable base. Clear away rocks, roots, and plants that might cause problems. Good ground stops the base from moving or breaking.
Checking For Level Surface
A flat, level surface is key. It helps the base stay even and strong. Use a spirit level or a long straight board to check. Fix any bumps or dips before building. A level base stops the shed from leaning or tipping over.
Considering Sunlight And Drainage
Think about sunlight and rain drainage. Place the shed where it gets enough light but not too much heat. Good drainage means water won’t pool around the base. Avoid low spots where water can gather. Proper sunlight and drainage keep the shed dry and safe.
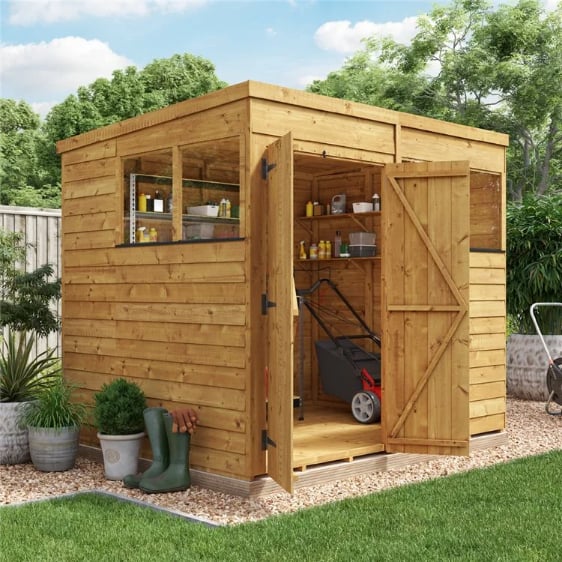
Credit: www.gardenbuildingsdirect.co.uk
Gathering Materials And Tools
Building a strong wooden base for your garden shed starts with gathering the right materials and tools. This step ensures the project goes smoothly and the base lasts long. Knowing what to buy and prepare saves time and avoids interruptions during work.
Choosing the correct wood type is key. The wood must resist weather and hold weight well. Tools need to be sharp and reliable for clean cuts and secure assembly. Safety gear protects you from accidents and injuries while working.
Selecting Wood Types
Use pressure-treated lumber for the base. It resists rot, insects, and moisture. Cedar or redwood are good alternatives but cost more. Avoid untreated wood; it will decay fast outside. Choose wood thick enough to support the shed’s weight. Typically, 2×6 or 2×8 boards work best. Make sure the wood is straight and free of cracks.
Essential Tools Checklist
Gather these tools before starting:
- Circular saw or handsaw for cutting boards
- Measuring tape for precise measurements
- Hammer or cordless drill for fastening screws or nails
- Level to ensure the base is flat
- Square for perfect corner angles
- Shovel for preparing the ground
- Safety gloves and goggles (covered next)
Safety Equipment
Protect yourself with proper safety gear. Wear gloves to avoid splinters. Use safety goggles to shield eyes from dust and debris. Ear protection helps during loud cutting or drilling. Wear sturdy shoes to protect feet. Dress in long sleeves and pants to prevent scratches. Keep a first aid kit nearby for emergencies.
Preparing The Site
Preparing the site is the first step to build a strong wooden base for your garden shed. It sets the stage for a stable and level foundation. A well-prepared site stops problems like sinking or tilting later on. Take time to do this right. Follow these steps to get your site ready.
Clearing The Area
Remove all plants, rocks, and debris from the shed area. Clear at least a few feet beyond the shed’s size. This space helps with construction and future maintenance. Use a rake or shovel to clear the ground. Make sure the soil is loose and free of large roots.
Marking The Base Dimensions
Measure the exact size of your garden shed base. Use stakes and string to mark the outline on the ground. Check the corners with a carpenter’s square for accuracy. This step ensures your base will fit the shed perfectly. Double-check measurements before moving on.
Leveling The Ground
Check the ground for high and low spots within the marked area. Use a spirit level or a long straight board with a level on top. Remove soil from high spots and fill low spots with dirt or sand. Compact the filled areas to avoid sinking. A level base keeps your shed stable and safe.
Building The Frame
Building the frame is a crucial step in creating a strong wooden base for your garden shed. This frame will hold the entire structure and keep it stable. You need to make sure it is level and square. Using quality timber and precise measurements will help you build a reliable frame.
Cutting The Timber
Start by measuring the timber according to your shed base plan. Use a saw to cut the wood pieces to the correct lengths. Cut carefully to ensure straight edges. Accurate cuts make assembly easier and the frame stronger. Mark each piece to avoid confusion during assembly.
Assembling The Frame
Lay the cut timber on a flat surface. Arrange the pieces to form a rectangle or square frame. Check the corners with a carpenter’s square to ensure right angles. Attach the timber pieces using nails or screws. Take your time to align everything properly for a sturdy base.
Securing The Joints
Use metal brackets or corner braces to reinforce the joints. Secure each joint with screws for extra strength. Tighten the screws to avoid any movement in the frame. Strong joints prevent the base from shifting or breaking over time. Double-check all connections before moving on.
Installing Support Beams
Installing support beams is a vital step in building a strong wooden base for a garden shed. These beams carry the weight of the shed and keep the structure stable. Proper installation prevents sagging and damage over time.
Careful planning and precise work make the base safe and durable. Follow the steps below to set your support beams correctly.
Spacing And Positioning
Space the support beams evenly under the shed base. Usually, place beams 16 to 24 inches apart. Check your shed size to adjust spacing if needed.
Position beams so they run under the longest side of the shed. This gives better support to the floor. Align beams with your frame’s edges for balance.
Fixing Beams To Frame
Attach beams securely to the frame using strong screws or nails. Use galvanized screws to prevent rust. Drive fasteners through the beams into the frame joists.
Double-check each beam is flush with the frame. Use a level to keep beams straight. Tight connections stop movement and squeaking later.
Ensuring Stability
Test the base by pressing down on the beams. They should not wobble or shift. Add blocking between beams if needed for extra support.
Use metal brackets at beam joints for more strength. Make sure all beams sit flat on the ground or foundation. This prevents uneven weight and settling.
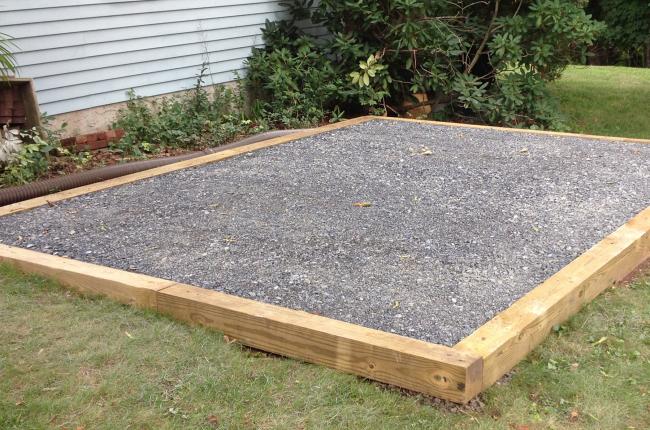
Credit: solidbuildwood.com
Laying The Floorboards
Laying the floorboards is a key step in building a sturdy wooden base for your garden shed. It creates a strong, flat surface for the shed floor. This part needs care and precision to ensure a lasting foundation.
Choosing the right floorboards and fixing them properly helps keep the shed stable. Checking the floor for level and gaps prevents future problems like water damage or uneven floors.
Choosing Floorboard Type
Select floorboards that are strong and weather-resistant. Pressure-treated wood is a good choice because it resists rot and insects. Tongue-and-groove boards fit tightly together, offering better stability. Avoid softwood that can easily warp or weaken over time.
Nailing Or Screwing Boards
Use galvanized nails or screws to prevent rust. Screws hold boards more securely and allow easier adjustments. Nail boards at every joist to keep them fixed firmly. Countersink screws slightly so they don’t stick out above the surface.
Checking For Level And Gaps
Use a spirit level to check the floor as you go. Make sure boards sit flat and level across the whole base. Leave small gaps between boards to allow for wood expansion and drainage. Fill any large gaps to stop pests or water from entering.
Applying Finishing Touches
Applying finishing touches is a key step in building a wooden base for a garden shed. It makes the base safe, strong, and long-lasting. This step protects the wood and helps your shed stay stable over time.
Sanding Rough Edges
Start by sanding all rough edges and surfaces. Use medium-grit sandpaper for best results. Smooth edges prevent splinters and make the base look neat. Take your time to reach every corner. Clean the dust off after sanding.
Applying Wood Preservative
Next, apply a wood preservative to protect the base. This stops rot, mold, and insect damage. Choose a preservative made for outdoor use. Use a brush or sprayer for even coverage. Let the wood dry fully before moving on.
Waterproofing The Base
Waterproofing keeps moisture from damaging the wood. Use a waterproof sealant or paint designed for wood. Cover all surfaces, including edges and undersides. This layer helps your base resist rain and damp ground. Allow it to dry completely before placing the shed.
Maintaining Your Wooden Base
Maintaining your wooden base is key to keeping your garden shed stable and strong. A well-cared-for base prevents damage and saves money on repairs. Regular care helps the wood last for years and keeps your shed safe.
Regular Inspections
Check your wooden base often for cracks, rot, or insect damage. Look for soft spots or areas that feel weak. Early spotting of problems makes repairs easier and cheaper. Inspect after heavy rain or storms to catch hidden damage.
Cleaning And Repairs
Remove dirt, leaves, and moss from the base regularly. Use a stiff brush and water to clean the wood surface. Avoid harsh chemicals that can harm the wood. Fix small cracks and loose boards right away. Replace any rotten or damaged wood quickly.
Extending Base Lifespan
Apply wood preservative or sealant every couple of years. This protects against moisture and insects. Keep the area around the base clear of plants and debris. Good drainage helps prevent water from pooling under the shed. Use gravel or paving stones around the base for extra protection.

Credit: www.youtube.com
Frequently Asked Questions
What Materials Do I Need For A Wooden Garden Shed Base?
You need treated timber, concrete blocks or gravel, screws, and a drill. Treated wood resists rot and insects. Concrete blocks or gravel help with drainage and stability.
How Do I Prepare The Ground For The Wooden Base?
Clear grass, rocks, and debris from the area. Level the ground to ensure a flat surface. Adding a layer of gravel improves drainage and prevents wood decay.
What Size Should The Wooden Base Be For A Shed?
Make the base slightly larger than the shed floor. This helps support the walls and roof properly. Check your shed’s dimensions before cutting wood.
How Do I Fix The Wooden Base To The Ground?
Use concrete blocks or anchor bolts to secure the base. This prevents movement during wind or rain. Make sure the base is level and stable before attaching.
How Can I Maintain My Wooden Garden Shed Base?
Check for signs of rot or damage regularly. Keep the base dry and clean to avoid mold. Reapply wood preservative every few years for protection.
Conclusion
Building a wooden base for your garden shed takes careful steps. Choose good materials and measure twice before cutting. Keep the base level and secure for lasting strength. A solid base helps your shed stay stable and dry. Take your time and follow each step carefully.
Soon, your shed will have a strong, sturdy foundation. Enjoy your new garden space with confidence.