
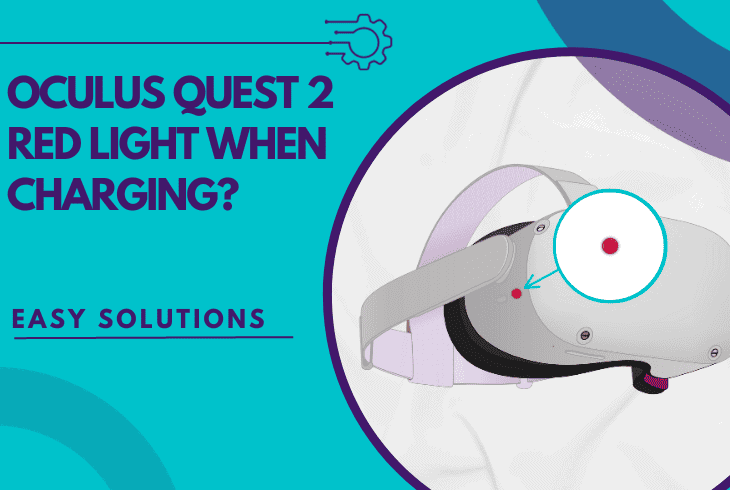
Seeing a blinking red light on your Oculus Quest 2 can be alarming. It often signals a problem that needs attention.
Understanding what this light means is crucial. The Oculus Quest 2 is a popular virtual reality headset. It offers an immersive experience for gaming and other activities. Yet, like any tech device, it can face issues. One common problem is the blinking red light.
This can indicate various issues, from battery problems to hardware faults. Knowing how to address this can save time and stress. In this post, we will explore what causes the blinking red light and how to fix it. Stay with us to ensure your VR adventures continue smoothly.

Credit: www.youtube.com
Common Causes
The Oculus Quest 2 blinking red light can be a frustrating issue. Understanding the common causes can help you fix it quickly. Below, we explore the most frequent reasons why your device might be showing this warning sign.
Battery Issues
One of the most common causes is battery issues. The red light often indicates that the battery level is critically low. Make sure to check the charge level of your Oculus Quest 2. A fully charged battery should have a green light.
If the battery is low, charge it using the provided charger. Ensure the charging cable is not damaged. Sometimes, a faulty cable can prevent proper charging.
Here are some steps to ensure proper charging:
- Use the official Oculus charging cable
- Check for any visible damage to the cable
- Plug into a reliable power source
- Allow the device to charge for at least 30 minutes before use
Firmware Problems
Another common cause for the blinking red light is firmware problems. Outdated or corrupted firmware can lead to various issues, including the red light warning.
To check for firmware updates, follow these steps:
- Open the Oculus app on your smartphone
- Navigate to Settings
- Select your Oculus Quest 2 device
- Check for available updates
- Install any updates if available
Ensure your device is connected to a stable Wi-Fi network during the update process. An interrupted update can cause more issues.
If the problem persists after updating, consider performing a factory reset. This will erase all data on your Oculus Quest 2 but can resolve many firmware-related problems.
To perform a factory reset:
- Turn off your Oculus Quest 2
- Hold the power and volume down buttons until the boot screen appears
- Use the volume buttons to navigate to “Factory Reset” and press the power button to select
- Confirm your selection and wait for the reset to complete
Credit: zontsound.com
Initial Checks
Experiencing a blinking red light on your Oculus Quest 2 can be frustrating. This issue usually points to a charging or power problem. Before diving into complex fixes, start with some initial checks. These simple steps can often resolve the problem quickly.
Inspect Charging Cable
First, look at your charging cable. Ensure it’s not damaged. A frayed or broken cable can’t charge your headset properly. Check both ends of the cable. They should be clean and free of debris.
Use a different cable if you suspect damage. Sometimes, even small issues with the cable can cause charging problems. This quick check can save you a lot of time.
Check Power Source
Your power source might be the culprit. Verify that the outlet you’re using works. Plug in another device to test it. If that device doesn’t charge, try a different outlet.
Another option is to use a different power adapter. Not all adapters provide the same power output. Your headset needs a reliable power source to charge correctly.
These initial checks can often solve the blinking red light issue. Simple steps like inspecting the charging cable and checking the power source might fix the problem.
Battery Solutions
Dealing with an Oculus Quest 2 blinking red light can be frustrating. This often indicates a battery issue. The solution might be simpler than you think. Read on for some effective battery solutions.
Proper Charging Methods
Charging your Oculus Quest 2 correctly is essential. Improper charging can cause battery issues. Follow these steps to ensure your device charges properly:
- Use the original charger that came with the device.
- Plug the charger into a wall outlet, not a computer USB port.
- Ensure the charger is securely connected to the headset.
- Charge the device for at least 2 hours uninterrupted.
Keep an eye on the charging indicator. A steady red light means it’s charging. A green light means it’s fully charged. If the light blinks red during charging, try a different power outlet or charger.
Battery Replacement
If proper charging methods don’t solve the problem, the battery might need replacing. Here are steps to check and replace the battery:
- Turn off the headset completely.
- Remove the facial interface and foam padding.
- Locate the battery compartment inside the headset.
- Remove the old battery carefully.
- Insert a new, compatible battery.
- Reassemble the headset and charge it fully.
Make sure to use a battery compatible with Oculus Quest 2. Using an incorrect battery can damage the device.
If you are unsure about replacing the battery yourself, seek professional help. Maintaining your Oculus Quest 2 ensures a better gaming experience.
Credit: www.reddit.com
Firmware Fixes
Experiencing a blinking red light on your Oculus Quest 2 can be frustrating. Often, this issue can be resolved through firmware fixes. Ensuring your device’s software is up-to-date and performing a reset can solve many common problems. Let’s explore these solutions in detail.
Update Firmware
Keeping your Oculus Quest 2 firmware up-to-date is crucial. Outdated firmware might cause the blinking red light issue. Follow these steps to update your firmware:
- Ensure your headset is charged at least 50%.
- Connect your headset to Wi-Fi.
- Put on the headset and navigate to the Settings menu.
- Select About and then click on Software Update.
- If an update is available, click on Install.
Updating firmware ensures your device has the latest features and bug fixes. This can often resolve the blinking red light issue.
Reset Device
If updating the firmware does not solve the problem, a reset may be necessary. Here are the steps to reset your Oculus Quest 2:
- Turn off the headset by holding the power button for 10 seconds.
- Hold the power and volume down buttons until the boot menu appears.
- Use the volume buttons to navigate to Factory Reset.
- Press the power button to select Factory Reset.
- Confirm your choice and wait for the reset to complete.
Performing a factory reset will erase all data on the device. Ensure you back up important data before proceeding. This step can help clear any persistent software issues causing the blinking red light.
Hardware Issues
Experiencing a blinking red light on your Oculus Quest 2 can be frustrating. This issue often points to hardware problems. Resolving these problems can restore your device to full functionality. Let’s explore some areas to check.
Examine Headset Ports
First, closely examine the headset ports. Dirt or debris can block connections. Use a flashlight to inspect the ports. Ensure they are clean and free of obstructions.
Cleaning Tips:
- Use compressed air to blow out dust.
- Gently wipe the ports with a soft, dry cloth.
Check for any signs of damage. Bent pins or corrosion can cause connection issues. If you spot damage, consider professional repair.
Inspect Charging Dock
Next, inspect the charging dock. A faulty dock can prevent proper charging. Ensure the dock is clean and in good condition.
Steps to Inspect:
- Unplug the dock from the power source.
- Look for any visible signs of damage.
- Test the dock with another device if possible.
If the dock appears damaged, replacing it might solve your problem. Always use a compatible charger to avoid further issues.
Software Conflicts
Experiencing a blinking red light on your Oculus Quest 2 can be frustrating. This issue often points to software conflicts, which can disrupt your VR experience. Addressing these conflicts can be straightforward. Below are some steps to help you resolve them.
Check For App Updates
Keeping your apps updated is crucial. Outdated apps can cause conflicts that result in a blinking red light. Follow these steps to check for updates:
- Open the Oculus app on your smartphone.
- Go to the Library section.
- Look for any apps with an Update button.
- Click Update to install the latest version.
Regularly updating your apps ensures compatibility and reduces the chances of errors.
Uninstall Problematic Apps
Some apps may cause more problems than others. If you suspect a specific app is the culprit, uninstall it. Here’s how:
- Open the Oculus app on your smartphone.
- Navigate to the Library section.
- Find the app causing issues.
- Click on the three dots next to the app.
- Select Uninstall.
Removing problematic apps can help resolve conflicts and stop the blinking red light.
By managing your software and keeping it up to date, you can ensure a smoother VR experience. Regular maintenance can prevent many common issues.
Advanced Troubleshooting
Encountering a blinking red light on your Oculus Quest 2 can be frustrating. If basic fixes don’t work, advanced troubleshooting might help. This section covers Factory Reset and Developer Mode. These steps can resolve complex issues.
Factory Reset
A factory reset can resolve many issues by returning your Oculus Quest 2 to its original settings. Warning: This process will delete all your data. Ensure to back up important information.
Steps to Factory Reset:
- Turn off your Oculus Quest 2.
- Hold the Power and Volume Down buttons simultaneously until the boot screen appears.
- Use the volume buttons to navigate to Factory Reset and press the power button to select it.
- Confirm the reset by selecting Yes, erase and factory reset.
- Wait for the process to complete and restart your device.
Developer Mode
Enabling Developer Mode can provide more options for troubleshooting. This mode allows deeper access to your Oculus Quest 2.
Steps to Enable Developer Mode:
- Open the Oculus app on your smartphone.
- Go to Settings and select your Oculus Quest 2.
- Tap on More Settings and then on Developer Mode.
- Toggle the switch to Enable Developer Mode.
- Restart your Oculus Quest 2.
Once Developer Mode is enabled, you can use additional tools and options for troubleshooting. This mode is especially useful for identifying and fixing software-related issues.
Getting Professional Help
Experiencing a blinking red light on your Oculus Quest 2? Seek professional help to diagnose and fix the issue quickly. This ensures proper functioning and longer device life.
If your Oculus Quest 2 is showing a blinking red light, it can be frustrating. Sometimes, the problem might be beyond basic troubleshooting. In such cases, getting professional help can be the best option. Professionals can diagnose and fix issues more accurately. Here are some steps to take for professional assistance.Contact Support
First, reach out to Oculus Support. They have experts who can guide you. Visit the Oculus website and find the support section. You can chat with a representative or send an email. Be sure to describe your issue clearly. Mention the blinking red light and any other symptoms. This helps the support team understand your problem better.Warranty Options
Check if your Oculus Quest 2 is still under warranty. The warranty covers many hardware issues. If your device is within the warranty period, repairs might be free. Go through the warranty terms on the Oculus website. If you are unsure, ask the support team about your warranty status. They can provide you with the needed information. By contacting support and checking warranty options, you can get your Oculus Quest 2 working again. Don’t hesitate to seek professional help if needed. “`Frequently Asked Questions
Why Is My Oculus Quest 2 Blinking Red Light?
A blinking red light means the battery is very low. Charge it immediately.
How Can I Fix The Red Light On Oculus Quest 2?
Charge your Oculus Quest 2 for at least 30 minutes. This should stop the red light.
What Does A Blinking Red Light On Oculus Quest 2 Mean?
It signals a low battery. Plug in the charger to avoid shutdown.
Is The Red Light On Oculus Quest 2 A Serious Issue?
No, it just indicates a low battery. Charging it will resolve the issue.
How Long Does It Take To Charge Oculus Quest 2 Fully?
It usually takes around 2. 5 hours to fully charge the Oculus Quest 2.
Conclusion
Dealing with a blinking red light on the Oculus Quest 2 can be frustrating. Follow the tips mentioned to troubleshoot the issue effectively. Always ensure your device is charged and updated. Regular maintenance helps prevent such problems. Seek professional help if the issue persists.
Enjoy your virtual reality experience without interruptions. Stay informed and take care of your Oculus Quest 2. Your VR adventures await.