
Cutting baseboards without a miter saw might sound tricky, but it doesn’t have to be. If you’re ready to tackle your home project without spending extra money on expensive tools, you’re in the right place.
You’ll learn simple, practical ways to get clean, precise cuts using tools you probably already have. By the end of this article, you’ll feel confident and ready to upgrade your space like a pro—no fancy saw required. Keep reading, and let’s make your baseboard project easier than you ever thought possible.
Tools Needed
Cutting baseboards without a miter saw is possible with the right tools. Having the proper tools helps you make clean and accurate cuts. This guide covers all tools needed for the job. Each tool plays a key role in making the process easier and safer.
Essential Cutting Tools
A handsaw is the main tool for cutting baseboards. Choose a fine-toothed saw for smooth cuts. A coping saw can help with detailed cuts on corners. A utility knife is useful for trimming small parts or paint edges. Having a sanding block or sandpaper helps smooth rough edges after cutting.
Measuring And Marking Supplies
A tape measure is necessary for accurate length measurement. Use a pencil to mark cut lines on the baseboard clearly. A square or speed square helps mark straight and precise angles. A protractor or angle finder can assist with tricky corner angles. Clear markings reduce mistakes during cutting.
Safety Gear
Wear safety glasses to protect your eyes from dust and wood chips. Use gloves to prevent splinters and improve grip. A dust mask helps avoid breathing sawdust. Make sure your workspace has good lighting to see your cuts clearly. Safety gear keeps you protected and comfortable while working.
Preparing The Baseboards
Preparing baseboards properly is key for smooth cutting without a miter saw. Good preparation saves time and prevents mistakes. It also helps you get clean, precise edges that fit well against walls and floors.
Before cutting, take your time to measure and mark carefully. This ensures each piece fits perfectly and looks professional. Let’s explore the steps to prepare your baseboards for accurate cutting.
Measuring For Accurate Cuts
Use a tape measure to find the length you need for each baseboard. Measure from one corner to the other along the wall. Write down each measurement clearly to avoid confusion.
Double-check measurements before marking or cutting. Measure twice, cut once. This simple rule helps prevent waste and errors. Keep the tape measure straight and close to the wall for accuracy.
Marking Cut Lines Clearly
Mark cut lines on the baseboard with a pencil. Draw a straight line where you plan to cut. Use a ruler or carpenter’s square for a clean, straight mark.
Make marks visible but not too thick. Thin, clear lines guide your saw without hiding the cut point. Mark the inside edge of the baseboard to match the wall edge.
Label each piece if needed. This helps keep track of which part goes where during installation. Clear marks and labels make cutting easier and reduce mistakes.
Cutting Techniques Without A Miter Saw
Cutting baseboards without a miter saw is possible with the right techniques. These methods help achieve clean, precise cuts. Some tools and skills come in handy to get the job done well. Below are some cutting techniques that work without a miter saw.
Using A Handsaw For Straight Cuts
A handsaw is great for straight cuts on baseboards. Mark the cutting line clearly with a pencil. Hold the baseboard steady on a flat surface. Saw slowly along the line using smooth, even strokes. Take your time to keep the cut straight. A sharp handsaw blade makes the process easier.
Creating Angled Cuts With A Handsaw
Cutting angles with a handsaw is trickier but doable. Measure the angle needed, usually 45 degrees for corners. Mark the angle on the baseboard carefully. Support the baseboard firmly to prevent movement. Saw along the angle line slowly. Use a square or protractor to check accuracy. Practice makes angled cuts cleaner and more precise.
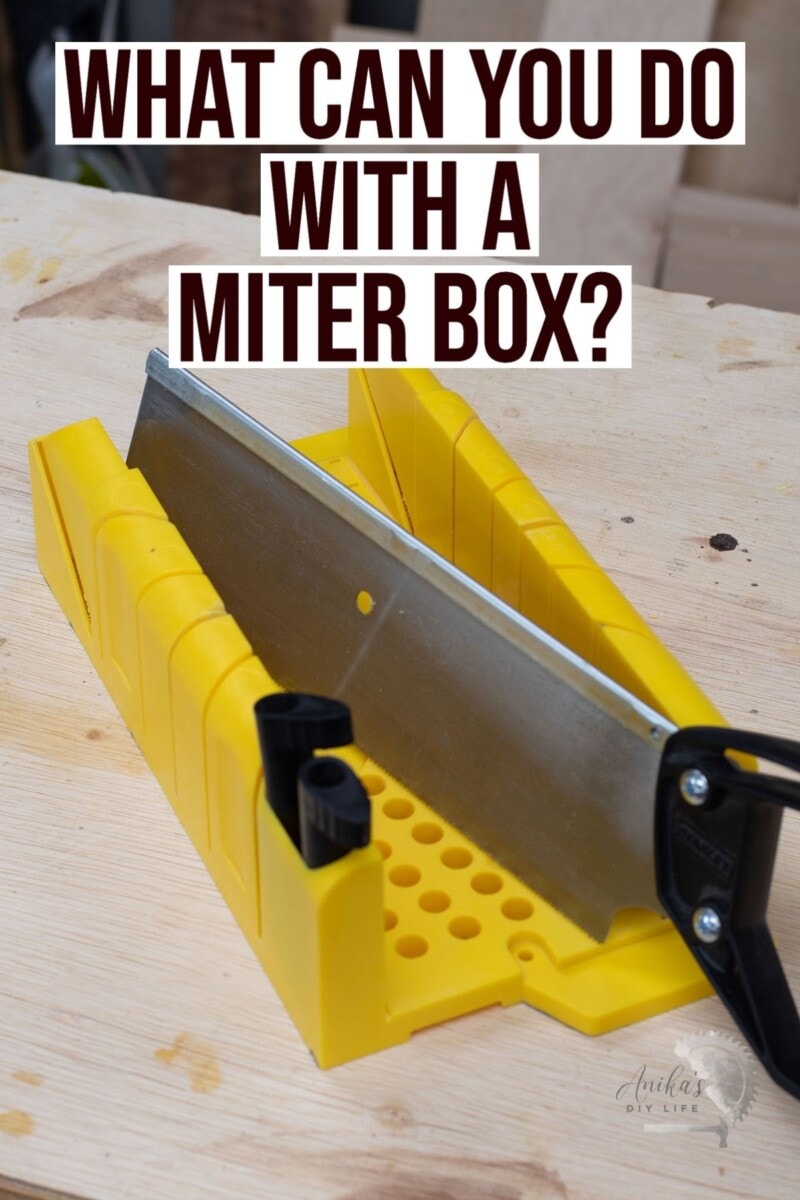
Employing A Miter Box
A miter box helps guide the handsaw for angled cuts. Place the baseboard inside the box. Align the cutting line with the slots in the box. These slots guide the saw at common angles, like 45 and 90 degrees. Saw steadily using the slots as a guide. This tool improves accuracy without expensive equipment.
Alternative Tools For Cutting
Coping saws and utility knives can assist with baseboard cuts too. Coping saws work well for curved cuts and detailed edges. A utility knife scores the baseboard before snapping it cleanly. A jigsaw offers another option for straight or curved cuts. Choose tools based on the cut type and baseboard material.

Credit: www.youtube.com
Achieving Clean And Precise Edges
Cutting baseboards without a miter saw can be tricky. Achieving clean and precise edges is key to a professional look. Sharp, smooth edges fit better and look neater. Taking time to finish the edges improves the entire project.
Sanding And Smoothing Cut Surfaces
Start by sanding the cut edges with medium-grit sandpaper. This removes rough spots and splinters. Next, use fine-grit sandpaper for a smooth finish. Sand in one direction for a clean look. Use a sanding block to keep the surface even. Smooth edges help paint or stain stick well. Take your time; rough edges show easily on baseboards.
Fixing Minor Cut Imperfections
Small chips or uneven cuts can be fixed with wood filler. Apply a thin layer over the damaged area. Let it dry fully before sanding it smooth. Use a putty knife for a neat application. For tiny gaps, painter’s caulk works well. Press caulk into the gaps and smooth with a wet finger. These fixes hide flaws and make the baseboard look seamless.
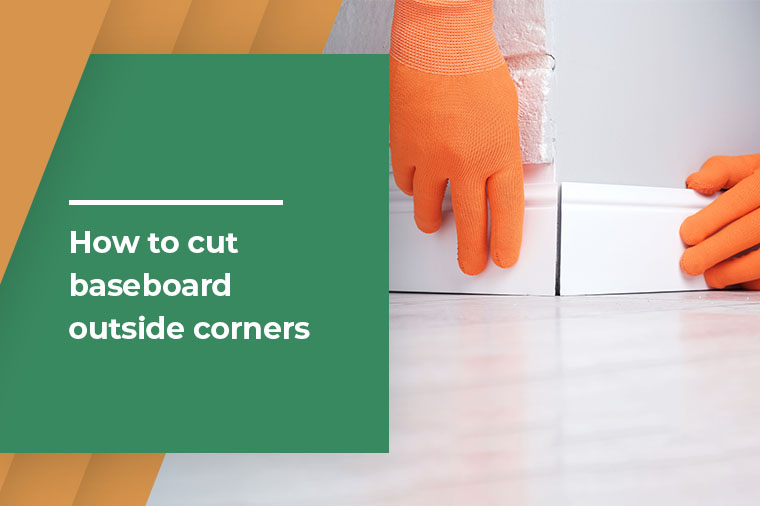
Installing Baseboards After Cutting
Installing baseboards after cutting them without a miter saw requires careful steps. Proper installation ensures a clean, professional look. Take time to check each piece before fixing it to the wall. This process helps avoid gaps and misalignments.
Dry Fitting Pieces
Start by placing each baseboard piece along the wall. Check how they fit together at corners and joints. Look for any gaps or uneven cuts. Adjust the pieces by sanding or trimming small parts. Dry fitting lets you see the final look without damage. It also helps you plan the order of installation.
Securing Baseboards To Walls
Use a nail gun or hammer with finishing nails to attach baseboards. Nail into wall studs for a strong hold. Space nails about every 12 inches along the baseboard. Be careful not to split the wood. Use wood filler to cover nail holes for a smooth finish. Finally, check that the baseboards sit flush and straight against the wall.
Credit: www.anikasdiylife.com
Common Mistakes To Avoid
Cutting baseboards without a miter saw can be tricky. Many people make simple mistakes that cause poor results. Knowing what to avoid can save time and frustration. Here are common errors to watch out for during your project.
Incorrect Measurements
Measuring wrong is the biggest mistake. Even a small error can cause gaps or uneven edges. Always measure twice before cutting. Use a reliable tape measure and mark clearly. Check corners and angles carefully to get the right length.
Improper Cutting Angles
Baseboards need precise angles to fit well. Cutting at the wrong angle creates gaps and uneven joints. Use a protractor or angle finder to get the correct angle. Practice on scrap wood before cutting the real baseboard. This helps avoid costly mistakes.
Neglecting Safety Precautions
Safety is crucial during any cutting task. Not wearing safety glasses or gloves can lead to injuries. Keep your work area clean and well-lit. Secure the baseboard firmly to prevent slips. Take your time and focus on each cut to stay safe.
Tips For Better Results
Cutting baseboards without a miter saw can feel tricky. Small mistakes can waste materials and time. Simple tips can help you get better results. These tips make your cuts cleaner and more accurate. Follow them for a smoother project and less stress.
Practicing Cuts On Scrap Wood
Start by practicing on scrap pieces of wood. These cuts help you get a feel for your tools. Try different angles and lengths before cutting your baseboards. Practice builds your confidence and reduces mistakes. It also helps you see how your saw handles the wood.
Using Clamps For Stability
Clamps hold your baseboard steady while cutting. This prevents movement that causes uneven cuts. Secure your wood to a workbench or table. Clamps free your hands and improve safety. Stable wood means cleaner cuts every time.
Maintaining Tools Properly
Keep your saw blades sharp and clean. Dull blades make rough cuts and can damage wood. Check your tools before starting the job. Tighten screws and oil moving parts. Well-maintained tools work better and last longer.
Credit: floridalumber.com
Frequently Asked Questions
How Can I Cut Baseboards Without A Miter Saw?
You can use a handsaw or a coping saw to cut baseboards. Measure carefully and mark the cutting line before cutting. Use a miter box for angled cuts without a power saw.
What Tools Replace A Miter Saw For Baseboard Cuts?
A handsaw, coping saw, and miter box work well for cutting baseboards. These tools help make straight and angled cuts without power tools. They are affordable and easy to use for beginners.
How Do I Make Angled Cuts Without A Miter Saw?
Use a miter box to guide your saw at the correct angle. Mark the angle on the baseboard before cutting. This method helps create clean corners for baseboards.
Is It Hard To Cut Baseboards Without Power Tools?
Cutting baseboards without power tools requires patience and steady hands. Take your time measuring and cutting slowly. With practice, you can get clean, accurate cuts.
Can I Join Baseboards Without Perfect Miter Cuts?
Yes, you can use coping cuts or caulk to hide small gaps. Coping fits one board over the other for tight corners. Caulk fills minor gaps and smooths the finish.
Conclusion
Cutting baseboards without a miter saw can be simple and effective. Using basic tools, you can get clean, straight cuts. Take your time and measure twice before cutting. Practice on scrap pieces to build confidence. This method saves money and space in your toolkit.
You don’t need fancy equipment to do a good job. Just focus on accuracy and patience. With a bit of effort, your baseboards will look neat and professional. Try these steps on your next project and see the difference.