
Are you dreaming of a perfect outdoor space where you can relax, entertain, or enjoy your morning coffee? Building a patio cover that isn’t attached to your house can give you just that—freedom to design your yard your way.
But how do you start? How do you make sure it’s sturdy, stylish, and fits your needs? In this guide, you’ll discover simple, step-by-step tips to create a patio cover that stands on its own. Keep reading, and you’ll be ready to transform your outdoor space into a cozy retreat you’ll love spending time in.
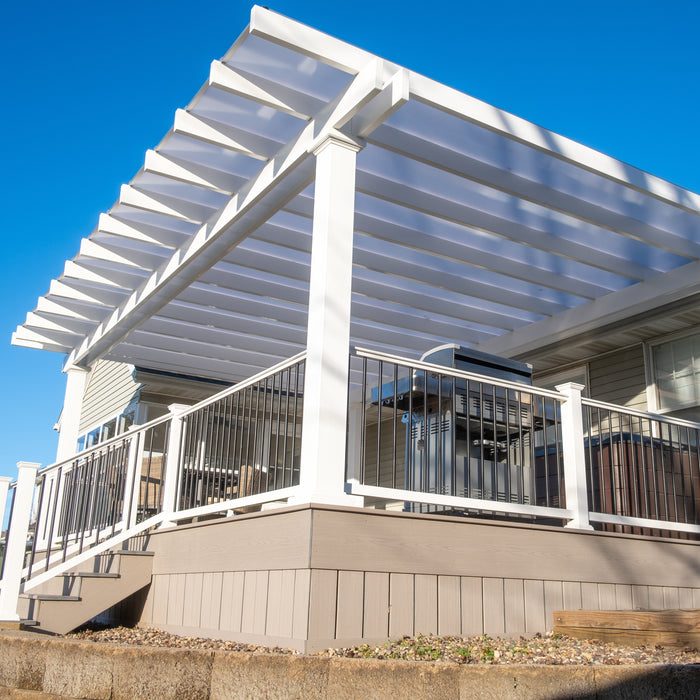
Choosing The Right Patio Cover
Choosing the right patio cover is key to creating a cozy outdoor space. It protects from sun and rain while adding style to your yard. The right cover fits your needs, budget, and home design. This guide helps you pick the best option for a detached patio cover.
Materials For Detached Patio Covers
Wood offers a classic, natural look. It is strong but needs regular care to avoid rot and pests. Aluminum is light and resists rust. It requires less maintenance and lasts long. Vinyl is affordable and easy to clean. It resists weather damage but may fade over time. Canvas or fabric covers give flexible shade and a soft look. They need replacement more often but offer good airflow.
Design Styles And Options
Flat roofs create a modern and simple look. Sloped roofs help water drain quickly. Pergolas have open slats for partial shade and a decorative touch. Gazebo-style covers add charm and full shelter. Choose a style that matches your home’s design and your outdoor needs. Consider how much sun or rain protection you want.
Sizing And Placement Considerations
Measure your outdoor space to fit the cover well. It should be large enough for furniture and movement. Avoid blocking windows or doors. Place the cover where it offers the best shade during peak sun hours. Think about nearby trees or structures that may affect space and light. Proper placement makes your patio cover more useful and comfortable.
Gathering Tools And Materials
Before starting your patio cover project, gathering all the necessary tools and materials is crucial. This step saves time and prevents interruptions during construction. Having everything ready helps maintain a smooth workflow and keeps the project on track.
Organize your workspace and check each item on your list. Preparing in advance creates a safer and more efficient building process. Below are key details about the tools, materials, and safety gear you will need.
Essential Tools For The Project
- Measuring tape for accurate dimensions
- Power drill for making holes and driving screws
- Circular saw or handsaw for cutting wood
- Hammer for nails and minor adjustments
- Level to ensure your patio cover is even
- Screwdrivers for tightening fixtures
- Shovel for digging post holes
- Wrench set for bolts and nuts
- Clamps to hold materials in place
Materials List And Estimates
- Pressure-treated lumber for posts and beams
- Concrete mix for securing posts in the ground
- Galvanized screws and nails to prevent rust
- Patio cover roofing materials like polycarbonate panels or metal sheets
- Brackets and connectors for strong joints
- Wood stain or paint for weather protection
- Gravel for drainage around posts
- Optional: Decorative trim for finishing touches
Estimate quantities based on your patio cover size. Buy a little extra to cover mistakes and cuts.
Safety Gear Checklist
- Safety goggles to protect your eyes
- Work gloves for hand protection
- Ear protection if using loud power tools
- Dust mask to avoid inhaling sawdust
- Sturdy work boots with good grip
- Hard hat if working under elevated structures
Wearing proper safety gear reduces injury risks. Keep your safety equipment close during the project.
Preparing The Site
Preparing the site is the first step to build a patio cover separate from your house. A good foundation keeps the structure safe and strong. Take time to plan and organize the area. This prevents problems later and makes building easier. Follow these simple steps to get started.
Selecting The Location
Choose a flat area with enough space for your patio cover. Avoid spots near trees or utility lines. Check sun direction to get shade where you want it. Think about access and how the cover fits with your yard. Pick a spot with good drainage to avoid water buildup.
Clearing And Leveling The Ground
Remove grass, rocks, and debris from the chosen location. Use a shovel or rake to clear the area completely. Check the ground for bumps or holes. Level the soil by adding or removing dirt as needed. A flat base is key for a sturdy build. Compact the soil to prevent settling after construction.
Marking The Layout
Use stakes and string to outline the patio cover’s size. Measure carefully to match your design plan. Double-check all corners and sides for accuracy. This layout guides digging and post placement. Clear markings help avoid mistakes and keep the project on track.
Credit: sunsetpergolakits.com
Building The Foundation
Building a strong foundation is the first step to creating a safe patio cover not attached to your house. The foundation supports the entire structure and keeps it steady. Without a solid base, the patio cover can tilt or collapse. Choosing the right foundation depends on your soil type, climate, and the size of your cover.
Types Of Foundations For Detached Covers
Several foundation types work well for detached patio covers. Concrete footings are common and provide strong support. Deck blocks are easier to install and work for smaller covers. Gravel pads offer good drainage and prevent wood from rotting. Each type suits different budgets and soil conditions.
Installing Concrete Footings
Start by marking where each post will go. Dig holes at least 12 inches wide and 24 inches deep. Pour concrete into the holes and smooth the top. Insert a post anchor into the wet concrete. Let the concrete dry for at least 48 hours before adding posts. This ensures the footing is firm and stable.
Setting Post Anchors
Post anchors connect your patio posts to the foundation. Use metal anchors made for outdoor use. Attach anchors to your concrete footings or blocks. Make sure each anchor is level and aligned. Secure the posts tightly to the anchors. This step prevents movement and increases the cover’s strength.
Constructing The Frame
Constructing the frame is the first important step to build a patio cover not attached to the house. This frame supports the entire structure and needs to be strong and stable. It includes installing support posts, adding beams and rafters, and making sure the frame can hold weight safely. A solid frame means a durable and safe patio cover.
Installing Support Posts
Start by setting the support posts in the ground. Use treated wood or metal posts for long-lasting strength. Dig holes at least two feet deep to prevent shifting. Place the posts evenly spaced to support the roof. Secure each post with concrete for extra stability. Make sure the posts are perfectly vertical using a level.
Adding Beams And Rafters
Attach horizontal beams to the top of the support posts. These beams hold the rafters and create the roof shape. Use strong beams that can carry the roof weight. Next, install rafters across the beams. Space rafters evenly to support the roofing material. Secure all connections with screws or bolts for safety.
Ensuring Structural Stability
Check all parts of the frame for tight connections. Use metal brackets or braces at joints for extra strength. Make sure the frame does not wobble or move. Add diagonal supports if needed to prevent swaying. Inspect the frame before adding the roof to avoid future problems.
Installing The Roof
Installing the roof is a key step in building a patio cover that stands apart from the house. A well-built roof protects you from sun, rain, and wind. It also adds beauty and value to your outdoor space. Focus on strong materials and proper installation for a durable roof.
Choosing Roofing Materials
Pick roofing materials that suit your climate and style. Metal panels offer long life and resist weather well. Polycarbonate sheets let light through but block UV rays. Asphalt shingles are affordable and easy to install. Wood shakes give a natural look but need more care. Think about weight, cost, and maintenance before choosing.
Attaching Roof Panels Or Shingles
Secure roof panels or shingles firmly to the frame. Use nails or screws made for outdoor use. Start at the bottom edge and work upward, overlapping each row. Keep panels straight and aligned to prevent leaks. Check that fasteners do not damage the material or leave gaps.
Waterproofing And Drainage
Waterproofing keeps your patio dry and safe. Install a waterproof membrane under the roofing material. Seal all joints and edges with waterproof tape or caulk. Add gutters and downspouts to direct rainwater away. Ensure the roof has a slight slope for water to flow off easily.
Finishing Touches
Finishing touches bring your patio cover to life. They make the space cozy and inviting. Small details can change the whole look. Focus on painting, lighting, and decoration. These elements complete your outdoor area beautifully.
Painting And Staining
Choose paint or stain that protects wood from weather. Pick colors that match your home’s style. Light colors reflect heat and brighten the space. Dark colors hide dirt and give a classic look. Always apply a sealant to keep the finish lasting longer. Use brushes or sprayers for an even coat. Let each layer dry fully before adding the next. Proper finishing keeps your patio cover strong and fresh.
Adding Lighting And Accessories
Add lights to enjoy your patio after dark. String lights create a warm and soft glow. Solar lights save energy and are easy to install. Spotlights highlight plants or architectural features. Choose weatherproof fixtures made for outdoor use. Accessories like wind chimes or hanging plants add charm. Keep wiring safe and hidden to avoid accidents. Good lighting changes mood and extends your outdoor time.
Furniture And Decoration Ideas
Select furniture that fits your space and needs. Use weather-resistant materials like wicker, metal, or treated wood. Add cushions with outdoor fabric for comfort and color. Rugs designed for outdoors can define seating areas. Decorate with pots of flowers or small trees. Keep the area tidy and avoid clutter. Personal touches make your patio cover a favorite spot.
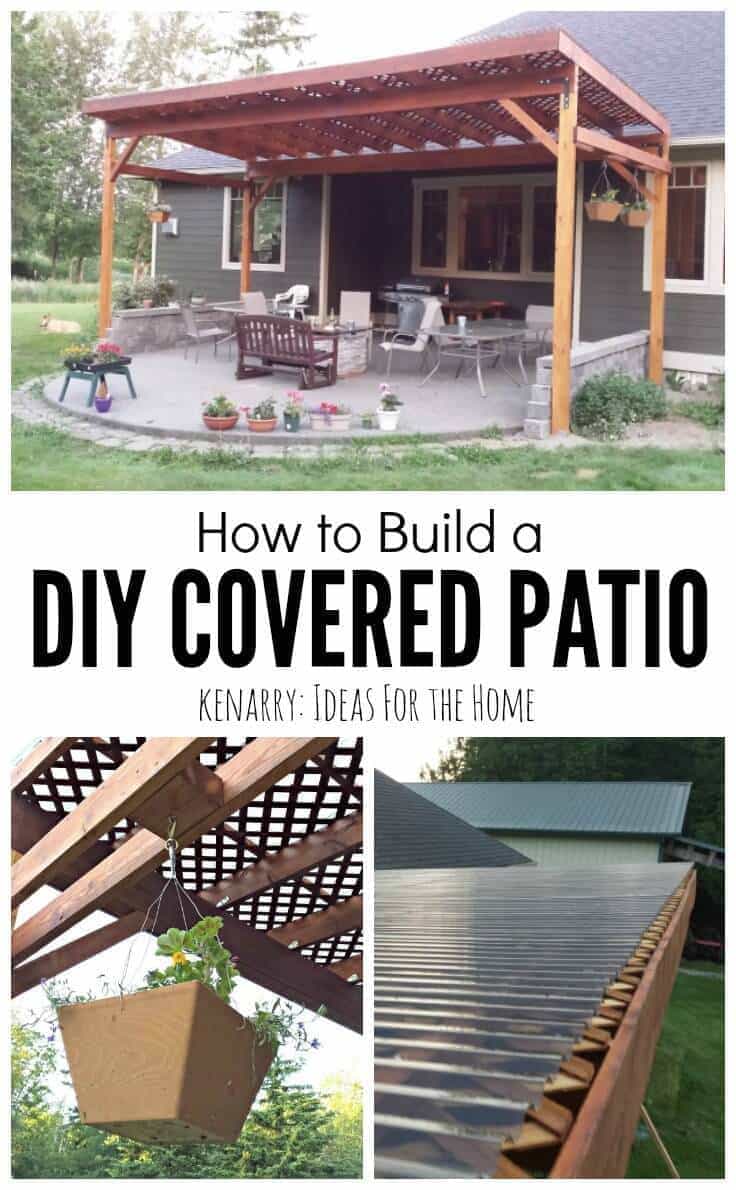
Credit: www.kenarry.com
Maintenance Tips
Maintaining a patio cover that is not attached to the house helps it last longer. Regular care keeps the structure safe and looking good. Small tasks done often prevent bigger problems later. Follow these simple maintenance tips to protect your patio cover.
Regular Cleaning
Remove dirt and debris from your patio cover weekly. Use a soft brush or cloth to clean surfaces gently. Avoid harsh chemicals that can damage materials. Rinse with water to wash away dust and grime. Clean gutters if your cover has them. This prevents clogs and water damage.
Inspecting For Damage
Check your patio cover for cracks, rust, or loose parts every month. Look at joints and fasteners to ensure they are tight. Replace any broken or worn-out pieces quickly. Early repairs stop small issues from becoming bigger. Keep an eye on wood for signs of rot or pests.
Seasonal Care
Prepare your patio cover for each season to avoid damage. Clear off snow in winter to reduce weight stress. Trim nearby trees to prevent falling branches in storms. Apply a sealant or paint to wooden covers every few years. This protects against moisture and sun damage. Adjust care based on weather changes to keep your cover strong.
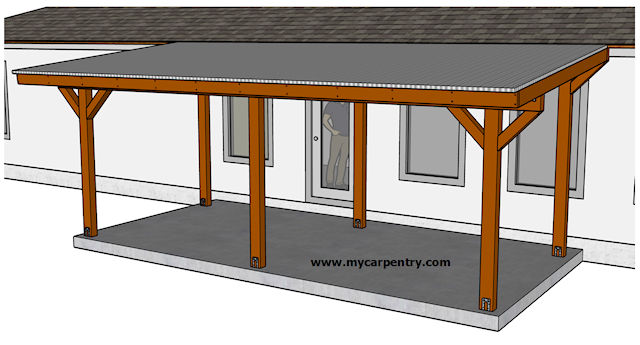
Credit: www.mycarpentry.com
Frequently Asked Questions
What Materials Work Best For A Freestanding Patio Cover?
Wood, metal, and vinyl are popular materials for freestanding patio covers. Wood offers a natural look, metal is durable, and vinyl requires low maintenance. Choose based on your budget and style preference.
How Do I Secure A Patio Cover Not Attached To The House?
Use concrete footings or anchors to secure posts firmly in the ground. Proper anchoring prevents movement and ensures safety during strong winds. Always follow local building codes for installation.
What Size Should A Freestanding Patio Cover Be?
The size depends on your outdoor space and intended use. Measure the area and plan for enough shade and clearance around furniture. Typically, covers range from 10×10 to 20×20 feet.
Can I Add Lighting And Fans To A Freestanding Patio Cover?
Yes, you can install electrical wiring safely with a licensed electrician. Adding lighting and fans improves comfort and usability. Plan wiring routes before building the structure.
How Long Does It Take To Build A Freestanding Patio Cover?
Building time varies by design complexity and skill level. Simple designs may take a weekend, while larger, detailed covers can take several days. Proper planning speeds up the process.
Conclusion
Building a patio cover not attached to your house adds space and shade. It gives you freedom to design anywhere in your yard. Using simple tools and clear steps makes the job easier. Choose strong materials to keep your cover safe and long-lasting.
Take your time and measure well before starting. Enjoy your new outdoor spot for relaxing or gatherings. This project brings comfort and value to your home. A well-built patio cover can change how you enjoy outdoors.