
Looking to add charm and extra seating to your space without spending a fortune? Turning a headboard into a bench is a clever and stylish way to do just that.
You probably have a headboard sitting unused or tucked away, but with a few simple steps, you can transform it into a beautiful, functional piece. Imagine having a unique bench that fits perfectly in your hallway, bedroom, or entryway—made by you! Keep reading, and you’ll discover easy tips and tricks to create your own custom bench that looks great and saves you money.
Ready to get started? Let’s dive in!
Choosing The Right Headboard
Choosing the right headboard is the first step to turning it into a bench. The right piece will make your project easier and more attractive. Consider the material, size, and style before starting. These factors help your new bench fit well in your space. They also ensure comfort and durability. Take time to pick a headboard that matches your needs and style.
Materials That Work Best
Wood and metal headboards work best for benches. Wood is sturdy and easy to paint or stain. Metal adds an industrial or modern look. Upholstered headboards can also work. Choose ones with firm padding and strong frames. Avoid soft or delicate materials that may wear out fast. Solid materials offer better support and last longer as benches.
Size And Shape Considerations
Choose a headboard wide enough for sitting comfortably. A width of 48 to 60 inches suits most benches. Height matters too. Taller headboards create a strong backrest. Shorter ones might need extra support. Consider the shape carefully. Straight, rectangular shapes are easier to work with. Curved or ornate shapes may require more effort to convert.
Matching Your Existing Decor
Pick a headboard that fits your room’s style. Match colors with your walls or furniture. Choose a design that complements your space. Rustic, modern, or classic styles all work well. Balance the headboard with other room pieces. This creates a unified look. A well-matched bench adds charm and comfort to any room.
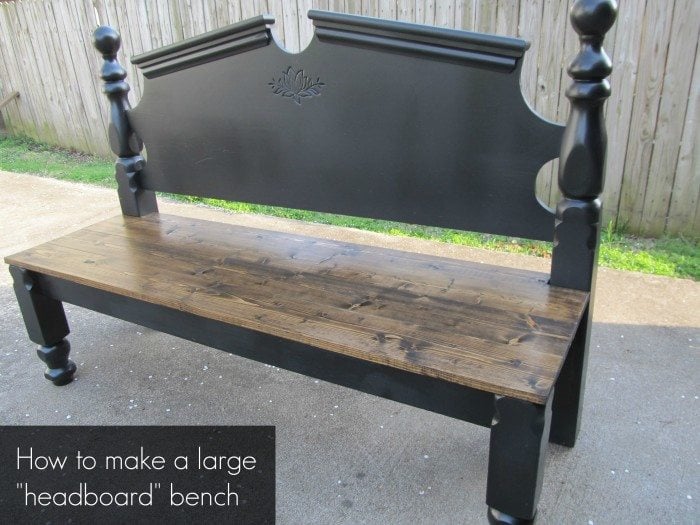
Credit: www.myrepurposedlife.com
Gathering Essential Tools And Supplies
Before starting your project to turn a headboard into a bench, gathering the right tools and supplies is important. Having everything ready will make the process smoother. It will help you avoid interruptions and keep the work steady. This section lists basic tools, materials for upholstery, and safety gear you need.
Basic Tools Needed
- Power drill with drill bits for screws
- Screwdriver set (flathead and Phillips)
- Measuring tape to check dimensions
- Hand saw or electric saw for cutting wood
- Staple gun for attaching fabric
- Hammer for nails and adjustments
- Sandpaper or sanding block for smoothing surfaces
- Clamps to hold pieces while working
Recommended Materials For Upholstery
- Foam padding for a comfortable seat
- Batting to add softness and smooth edges
- Durable fabric that matches your style
- Wood screws or nails to secure parts
- Wood glue for extra strength
- Paint or wood stain for finishing touches
Safety Gear To Have On Hand
- Safety goggles to protect your eyes
- Dust mask to avoid inhaling sawdust
- Work gloves to protect your hands
- Ear protection if using loud power tools
- First aid kit nearby for minor injuries
Preparing The Headboard For Conversion
Preparing the headboard for conversion is an important first step. It sets the foundation for a sturdy and stylish bench. Taking time to clean, repair, and smooth the surface improves the final result. Each step helps the headboard look fresh and strong.
Cleaning And Repairing
Start by wiping the headboard with a damp cloth. Remove dust, dirt, and grime from all surfaces. Use mild soap if needed. Check for loose nails, screws, or broken parts. Tighten or replace any damaged hardware. Fix cracks or holes with wood filler. Let the filler dry completely before the next step.
Removing Unnecessary Parts
Look for parts that do not fit the bench design. Remove decorative elements like finials or extra molding. Take off any upholstery or fabric. Use a screwdriver or pry bar carefully. Avoid damaging the main structure. A clean, simple shape makes the bench easier to build.
Sanding And Priming Surfaces
Sand the entire headboard using medium-grit sandpaper. Smooth rough spots and remove old paint or varnish. Wipe away dust with a tack cloth. Apply a coat of primer to all surfaces. Primer helps paint stick better and last longer. Let the primer dry fully before painting or assembling.

Credit: www.youtube.com
Building The Bench Frame
Building the bench frame is the key step to turn your headboard into a functional bench. A strong frame gives support and keeps the bench stable. This part needs focus on precise measuring, cutting, and assembling wood parts. Use quality wood and tools for lasting results.
Start by planning the frame size to match your headboard. The frame should fit well and hold weight safely. Next, cut and join the wood pieces carefully. A sturdy base and solid legs help the bench stay balanced and durable.
Measuring And Cutting Wood
Measure the headboard width to set the bench length. Add extra length for comfort if needed. Mark the wood pieces with a pencil and ruler. Use a saw to cut straight and clean edges. Double-check each piece for accuracy before moving on.
Constructing A Sturdy Base
Join the cut wood pieces to form a rectangle or square base. Use wood screws or nails to secure joints tightly. Add support beams inside the frame for extra strength. Ensure the base is level and flat to avoid wobbling later.
Attaching Legs Or Supports
Choose strong legs or supports to hold the bench up. Attach them firmly to each corner of the frame. Use screws and brackets for extra stability. Check that all legs are the same height to keep the bench balanced. Reinforce legs if needed for heavy use.
Attaching The Headboard To The Bench
Attaching the headboard to the bench is a key step. It shapes the bench’s look and strength. Proper attachment keeps the bench safe to use. Follow simple steps to join these parts firmly.
Aligning And Securing Connections
Start by placing the headboard upright behind the bench base. Check if the edges line up evenly. Use clamps to hold both parts tight. Drill pilot holes through the headboard into the bench frame. This prevents wood from splitting. Then, screw the parts together using wood screws. Choose screws long enough to hold both pieces well.
Reinforcing Joints For Stability
Add brackets or metal plates on the inside corners. Attach them with screws for extra strength. Use wood glue along the joint before screwing. This creates a stronger bond. Make sure all screws and brackets sit flush. Sand any rough edges to avoid splinters. Reinforcement helps the bench last longer.
Testing For Durability
Push gently on the headboard and bench to check for movement. Sit on the bench and lean back lightly. Listen for creaks or feel any wobbling. Tighten screws if you notice any looseness. Repeat tests until the bench feels solid. A stable bench ensures safe daily use.
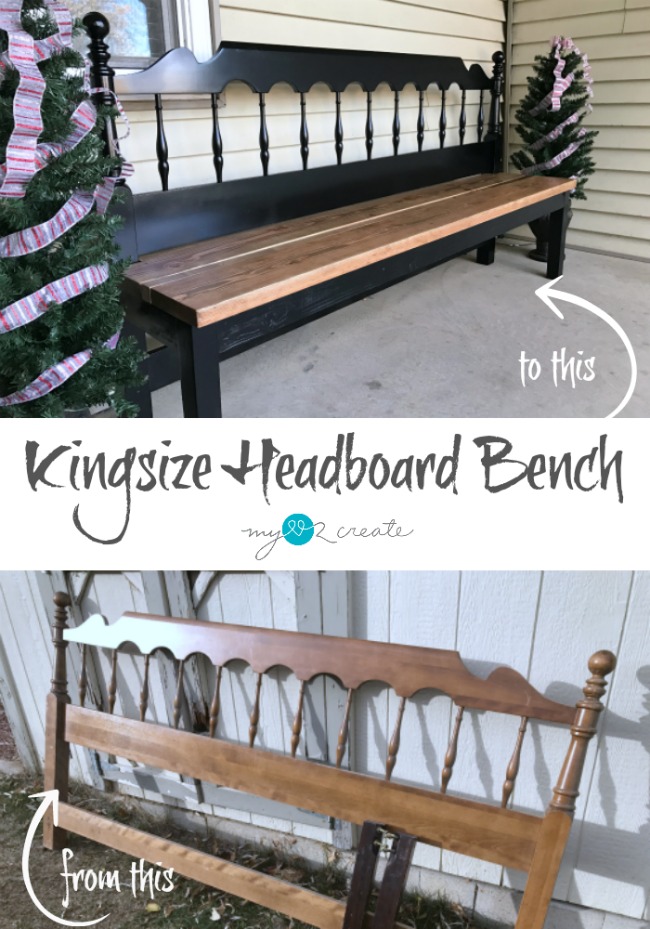
Credit: mylove2create.com
Adding Comfort And Style
Adding comfort and style to a headboard turned bench makes it both useful and attractive. Soft cushions and padding create a cozy spot to sit. Nice colors and textures add charm and match your room’s look. A well-finished bench invites you to relax and enjoy your space.
Choosing Cushions And Padding
Pick cushions that fit the bench size well. Foam padding offers good support and comfort. Use thick cushions for a soft seat. Cover cushions with fabric that feels nice to touch. Choose colors that blend with your room theme. Durable fabrics last longer and resist stains.
Upholstery Techniques
Wrap padding with fabric tightly to avoid wrinkles. Staple the fabric underneath the bench frame for a neat look. Use batting to add softness between the foam and fabric. Smooth out air bubbles and folds carefully. Secure all edges well to keep fabric in place. Simple upholstery tools work well for this project.
Painting And Finishing Touches
Sand the headboard surface for smoothness before painting. Use primer to help paint stick and last longer. Choose paint colors that match or contrast nicely with cushions. Apply two thin coats for even coverage. Add a clear sealant to protect the paint from wear. Finish with decorative trim or buttons for extra style.
Placement And Styling Ideas
Transforming a headboard into a bench opens many possibilities for your space. The right placement and style make the bench both functional and attractive. This section explores practical spots and design tips. It also covers care suggestions to keep your bench looking fresh and inviting.
Ideal Spots For Your New Bench
Place the bench near a window to create a cozy reading nook. It works well in an entryway for seating while putting on shoes. A bedroom corner can become a quiet spot to relax. Use it at the foot of the bed for extra seating or storage space. Hallways also offer a narrow space perfect for a headboard bench.
Decorating Tips To Enhance Appeal
Add cushions or throw pillows for comfort and color. Choose fabrics that match your room’s theme for a unified look. A small throw blanket can add warmth and texture. Use decorative baskets underneath for storage and style. Fresh flowers or a small plant on one side brighten the area.
Maintenance And Care Tips
Dust the bench regularly to keep it clean. Use a soft cloth and gentle cleaner for wooden parts. Avoid harsh chemicals that can damage the finish. Check for loose screws or joints and tighten them as needed. Treat any fabric with a stain protector to prevent damage.
Frequently Asked Questions
How Do I Turn A Headboard Into A Bench?
Start by measuring the headboard width and height. Attach legs or a sturdy base to support seating. Add cushions for comfort and style.
What Tools Are Needed To Make A Bench From A Headboard?
Basic tools include a drill, screws, saw, and measuring tape. Sandpaper and paint help with finishing touches. Safety gear is also important.
Can Any Headboard Be Converted Into A Bench?
Most wooden or metal headboards work well for benches. Avoid very tall or heavy headboards for stability. Choose a design that fits your space.
How Do I Make The Bench Comfortable Using A Headboard?
Add foam padding or cushions on the seat area. Use fabric that matches your room decor. Secure cushions firmly to prevent slipping.
Is It Expensive To Convert A Headboard Into A Bench?
Cost depends on materials and tools you already own. Using leftover paint or cushions lowers expenses. DIY projects usually save money compared to buying new furniture.
Conclusion
Turning a headboard into a bench saves money and adds charm. It offers a unique piece for any room. The project is simple and fun to do. Use basic tools and some creativity to start. Personalize your bench with paint or cushions.
This idea brings new life to old furniture. Enjoy your new bench for seating or decor. Try this easy DIY and see the difference.