
Are you looking to add a touch of style and personality to your room without a full makeover? Creating an accent wall with wood trim is one of the easiest and most affordable ways to transform any space.
Imagine turning a plain wall into a stunning focal point that catches everyone’s eye the moment they walk in. In this guide, you’ll discover simple steps and expert tips to help you craft a beautiful wood-trim accent wall, even if you’re new to DIY projects.
Ready to give your room that wow factor? Let’s get started!
Choosing The Right Wall
Choosing the right wall is the first step in making an accent wall with wood trim. This choice affects the room’s look and feel. The wall should highlight the wood trim and make the space more inviting. Think about the room’s layout and how the wall will fit.
Consider the amount of natural light. This affects the wall’s color and texture. The wall’s size and shape also matter. A well-chosen wall will balance the room and draw attention to the trim.
Assessing Room Layout
Look at how the room is arranged. Choose a wall that faces the main entrance. This wall gets the most attention. Avoid walls with lots of doors or windows. They make it hard to install wood trim evenly. The wall should feel like a natural focal point.
Considering Natural Light
Notice how sunlight hits the walls during the day. Bright walls can handle darker wood trim. Dark rooms need lighter wood to avoid a heavy look. Watch for shadows that the trim might cast. Natural light can add depth to the accent wall.
Selecting Wall Size And Shape
Choose a wall large enough for the design you want. A small wall limits the wood trim pattern. A very big wall needs more wood, which can be costly. Rectangular walls work best for simple trim designs. Odd shapes may need custom cuts and more planning.
Credit: www.youtube.com
Picking Wood Trim Styles
Choosing the right wood trim style shapes the look of your accent wall. It affects the room’s mood and style. Wood trim adds texture and depth, making walls stand out. Picking the best trim involves considering style, material, and how it fits your space.
Popular Trim Profiles
Trim profiles vary from simple to detailed. Flat trim offers a modern, clean look. Cove and ogee trims have gentle curves, adding softness. More intricate profiles, like dentil or egg-and-dart, bring classic charm. Choose a profile that suits your room’s style.
Materials And Finishes
Wood trim comes in several materials. Pine is affordable and easy to paint. Oak offers strength and a rich grain. MDF is smooth and budget-friendly but less durable. Finishes range from natural wood stain to painted white or bold colors. Pick a finish that matches your design goals.
Matching Existing Decor
Keep your room’s current style in mind. Match trim color to existing doors and window frames. Repeat the room’s wood tone for harmony. Contrast colors to create a bold statement. Consider the room’s furniture and wall colors to keep balance.
Gathering Tools And Materials
Starting an accent wall with wood trim requires the right tools and materials. Preparing everything beforehand helps the project go smoothly. It saves time and avoids frustration.
This section lists what you need for a successful build. Check each item carefully. Quality materials and tools make a big difference in the final look.
Essential Tools List
- Measuring tape for precise dimensions
- Level to ensure straight lines
- Miter saw or hand saw for cutting wood
- Nail gun or hammer with finishing nails
- Sandpaper or electric sander for smooth edges
- Stud finder to locate wall studs
- Wood glue for extra hold
- Protective gear like safety glasses and gloves
- Caulk gun for filling gaps
Recommended Wood Types
Choose wood that fits your style and budget. Pine is affordable and easy to paint. Poplar is smooth and takes paint well. Oak offers durability and a rich grain for staining. MDF is budget-friendly but less durable. Avoid soft woods that dent easily.
Paints And Stains
Pick paint or stain based on your room’s look. Paint offers bold color and hides wood grain. Use semi-gloss or satin for easy cleaning. Stain shows the natural wood pattern. Choose a clear protective topcoat for durability. Always test samples before applying on the wall.
Preparing The Wall Surface
Preparing the wall surface is the first step to creating a beautiful accent wall with wood trim. A clean, smooth surface helps the wood trim stick better and look neat. This section explains how to prepare the wall properly for the best results.
Cleaning And Repairing
Start by cleaning the wall to remove dust and dirt. Use a damp cloth or sponge with mild soap. Let the wall dry completely before moving on.
Check for holes, cracks, or dents. Fill these with spackle or wall filler. Smooth the area with sandpaper once dry. This creates a flat surface for the trim.
Priming And Painting Base Color
Apply a primer to the wall to help paint stick well. Choose a primer suitable for your wall type. Let it dry fully.
Paint the wall with the base color you want behind the wood trim. Use a roller for even coverage. Allow the paint to dry before adding trim.
Measuring And Marking Layout
Measure the wall carefully to plan the trim layout. Use a tape measure and pencil for accuracy.
Mark the positions lightly on the wall. This guide helps place the wood trim evenly and straight. Double-check measurements to avoid mistakes.
Installing Wood Trim
Installing wood trim is a key step in creating a stylish accent wall. It adds texture and depth to plain walls. Proper installation helps the trim look neat and lasts longer. Take your time to measure and place each piece carefully. Follow these tips to get the best results.
Cutting Trim Pieces Accurately
Measure each wall section before cutting the trim. Use a miter saw for clean, precise cuts. Cut at the right angle to fit corners perfectly. Mark each piece to avoid confusion during installation. Double-check measurements to prevent mistakes.
Attaching Trim Safely
Use a nail gun or hammer with finishing nails to attach the trim. Secure the trim firmly to the wall studs. Wear safety glasses to protect your eyes. Avoid hitting wires or pipes inside the wall. Work slowly to keep the trim steady and straight.
Ensuring Level And Spacing
Use a level to keep each trim piece straight. Check spacing between pieces to create a balanced look. Keep gaps even for a tidy finish. Adjust nails and trim as needed before the glue dries. Step back often to see the wall from a distance.
Finishing Touches
Finishing touches bring your wood trim accent wall to life. These steps make the wall look clean and polished. Attention to detail helps your wall stand out beautifully.
Filling Gaps And Nail Holes
Fill any gaps between the trim pieces with wood filler. Use a putty knife to smooth the filler evenly. Cover nail holes with the same filler for a seamless look. Let the filler dry fully before moving on.
Sanding And Smoothing
Sand the wood trim gently using fine-grit sandpaper. Focus on filled areas to blend them with the rest of the wood. Sand the entire surface lightly for a smooth finish. Wipe off dust with a clean cloth afterward.
Painting Or Staining Trim
Choose paint or stain that matches your room’s style. Apply a thin, even coat with a brush or roller. Let the first coat dry before applying a second coat. Staining enhances the wood’s natural grain and color. Painting offers a bold, clean look. Finish with a clear sealant for protection.
Maintenance Tips
Maintaining your wood trim accent wall keeps it looking fresh and beautiful. Regular care helps protect the wood and paint or stain. Follow simple steps to keep your wall in top shape.
Cleaning Wood Trim
Dust your wood trim often with a soft cloth. Use a damp cloth for sticky spots. Avoid harsh cleaners that can damage the wood or finish. Mild soap and water work well. Dry the trim fully after cleaning to prevent water damage.
Touching Up Paint Or Stain
Keep extra paint or stain for quick touch-ups. Match the color and finish exactly. Lightly sand the area before applying paint or stain. Use a small brush for precise work. Let it dry completely before touching the wall again.
Preventing Damage
Avoid hitting the trim with furniture or tools. Use corner guards in busy areas to protect edges. Control indoor humidity to prevent wood warping or cracking. Fix any cracks or chips quickly to stop further damage.

Credit: remingtonavenue.com
Design Inspiration
Design inspiration for an accent wall with wood trim sparks creativity. Wood adds warmth and texture to any room. The style you choose sets the tone and mood. Explore different patterns and materials to find your perfect look.
Think about your room’s style and colors. Wood trim can fit modern or classic designs. It can also blend with other materials for a unique effect. Here are some ideas to inspire your wood accent wall.
Modern Geometric Patterns
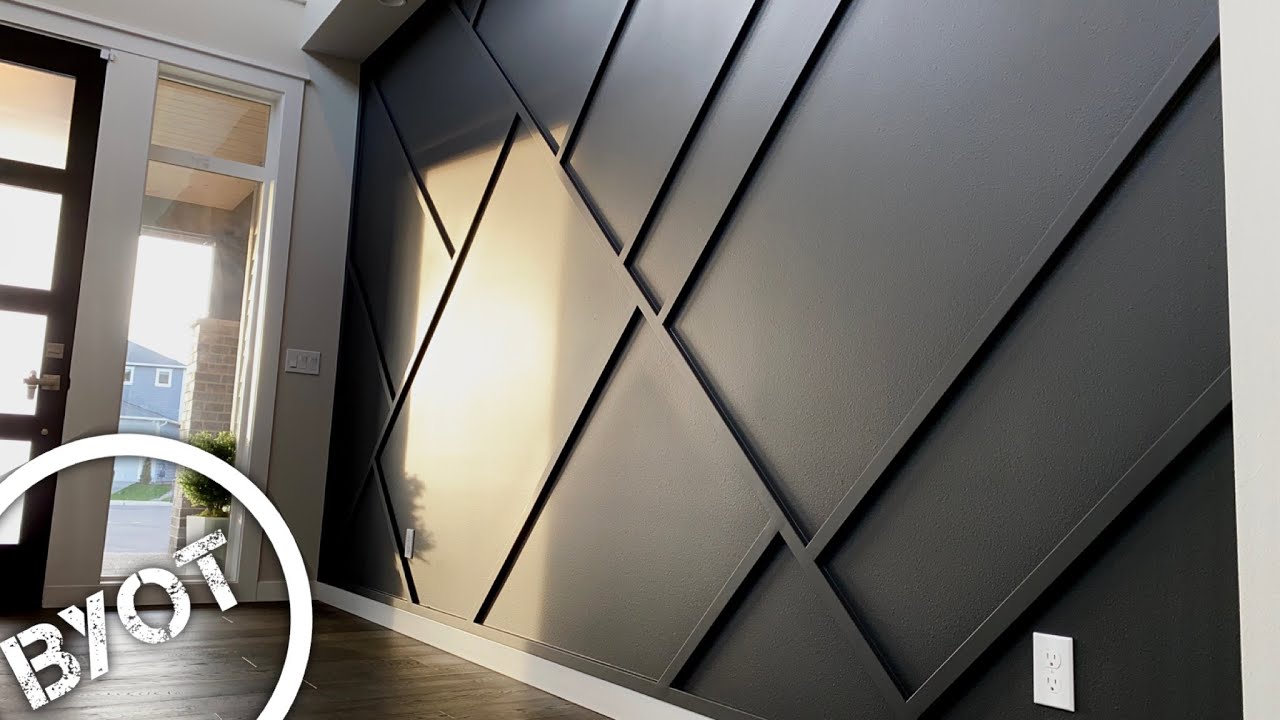
Geometric patterns create a bold, stylish accent wall. Use wood strips to form triangles, squares, or diamonds. The shapes add depth and interest to plain walls. Choose light or dark wood for contrast. Keep lines clean and simple for a modern feel.
Classic Paneling Styles
Classic paneling brings elegance and charm to any space. Wood trim forms rectangles or squares on the wall. This style suits traditional or farmhouse interiors well. Paint the panels or leave the wood natural. It creates a timeless, cozy atmosphere.
Mixing Wood With Other Materials
Combine wood trim with materials like stone, brick, or metal. This mix adds texture and visual interest. Wood softens hard surfaces and creates balance. Use wood strips to frame stone or metal panels. This approach works well in rustic and industrial rooms.

Credit: angelarosehome.com
Frequently Asked Questions
What Materials Do I Need For A Wood Trim Accent Wall?
You need wood trim pieces, nails or adhesive, paint or stain, a measuring tape, and a saw. These basic tools help you create clean lines and attach the trim securely.
How Do I Choose The Right Wood Trim Style?
Pick a style that matches your room’s look and size. Simple trims work well for modern rooms, while ornate ones suit classic designs.
Can I Paint Or Stain Wood Trim On An Accent Wall?
Yes, both paint and stain work well on wood trim. Paint offers bold color, while stain highlights the wood’s natural grain.
How Long Does It Take To Make A Wood Trim Accent Wall?
It usually takes a few hours to a full day, depending on room size and trim complexity. Planning helps speed up the process.
Will A Wood Trim Accent Wall Damage My Existing Wall?
No, wood trim can be installed with minimal wall damage using adhesive or small nails. It’s also easy to remove later if needed.
Conclusion
Creating an accent wall with wood trim adds charm and style to any room. It’s a simple way to change your space without major work. Choose the right wood and design for your taste. Take your time to measure and install carefully.
The result will be a beautiful, personalized wall that stands out. Enjoy the new look and feel of your home. This project brings warmth and character with little effort. Give your room a fresh, unique touch today.