
Want to add a stylish touch to your walls but don’t have a nail gun? You’re not alone.
Installing a chair rail can seem tricky without special tools, but it’s easier than you think. In this guide, you’ll learn simple, step-by-step methods to get the job done using tools you already have. By the end, you’ll know exactly how to install a chair rail that looks professional—no nail gun required.
Keep reading, and let’s make your space look amazing together.
Credit: notinggrace.com
Tools Needed
Installing chair rail without a nail gun is possible with the right tools. You do not need expensive equipment. A few simple hand tools and materials will do the job well. Understanding what tools you need will save time and effort.
Essential Hand Tools
A good measuring tape helps get exact lengths. A pencil marks cuts and placement spots clearly. Use a miter box and handsaw to cut the rails accurately. A level ensures the rail is straight and even. A hammer is needed to gently tap the rails into place. A putty knife helps smooth out any filler used later.
Materials Required
Chair rail molding is the main material needed. Wood glue adds extra hold without nails. Wood filler covers small holes or gaps after installation. Sandpaper smooths any rough edges or filler spots. Painter’s tape can hold the rail temporarily while glue dries.
Preparing The Wall
Preparing the wall is the first step to a smooth chair rail installation. This stage helps ensure the rail fits well and stays in place without nails. Taking time to prepare the wall properly saves effort later and gives a clean look.
Measuring And Marking
Start by measuring the height for the chair rail. Most chair rails sit about 32 inches above the floor. Use a tape measure to find this spot along the wall.
Mark the height with a pencil in several places. Connect these marks using a level. This line guides where the chair rail will go. Check the line for straightness to avoid a crooked finish.
Cleaning And Smoothing
Clean the wall surface to remove dust and dirt. Use a damp cloth or mild cleaner. Let the wall dry fully before moving on.
Smooth the wall by sanding any bumps or rough spots. This helps the adhesive stick better. Wipe away dust after sanding to keep the surface clean.
Cutting The Chair Rail
Cutting the chair rail is a key step in installing it without a nail gun. Precise cuts ensure the rail fits perfectly along your wall. Taking your time here prevents gaps and uneven edges. Proper cutting also makes the installation look clean and professional. Below are tips to measure and cut the rail accurately using simple tools.
Measuring For Accuracy
Start by measuring the wall length where the chair rail will go. Use a tape measure and write down the exact number. Double-check your measurement to avoid mistakes. Mark the chair rail with a pencil at the correct length. Measure twice, cut once is a good rule to follow. Mark the ends clearly for straight cuts. If you have corners, measure each section separately.
Using A Handsaw Effectively
Choose a fine-toothed handsaw for smooth cuts on the chair rail. Secure the rail on a stable surface like a workbench. Hold the rail firmly to stop it from moving. Start the cut slowly to create a guide line. Saw with steady, even strokes, not fast or jerky. Keep the saw straight to avoid angled cuts. Sand the edges lightly after cutting for a neat finish.

Credit: knappconnectors.com
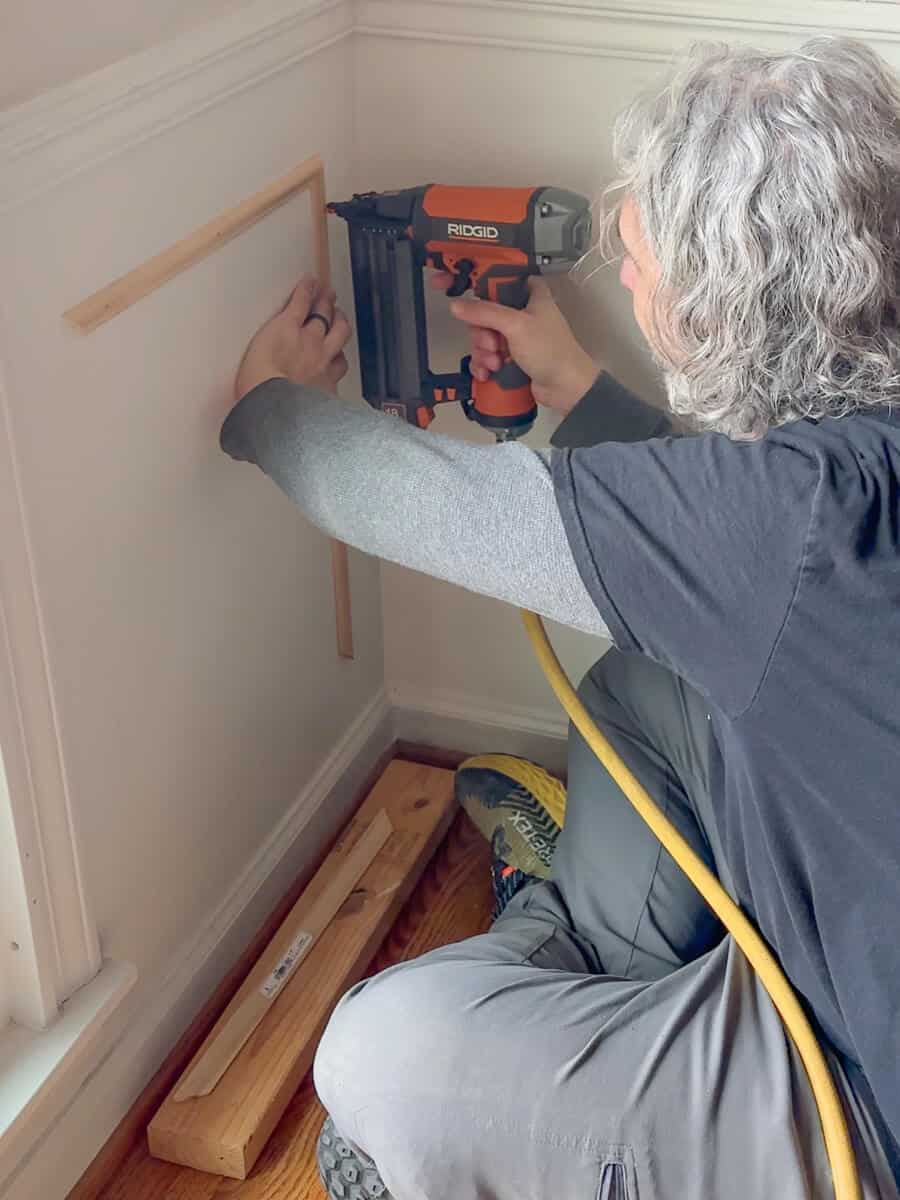
Attaching The Chair Rail
Attaching the chair rail without a nail gun requires care and the right techniques. The goal is to secure the rail firmly to the wall. You want it straight and stable. There are a few simple methods to try. Using adhesive, hand-applied nails, and clamping can work well. Each method helps keep the chair rail in place during and after installation.
Using Adhesive For Secure Bonding
Choose a strong construction adhesive made for wood and walls. Apply a thin, even bead along the back of the chair rail. Press the rail firmly against the wall. Hold it for a minute to set the bond. Adhesive helps keep the rail in place without nails. It also fills small gaps and prevents movement. Let the adhesive dry fully before any further steps.
Applying Finishing Nails By Hand
Use a hammer and small finishing nails to add extra hold. Place nails at an angle through the rail and into wall studs. Drive nails gently to avoid splitting the wood. Use a nail set to push the nail heads just below the surface. This keeps the rail neat and ready for painting. Hand nailing takes patience but works well without a nail gun.
Clamping Techniques
Clamps hold the chair rail tight while adhesive dries or nails set. Use bar clamps or C-clamps sized for your rail. Position clamps every 12 to 18 inches along the rail. Tighten clamps enough to hold firmly but not damage the wood. Leave clamps in place for at least an hour. Check the rail after removing clamps for any loose spots.
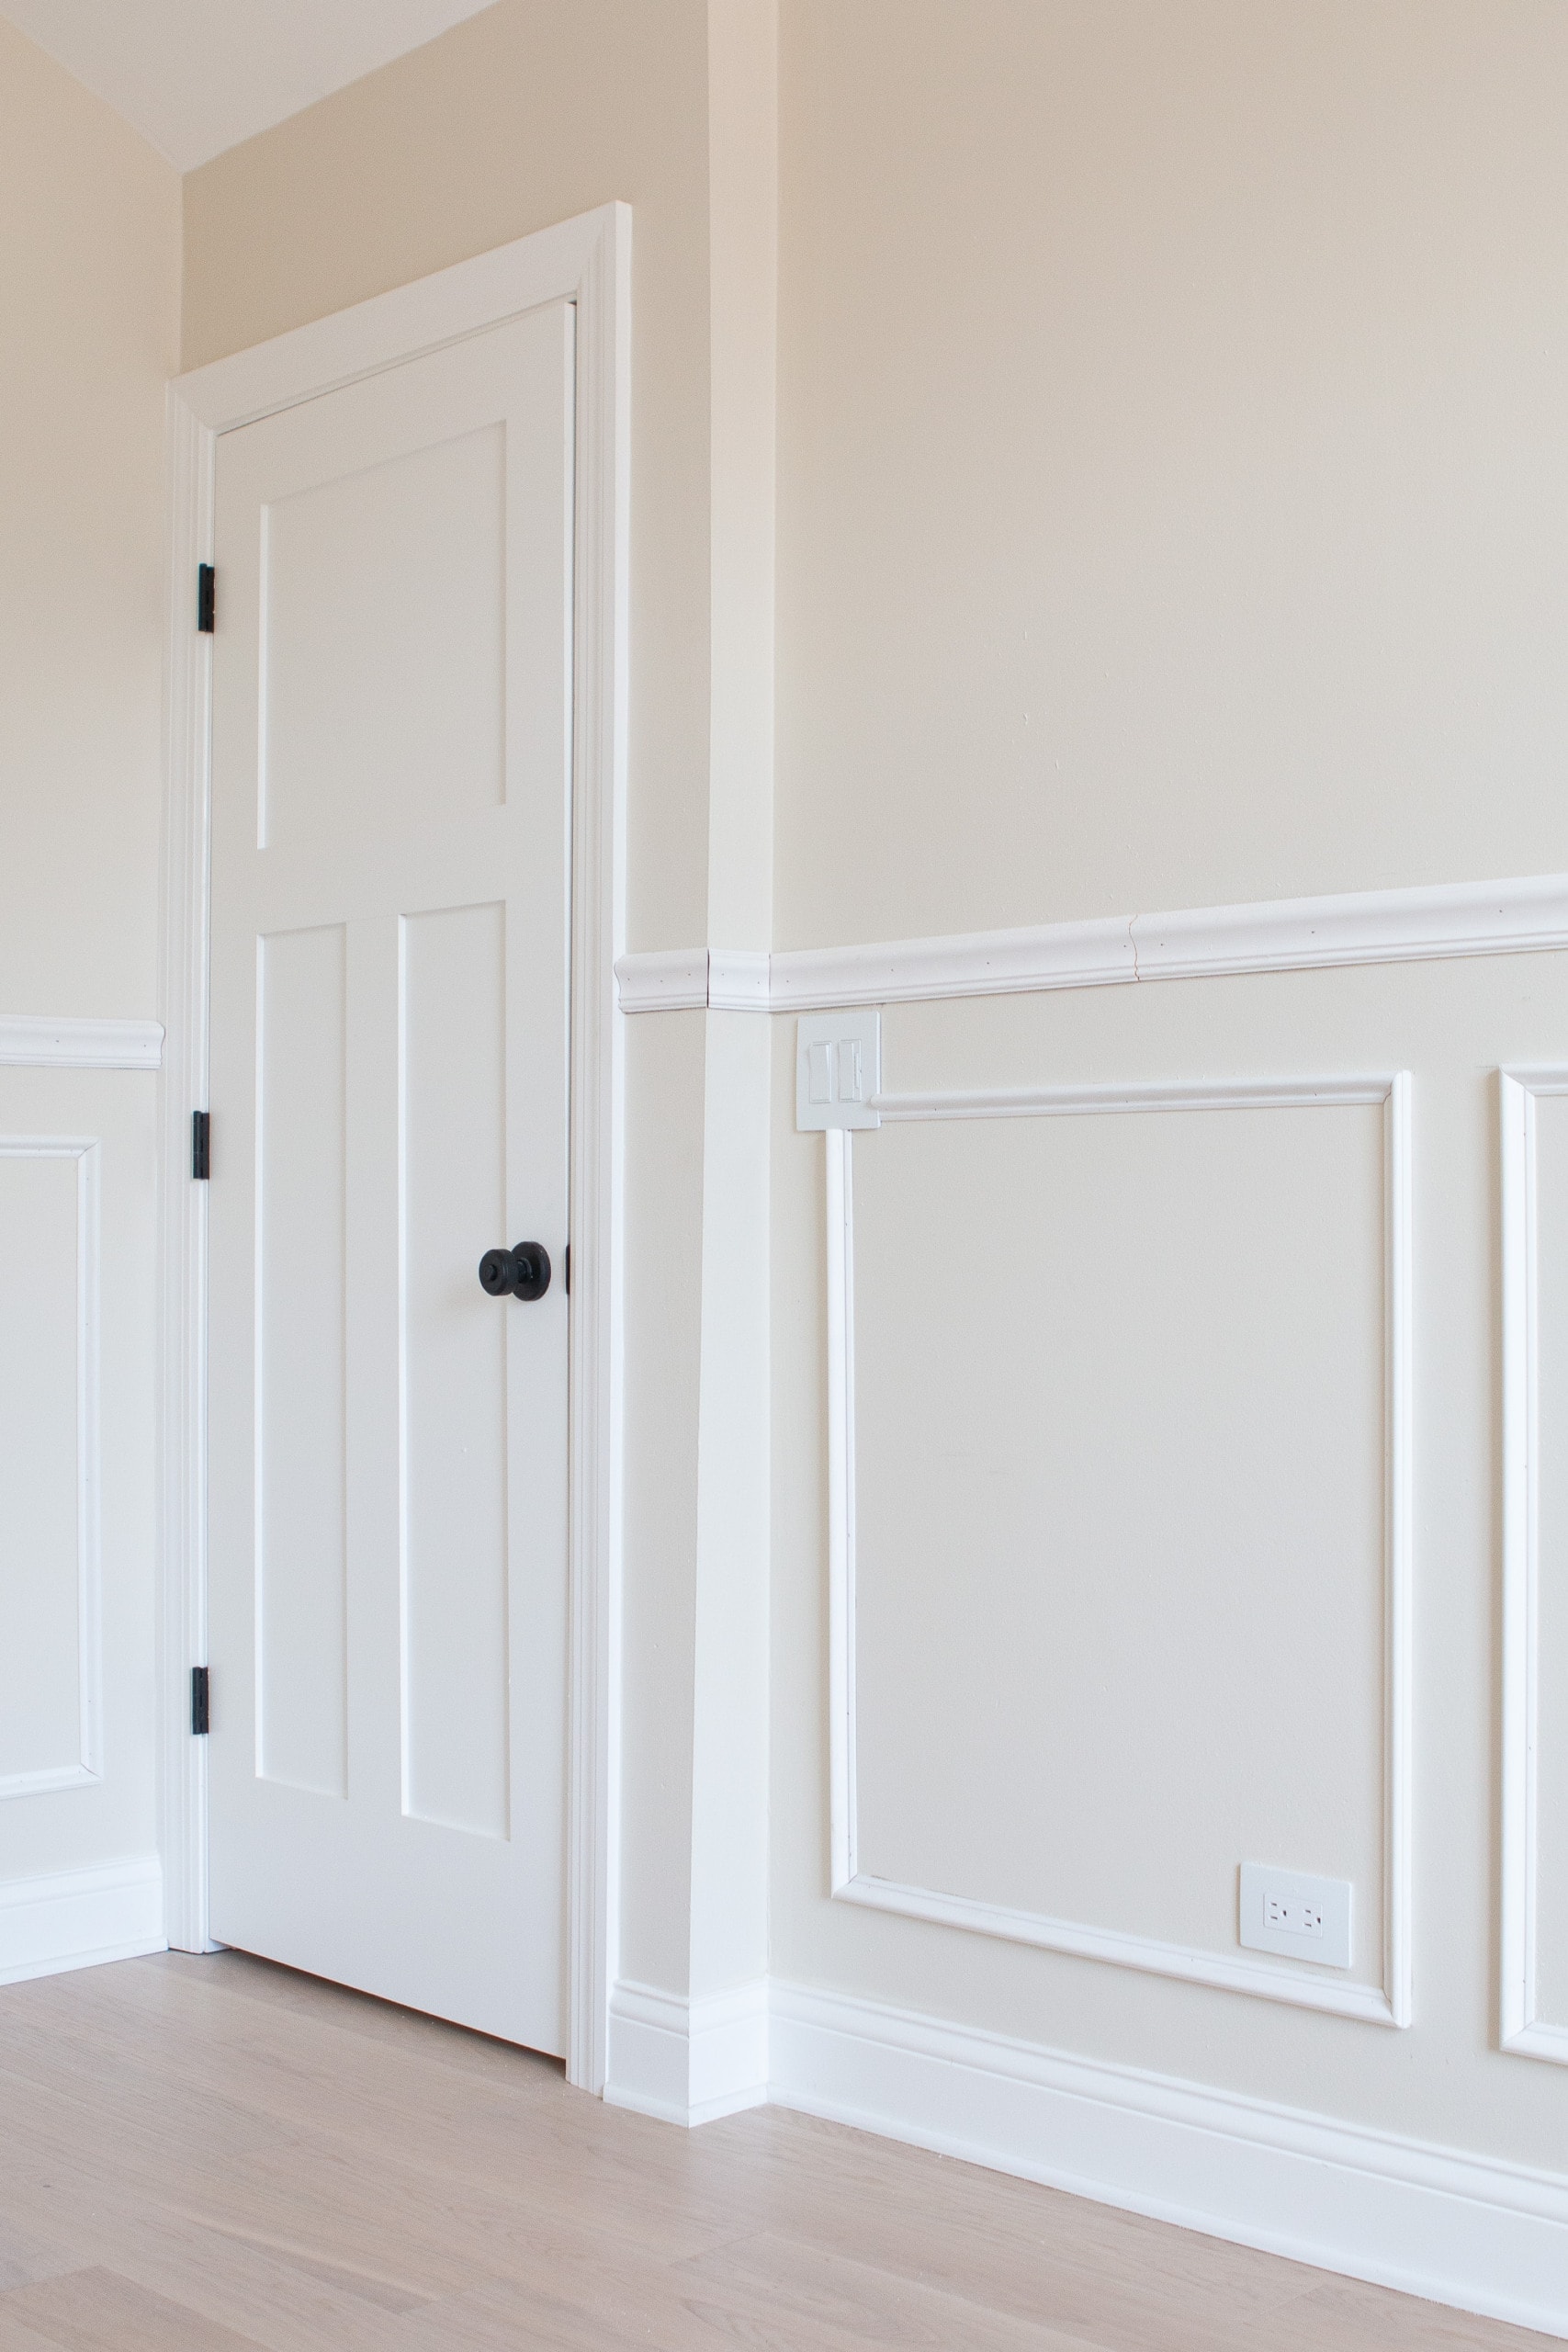
Sealing And Painting
Sealing and painting the chair rail completes the installation and gives it a polished look. It protects the wood and helps the rail blend with your room’s decor. This step requires care to cover all gaps and ensure smooth, even color.
Filling Gaps And Holes
Use wood filler to fill nail holes and any small gaps between the wall and chair rail. Apply the filler with a putty knife, pressing it firmly into the holes. Let it dry fully before sanding it smooth. Sand lightly to make the surface even with the wood. Wipe away dust with a damp cloth. Filling gaps stops moisture from damaging the wood and makes the paint look neat.
Priming And Painting Tips
Start with a primer suited for wood surfaces. Apply a thin, even coat using a brush or roller. The primer helps paint stick better and last longer. Allow the primer to dry completely before painting.
Choose a high-quality paint for trim or woodwork. Use a small brush for tight corners and a roller for flat areas. Apply thin coats to avoid drips and uneven texture. Let each coat dry before adding another. Two coats usually provide good coverage and a clean finish.
Troubleshooting Common Issues
Installing chair rail without a nail gun can be tricky. Problems may arise that slow your progress or affect the final look. Knowing how to handle common issues helps keep your project on track. This section covers key challenges and easy fixes. Follow these tips to get smooth, professional results.
Dealing With Uneven Walls
Uneven walls cause gaps between the chair rail and wall. Use a flexible caulk to fill small gaps. For larger gaps, add thin wood shims behind the rail. Press the rail firmly against the wall while the adhesive dries. Sand rough spots on the wall before attaching the rail. This creates a better surface for the glue.
Preventing Rail Warping
Wood can warp due to moisture or poor storage. Store rails flat and dry before installation. Seal the rails with primer or paint to protect them from moisture. Attach the rail securely with strong adhesive and finishing nails. Check the rail’s shape before fixing it. Straight rails give a neat, lasting finish.
Credit: thediyplaybook.com
Frequently Asked Questions
How Do I Attach Chair Rail Without A Nail Gun?
You can use strong construction adhesive to attach chair rail. Press the rail firmly and hold it in place until it sticks well.
What Tools Can Replace A Nail Gun For Chair Rail?
A hammer and finishing nails work well for chair rail installation. Use a nail set to sink nails below the surface neatly.
Can I Install Chair Rail Using Only Glue?
Glue alone may not hold chair rail securely over time. Combine glue with small finishing nails for better strength and durability.
How Do I Prevent Damage Without A Nail Gun?
Use painter’s tape to hold the rail while adhesive dries. Be gentle when hammering nails to avoid splitting the wood.
What’s The Best Way To Align Chair Rail Correctly?
Measure and mark the wall at the desired height before attaching. Use a level to ensure the chair rail is perfectly straight.
Conclusion
Installing chair rail without a nail gun is simple and doable. Use strong glue and clamps to hold the rail in place. Measure carefully and cut straight lines for a clean look. Take your time and check each step. This method saves money and avoids damage to walls.
You can achieve a neat finish with basic tools. Enjoy your updated room with this easy DIY project. Small efforts bring big changes. Give it a try and see the difference yourself.