
Have you ever noticed old hinge holes in your door frame that make it look worn out or affect how your door fits? Those small gaps can be more than just an eyesore—they can let in drafts, cause the door to hang unevenly, and even weaken the frame over time.
But don’t worry, fixing them is easier than you might think. You’ll learn simple, step-by-step methods to fill hinge holes quickly and effectively, saving you time, money, and frustration. Keep reading, and you’ll have your door frame looking solid and smooth in no time.
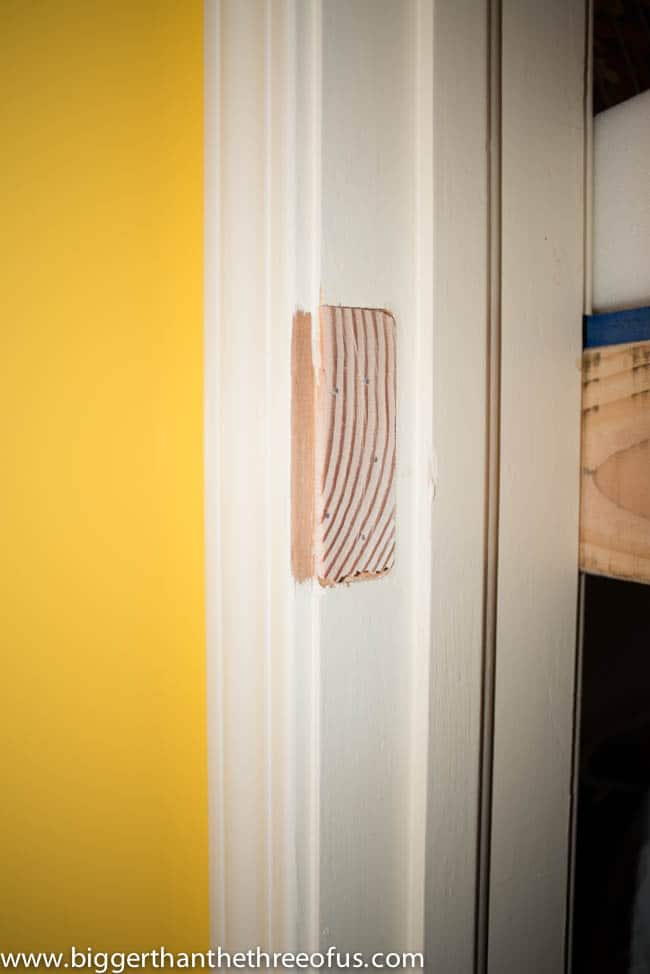
Credit: biggerthanthethreeofus.com
Tools And Materials Needed
Fixing hinge holes in a door frame needs the right tools and materials. Using proper supplies makes the repair easier and stronger. This section lists everything needed for a smooth repair job.
Basic Repair Tools
- Screwdriver: To remove the door hinges and screws.
- Chisel: Helps to clean out damaged wood or old filler.
- Sandpaper: Smooths the area before and after filling.
- Putty knife: Applies wood filler evenly into the holes.
- Drill: For making new pilot holes if needed.
- Clamps: Hold parts steady while the filler dries.
Types Of Wood Fillers
- Epoxy filler: Very strong and durable for large holes.
- Wood putty: Easy to apply, best for small holes.
- Latex-based filler: Dries quickly and sands easily.
- Polyester filler: Good for heavy damage and fast repairs.
Optional Supplies For Finishing
- Paint or wood stain: Matches the door frame’s color.
- Primer: Prepares the surface for painting.
- Sealant: Protects the repair from moisture.
- Brushes or rags: For applying finishes neatly.
Preparing The Door Frame
Preparing the door frame is an important first step to fill hinge holes properly. It ensures the repair material sticks well and lasts long. Taking time to get the surface ready can save effort later.
Removing Loose Debris
Start by removing any loose wood or old filler around the hinge hole. Use a small brush or a vacuum to clear out dust and chips. Loose debris can prevent new filler from bonding firmly.
Cleaning The Hole Area
Wipe the hole area with a damp cloth to remove dirt and grease. Clean surfaces help the filler stick better. Allow the area to dry completely before moving to the next step.
Sanding For Better Adhesion
Lightly sand the hole edges with fine-grit sandpaper. This roughens the surface and improves filler grip. After sanding, remove dust using a clean cloth or brush.
Choosing The Right Filler
Choosing the right filler is key to fixing hinge holes in a door frame. The filler must be strong and blend well with the door’s wood. It also needs to hold nails or screws firmly. Using the wrong filler can cause the repair to fail quickly. Understanding the types of fillers helps to pick the best one for your project.
Wood Putty Vs Epoxy
Wood putty is easy to use and dries quickly. It works well for small holes and minor repairs. Putty is soft and does not hold nails well. It is best for holes that won’t face much stress.
Epoxy is a two-part filler. It hardens into a very strong material. Epoxy holds nails and screws tightly. It is perfect for large holes or damaged areas. Epoxy requires mixing and takes longer to dry.
When To Use Wood Glue
Wood glue helps when the hole is caused by loose wood pieces. It bonds the wood fragments together firmly. Use wood glue before applying filler for better strength. It is not a filler but supports the repair.
Wood glue works best on cracks or splits near the hinge. It helps the filler stay in place longer. Avoid using wood glue alone to fill holes.
Selecting Color-matched Fillers
Choosing a filler color close to the door frame hides repairs. Color-matched fillers create a smooth, natural look. Many fillers come in various shades of wood tones.
Test the filler on a small area first. Some fillers can be stained or painted after drying. This ensures the repair blends perfectly with the door frame.

Credit: diy.stackexchange.com
Filling The Hinge Holes
Filling hinge holes in a door frame is a simple task that improves door stability. It also prepares the frame for new hinges. A well-filled hole stops the hinge from loosening over time. Use the right tools and materials for a strong repair.
Applying The Filler Correctly
Choose a wood filler that matches the door frame material. Use a small putty knife to scoop some filler. Press the filler firmly into the hole. Avoid just covering the surface. Fill the hole completely to avoid weak spots.
Packing The Hole For Stability
Packing the filler tightly gives a solid base for the hinge. Push the filler deep into the hole with steady pressure. Add more filler if needed. Remove any air pockets inside the hole. A packed hole keeps screws from wobbling.
Smoothing The Surface
After filling, smooth the surface with the putty knife. Level it with the surrounding wood. Let the filler dry fully before sanding. Use fine-grit sandpaper to finish. The smooth surface makes the hinge sit flush and neat.
Drying And Curing Time
Drying and curing time is important when filling hinge holes in door frames. It affects the strength and finish of the repair. Rushing this process can cause weak spots or uneven surfaces. Patience ensures the filler sets properly and lasts longer.
The time needed depends on the filler type and environmental conditions. Humidity and temperature play key roles in drying speed. Knowing the right wait times helps avoid mistakes and improves results.
Recommended Waiting Periods
Most wood fillers need 1 to 4 hours to dry. For deeper holes, wait at least 24 hours. Some epoxy fillers require longer curing times, up to 48 hours. Always check the product label for exact times. Avoid sanding or painting too soon to prevent damage.
Tips To Speed Up Drying
Use a fan or open windows to increase air flow. Warm rooms help fillers dry faster than cold ones. Avoid high humidity areas as they slow drying. Thin layers of filler dry quicker than thick ones. Applying heat with a hairdryer on low helps but keep it moving to avoid cracking.

Credit: www.youtube.com
Sanding And Finishing Touches
After filling the hinge holes in your door frame, sanding and finishing touches are important. These steps make the repair look clean and blend well with the rest of the door frame. Proper sanding smooths out rough areas and prepares the surface for paint or stain. Finishing touches protect the repair and keep it durable for a long time.
Achieving A Smooth Surface
Start with medium-grit sandpaper to level the filler with the door frame. Sand gently to avoid removing too much material. Switch to fine-grit sandpaper for a smooth finish. Check the surface by running your hand over it. The repair should feel even and flush with the surrounding wood.
Matching Paint Or Stain
Choose paint or stain that matches your door frame color. Test a small area first to see the result. Apply thin coats for better control and coverage. Let each coat dry before adding the next. This helps the repair blend naturally with the rest of the frame.
Protecting The Repair Area
Apply a clear sealant or varnish to protect the repair from moisture and wear. Use a brush for even coverage. Allow the sealant to dry completely. This step keeps the repair strong and helps it last longer. Regular cleaning will also maintain the finish well.
Reinstalling The Door Hinge
Reinstalling the door hinge is a key step after filling hinge holes in a door frame. It ensures the door works smoothly and stays secure. Follow careful steps to put the hinge back correctly. This prevents damage and keeps the door aligned.
Drilling New Pilot Holes
Use a drill bit smaller than the screw size for pilot holes. Pilot holes guide screws and stop the wood from splitting. Mark the hinge screw spots clearly before drilling. Drill straight and to the right depth. This helps screws fit tightly and hold the hinge firmly.
Securing The Hinge Properly
Place the hinge on the door frame exactly where it belongs. Use screws that fit the hinge and pilot holes well. Tighten screws evenly to avoid bending the hinge. Secure screws until they are snug but avoid over-tightening. This keeps the hinge strong and the door stable.
Checking Door Alignment
After installing the hinge, open and close the door slowly. Watch for any sticking or uneven gaps. Adjust screws slightly if the door does not swing smoothly. Proper alignment prevents wear and keeps the door looking good. Repeat checks until the door moves freely and fits well in the frame.
Preventing Future Damage
Preventing future damage to hinge holes in door frames is essential to keep doors working well. Small fixes today stop bigger problems later. Protecting the door frame makes the door last longer and keeps it safe to use.
Using Reinforcement Plates
Reinforcement plates add extra strength to the door frame. These metal plates spread the pressure from the hinges across a larger area. They stop the wood from breaking or cracking under stress. Install plates behind the hinge before attaching screws for better support. This simple step reduces wear and tear significantly.
Regular Maintenance Tips
Check door hinges often for loose screws or damage. Tighten screws if they feel loose but do not force them. Clean hinges to prevent rust and dirt buildup. Lubricate hinges with oil to keep them moving smoothly. Regular care keeps the door frame strong and stops damage early.
Avoiding Over-tightening Screws
Over-tightening screws can strip the wood inside hinge holes. Use just enough force to make screws snug but not too tight. Stripped holes cause the hinge to loosen and damage the frame. Use a screwdriver with good control or a drill with a clutch setting. This helps prevent future damage and keeps hinges secure.
Frequently Asked Questions
How Do I Fill Hinge Holes In A Door Frame?
To fill hinge holes, clean out loose wood first. Use wood filler or wood putty to fill the holes. Let it dry and sand smooth before painting.
What Materials Work Best For Filling Door Hinge Holes?
Wood filler or wood putty are the best choices. They stick well to wood and dry hard. Choose a product that can be sanded and painted.
Can I Reuse The Same Hinge After Filling The Holes?
Yes, but you may need longer screws. Filled holes won’t hold screws as well, so longer screws help secure the hinge.
How Long Does Wood Filler Take To Dry In Hinge Holes?
Drying time varies but usually takes 1 to 4 hours. Check the product label for exact times. Ensure the filler is fully dry before sanding.
Is It Necessary To Paint Over Filled Hinge Holes?
Painting protects the filled area and matches the door frame. It also helps the filler blend in. Use paint that matches your door frame color.
Conclusion
Filling hinge holes in a door frame is a simple fix anyone can do. Choose the right filler, apply it carefully, and let it dry well. Sand the surface smooth for a neat look. This small repair keeps your door strong and stable.
It also helps your home look tidy and cared for. Try this easy project to save money and avoid bigger repairs later. Simple steps, good results.