
Are you frustrated because your Bosch laser level keeps blinking and you don’t know why? You rely on your laser level for precise measurements, and when it starts acting up, it can throw off your entire project.
Understanding what those blinking lights mean can save you time and prevent mistakes. You’ll discover the common reasons behind the Bosch laser level blinking and simple steps you can take to fix it quickly. Keep reading to get your tool working perfectly again and stay on track with your work.

Credit: www.youtube.com
Common Reasons For Blinking
Bosch laser levels blink to signal different issues. Understanding why your device blinks helps fix problems fast. Some reasons are simple to solve, while others may need more care. Knowing the common causes prevents frustration and saves time.
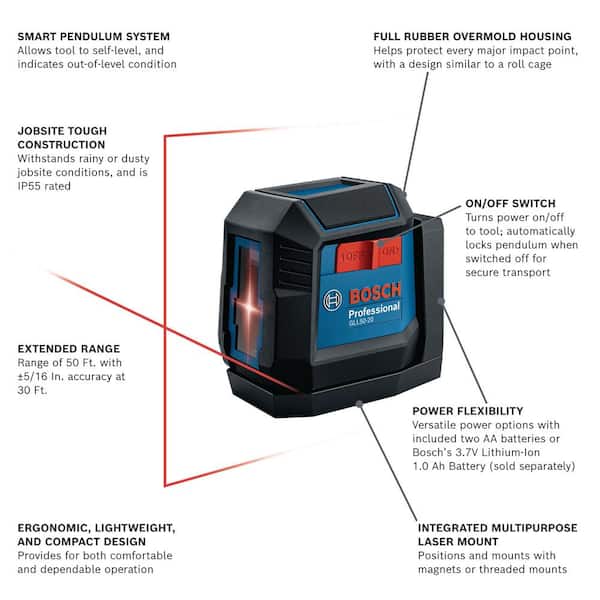
Low Battery Issues
Low batteries often cause blinking in Bosch laser levels. The device signals it needs fresh power. Weak batteries reduce laser brightness and accuracy. Replacing or recharging batteries usually stops the blinking. Always keep spare batteries handy on the job.
Calibration Errors
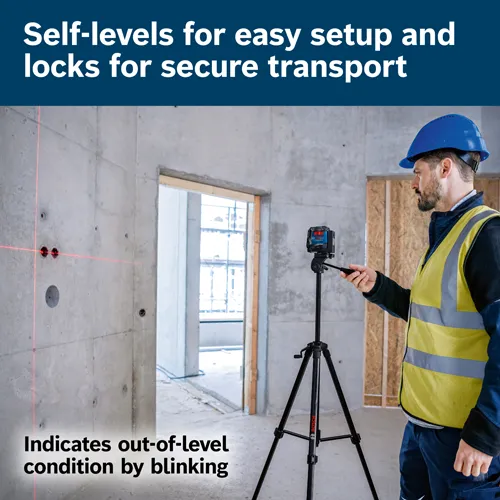
Blinking can mean the laser level is out of calibration. The tool may not sit flat or is bumped during use. Calibration errors affect measurement accuracy. Resetting or recalibrating the device often clears the blinking. Follow the user manual to calibrate correctly.
Signal Interference
Signal interference from other devices may cause blinking. Wireless signals or metal objects nearby can disrupt the laser. Interference lowers laser beam stability and precision. Move away from possible sources of interference. This helps maintain a steady, clear laser line.
Overheating Problems
Overheating leads to blinking as a warning sign. Extended use or high temperatures strain the laser level. Overheating can damage internal parts if ignored. Give the tool time to cool down during breaks. Avoid using it in direct sunlight for long periods.
Credit: www.homedepot.com
Quick Fixes For Battery Problems
Battery issues cause Bosch laser level blinking. Most problems relate to weak power or poor connection. Fixing these is simple and quick. Try these easy steps to restore your tool’s performance.
Checking And Replacing Batteries
Start by checking the battery’s power. Remove the battery from the device. Look for any signs of damage or leaks. Test the battery with a meter if available. Replace old or weak batteries with new ones. Use batteries recommended by Bosch for best results.
Charging Rechargeable Batteries
Rechargeable batteries need proper charging. Use the charger that came with your Bosch tool. Plug the charger into a working outlet. Let the battery charge fully before use. Avoid overcharging to extend battery life. If the battery won’t charge, try a different charger or outlet.
Battery Contact Cleaning Tips
Dirty contacts can cause blinking issues. Use a dry cloth or a soft brush. Gently clean the battery contacts inside the tool. Also clean the battery terminals. Avoid using water or chemicals. Clean contacts improve power flow and reduce blinking.
Resetting And Recalibrating The Laser Level
Resetting and recalibrating your Bosch laser level fixes blinking problems and ensures accuracy. Over time, the device may lose its settings or calibration. This can cause errors and affect your work. Resetting brings the device back to its original state. Recalibrating aligns the laser properly for precise measurements. Both steps are simple and important to keep your laser level reliable.
Performing A Factory Reset
Start by turning off the laser level. Hold the reset button or use the reset option in the menu. Wait for the device to restart automatically. Factory reset clears all custom settings. The laser level returns to its original factory settings. This step fixes software glitches that cause blinking. After reset, test the laser to see if blinking stops.
Manual Calibration Steps
Place the laser level on a flat surface. Check the user manual for specific calibration instructions. Adjust the screws or knobs to center the laser beam. Use a target or wall to verify alignment. Make small adjustments until the laser is steady and accurate. Manual calibration improves precision after reset or shocks. Repeat the process if blinking or errors continue.
Using Calibration Tools
Use a calibration plate or target for better accuracy. These tools help detect laser misalignment. Place the laser level and tool at a fixed distance. Follow the device’s guide to adjust settings based on tool feedback. Calibration tools reduce errors and improve performance. They ensure the laser beam is perfectly level and steady. Use these tools regularly to maintain your Bosch laser level.
Avoiding Signal And Environmental Interference
Signal and environmental interference can cause a Bosch laser level to blink. This blinking may confuse users and affect measurement accuracy. Avoiding such interference helps keep the laser stable and reliable. Simple steps can reduce signal problems and environmental effects. This section explains how to do that.
Choosing The Right Location
Select a flat and stable surface for your laser level. Avoid places near heavy machinery or metal objects. These can affect the laser signal. Keep the laser away from vibrating floors or uneven ground. Check for obstacles that block the laser beam path. Clear lines of sight improve the device’s performance.
Managing External Light Sources
Bright sunlight or strong indoor lights can interfere with the laser beam. Work in shaded areas or use curtains to reduce sunlight. Turn off or dim bright lights near the laser device. Avoid pointing the laser toward reflective surfaces. This helps prevent signal confusion and blinking.
Reducing Magnetic And Electronic Interference
Avoid placing the laser near strong magnetic fields or electronic devices. Items like speakers, cell phones, and radios can cause interference. Keep a safe distance from electrical panels or power tools. This reduces the risk of the laser blinking or losing accuracy. Use the laser in quiet, low-electronic environments for best results.
Preventing Overheating And Hardware Damage
Preventing overheating and hardware damage is vital for the long life of your Bosch laser level. Overheating can cause the device to blink and stop working properly. Taking care of your tool helps avoid repair costs and keeps your projects on track.
Proper Usage Duration
Limit the laser level’s continuous use to avoid overheating. Most models work well for 2 to 3 hours without breaks. Give the device a rest after extended use to cool down. Using it too long without pauses increases the risk of damage.
Cooling Techniques
Use the laser level in a shaded, cool area when possible. Avoid direct sunlight or hot environments. Place the tool on a flat surface to improve air circulation. Fans or portable coolers can help lower the temperature during use.
Inspecting For Physical Damage
Check the laser level regularly for cracks or dents. Physical damage can block ventilation and cause overheating. Clean dust and debris from vents and lenses carefully. Early inspection helps prevent bigger problems and keeps the device safe.
Credit: www.boschtools.com
When To Contact Bosch Support
Knowing when to contact Bosch support is important for your laser level’s care. Some blinking issues can be fixed at home. Others need expert help. Choosing the right time to get professional support saves you time and effort.
Warranty And Repair Options
Check your Bosch laser level’s warranty first. Most come with a limited warranty. This covers parts and repairs for a set time. If your device blinks and the warranty is valid, Bosch can repair or replace it.
Repairs outside warranty may cost you. Bosch offers repair services for a fee. Understanding your warranty helps avoid unexpected charges.
Authorized Service Centers
Use only Bosch authorized service centers. These centers have trained technicians. They use genuine Bosch parts. This keeps your laser level working well.
Unauthorized repairs can void your warranty. They may also cause more damage. Find the nearest authorized center on Bosch’s website or contact support.
Preparing For Professional Help
Before contacting Bosch support, gather important details. Note your laser level’s model and serial number. Describe the blinking pattern clearly. Mention any troubleshooting steps you tried.
Keep your purchase receipt handy. This proves warranty status. Clear information helps technicians diagnose and fix problems faster.
Frequently Asked Questions
Why Is My Bosch Laser Level Blinking?
A blinking laser usually means the device is out of level or low on battery. Check if the surface is even and replace batteries if needed.
How To Fix A Blinking Bosch Laser Level?
Make sure the level is on a flat surface and stable. Replace old batteries and reset the laser level to stop blinking.
What Does A Blinking Red Light On Bosch Laser Mean?
A blinking red light signals an error like low power or calibration issues. Charge or change batteries and recalibrate the tool.
Can A Blinking Bosch Laser Level Affect Accuracy?
Yes, blinking often shows the tool is not properly leveled. Fix the blinking first to ensure correct measurements.
How Often Should I Replace Bosch Laser Level Batteries?
Replace batteries when the laser starts blinking or dims. Regular checks every few months keep the tool ready to use.
Conclusion
Bosch laser level blinking often signals a simple issue. Check the batteries first and replace them if needed. Ensure the device is on a flat surface for accurate readings. Clean the laser lens to avoid errors. Always read the user manual for specific instructions.
Regular maintenance keeps your tool working well. Staying aware of these tips helps avoid frustration. Keep your Bosch laser level ready for precise work every time.