
Have you ever wanted to add a warm, cozy glow to your room while enjoying the benefits of a natural air purifier? Making a salt rock lamp yourself is easier than you might think.
Imagine creating a beautiful, calming light that not only brightens your space but also helps improve your mood and air quality. In this guide, you’ll discover simple steps to craft your own salt rock lamp that fits perfectly in your home.
Keep reading, and you’ll be surprised how quickly you can turn a few basic materials into a stunning, soothing light source you’ll love.

Credit: www.youtube.com
Materials Needed
Gathering the right materials is the first step to make a salt rock lamp. Using proper items ensures your lamp is safe and looks great. Each material has a specific role in the process.
This section covers the key materials, tools, and safety tips for your project.
Choosing The Right Salt Rock
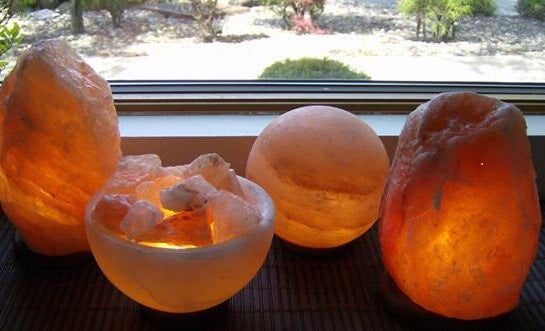
Select a salt rock that is large and solid. A pink Himalayan salt block works well. It should have a flat surface to hold the light bulb. The color can range from light pink to deep orange.
A good salt rock feels heavy and firm. Avoid rocks with cracks or soft spots. These can break or crumble easily.
Essential Tools And Supplies
You will need a lamp kit with a bulb, socket, and cord. A small drill helps create holes in the salt rock. Sandpaper smooths rough edges. A sturdy base, like wood or metal, holds the rock steady.
Gather a clean cloth to wipe dust. Use gloves to protect your hands from rough salt surfaces. Basic tools like a screwdriver will help assemble the lamp.
Safety Precautions
Wear gloves to avoid skin irritation from salt dust. Use eye protection while drilling the rock. Work in a well-ventilated area to prevent inhaling fine particles.
Keep water away from electrical parts. Always unplug the lamp before changing the bulb. Follow instructions on the lamp kit to avoid electric shocks.
Credit: www.thesaltlampshop.com.au
Preparing The Salt Rock
Preparing the salt rock is the first step in making a salt rock lamp. This step ensures the rock is clean, shaped, and ready for the light. Proper preparation helps the lamp look good and work well. Follow these simple steps to get your salt rock ready.
Cleaning And Drying
Start by wiping the salt rock with a dry cloth. Remove dust and dirt from all sides. Use a damp cloth if needed, but do not soak the rock. After cleaning, let the rock air dry completely. Drying is important to avoid moisture inside the lamp.
Shaping The Rock
Next, shape the salt rock to fit your design. Use sandpaper or a small file for smooth edges. Shape the bottom flat so the lamp stands steady. Be careful to keep the rock thick enough to hold the light inside.
Drilling The Hole
Drill a hole at the base of the rock for the light bulb and cord. Use a drill with a small bit made for stone or salt. Drill slowly and gently to avoid cracking the rock. Make the hole deep enough for the light fixture to fit securely.
Installing The Light
Installing the light in your salt rock lamp is a key step. It brings the lamp to life and creates a warm glow. This part needs care and the right tools. Follow the steps to install the light safely and correctly.
Selecting The Light Source
Choose a light that fits inside the salt rock. LED bulbs work best. They use less energy and do not heat up much. Pick a bulb with low wattage, around 15 watts or less. This keeps the salt rock safe from cracking.
Wiring And Assembly
Use a lamp kit with a socket and cord for easy wiring. Connect the wires to the socket carefully. Make sure all connections are tight and secure. Place the socket inside the hollow part of the salt rock. Use a base or stand to hold the lamp steady.
Testing The Lamp
Plug in the lamp and switch it on. Check if the light works well. Look for any flickering or loose wires. If all is good, the lamp is ready to use. Enjoy the soft, calming light of your salt rock lamp.
Finishing Touches
Finishing touches give your salt rock lamp a polished, complete look. They protect the lamp and make it stand out. Small details can turn your project into a beautiful home decoration.
Sealing And Protecting
Seal the lamp to protect it from moisture and dust. Use a clear, water-resistant sealant made for natural stone. Apply a thin, even coat with a soft brush. Let it dry fully before handling the lamp again. This step helps keep the lamp safe and looking fresh longer.
Adding A Base Or Stand
A base or stand adds stability and style to your lamp. Choose wood, metal, or ceramic for a sturdy foundation. Attach the lamp securely to prevent tipping. A good base also raises the lamp for better light spread. This simple addition improves both safety and appearance.
Customizing The Look
Personalize your lamp to fit your space and taste. Paint the base or add small decorative stones around it. Use soft fabric or felt pads under the base to protect surfaces. You can also place your lamp on a wooden tray for a cozy feel. These custom touches make your lamp truly yours.
Tips For Maintenance
Salt rock lamps add a warm glow to any room. To keep them looking and working their best, regular care is important. Proper maintenance helps the lamp last longer and stay beautiful.
Simple steps like cleaning, changing the bulb, and protecting from moisture keep your lamp in top shape. These tips are easy to follow and save you time and effort.
Cleaning The Lamp
Use a soft, dry cloth to wipe the lamp’s surface. Avoid water or any liquid cleaners, as salt can dissolve. Clean the lamp gently to keep its natural texture.
Dust the lamp weekly to prevent buildup. This keeps the light bright and the salt looking fresh.
Replacing The Bulb
Turn off and unplug the lamp before changing the bulb. Use the correct wattage bulb recommended for your lamp. This avoids overheating and damage to the salt rock.
Handle the bulb with care to prevent breakage. Replace the bulb as soon as it burns out to keep the lamp glowing softly.
Avoiding Moisture Damage
Salt rock lamps absorb moisture from the air. Place the lamp in dry areas to prevent melting or sweating. Avoid placing the lamp near windows or bathrooms.
If the lamp feels wet, turn it off and dry it with a cloth. Use a small fan to help evaporate moisture if needed.
Benefits Of Salt Rock Lamps
Salt rock lamps offer more than just light. They bring unique benefits to any space. These lamps are popular for their beauty and potential health effects. Many enjoy their warm glow and calming presence. Let’s explore the main benefits of salt rock lamps.
Aesthetic Appeal
Salt rock lamps have a warm, natural look. Their soft orange and pink tones create a lovely glow. Each lamp is unique because of the natural salt crystals. They add charm and style to any room. Perfect for desks, nightstands, or living areas.
Air Purification Claims
Some believe salt lamps can clean the air. They say lamps release negative ions that help reduce dust. These ions may lower allergens and pollution indoors. Research is limited, but many users report fresher air. A gentle way to improve indoor air quality.
Creating A Cozy Atmosphere
Salt lamps emit a soft, warm light. This light helps create a peaceful, cozy space. Ideal for relaxing after a long day. The gentle glow can reduce stress and promote calmness. A simple way to make your home feel welcoming.

Credit: www.puravidabracelets.com
Frequently Asked Questions
What Materials Do I Need To Make A Salt Rock Lamp?
You need a salt rock, a lamp kit, a bulb, and a power cord. Basic tools like a drill and sandpaper help shape the rock. Safety gear, like gloves and goggles, is important too.
How Do I Safely Hollow Out The Salt Rock?
Use a drill with a hole saw bit to create the lamp cavity. Work slowly and keep the rock steady to avoid cracks. Wear safety glasses to protect your eyes from dust.
What Type Of Bulb Is Best For A Salt Rock Lamp?
Choose a low-wattage, heat-safe bulb like an LED or incandescent. It should fit inside the lamp cavity without touching the salt. This prevents overheating and keeps your lamp safe.
How Do I Assemble The Lamp Kit Inside The Salt Rock?
Insert the bulb holder into the hollowed space carefully. Connect the power cord to the lamp kit following instructions. Test the lamp before sealing to ensure it works.
How Can I Maintain And Clean My Salt Rock Lamp?
Wipe the lamp with a dry cloth to remove dust and moisture. Avoid using water or cleaning sprays as salt dissolves easily. Keep the lamp in a dry place to prevent damage.
Conclusion
Making a salt rock lamp is simple and fun. You only need a few materials and some patience. The warm glow adds calm to any room. It also helps clean the air naturally. Try making one to enjoy its soft light and health benefits.
A homemade salt lamp brings cozy charm without much cost. Give it a try and see how it changes your space. Small steps can create big comfort.